INTILION scalebloc 0.5C
78
6.1
Preparatory work and information
Carry out the following activities prior to initial commissioning or re-commissioning:
–
Check and make sure that all safety devices are attached and are correctly
functioning.
–
Check the battery storage system for visible damage and rectify any detected defects
immediately
– the battery storage system must only be operated in perfect condition.
–
Check and make sure that there are exclusively authorised persons in the working
area of the battery storage system and that no other persons will be endangered by
the commissioning of the battery storage system.
–
Remove any objects or other materials from the working area that are not required for
the operation of the battery storage system.
–
Before switching on the battery storage system, check that its electrical connection is
correct in terms of design and that it is securely fixed in place. Make a note of the
results in the log book.
Carry out the following activities after initial commissioning or re-commissioning:
–
Fill in a commissioning log in order to verify to the network operator that the battery
storage system has been set up in line with and complies with the applicable
standards and regulations.
Changing the network settings in Windows
Many settings that are performed during the course of commissioning require you to
change the network address of your commissioning computer/laptop. This description is
aimed at Windows 10 users but is also applicable to Windows 7.
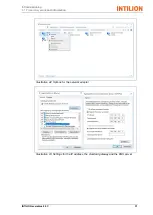
The control panel, which is accessed either via the gear symbol on the left-hand side of
the Start menu or by typing “control panel” after pressing the Windows button, can be
seen in Illustration 39
. To change the settings, you will need to go to the “Network and
Internet” area, which will take you to the screen shown in Illustration 40. From the
“Change network settings” section, clicking on “Change adapter settings” takes you to the
settings for the network interface card (Illustration 42). From here, you can select the
network adapter for the network interface card -
in this case the one called “Ethernet,
Netzwerk 7” - and you can right-click on the card to see the available options (Illustration
42
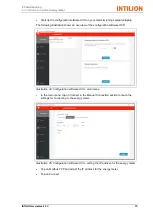
). Clicking on “Properties” from this list of options and then clicking on “Yes” to confirm
the Windows UAC will take you to the properties of the network adapter (Illustration 43,
left-hand side). Double-
clicking within this list will open the entry “Internet Protocol
Version 4 (TCP/IPv4)” (Illustration 43, right-hand side). This is the location to which the
network configuration is set or switched. If there is subsequent reference to a change to
the network address, the network settings or the ID address space, this relates to the
configuration described here.
The subnet mask is always 255.255.255.0
Summary of Contents for scalebloc 0.5C
Page 33: ...2 Safety 2 10 Obligations of the system manager INTILION scalebloc 0 5C 31 ...
Page 34: ......
Page 46: ...4 Transport and storage 3 3 Technical specifications 44 INTILION GmbH ...
Page 77: ...5 Installation 5 12 Establishing the mains connection INTILION scalebloc 0 5C 75 ...
Page 78: ......
Page 98: ...6 Commissioning 6 8 Contacting the Hoppecke Service team 96 INTILION GmbH ...
Page 100: ......
Page 102: ...8 Fault 100 INTILION GmbH ...


