background image

Terminal User Guide 


Page 67


iWL250 User Guide


Copyright© 2019 Ingenico 


X Balance Report 

The X Balance report is sometimes referred to as an End of Shift Balance report. 
This is because it allows you to print a total of all transactions performed since the 
last Z Balance report. The X Balance may be printed at any time throughout the 
day. 
Transactions are listed by card type, and by Operator ID (Waiter ID for example, if 
enabled) showing transactions together with any gratuities or cashback (if 
enabled) by each operator.  
A list of all transactions done since the last Z Balance was completed is also 
shown. 


The totals within the terminal will not be reset after printing an X 
Balance. 

To perform an X Balance report press the menu


key 

twice

, then choose 

REPORTS

. You will be asked to type your supervisor password, then press 

green


key, choose 

X BALANCE and press green key

The X Balance report is exactly the same as the Z Balance excepting the totals 

are not

 reset. 

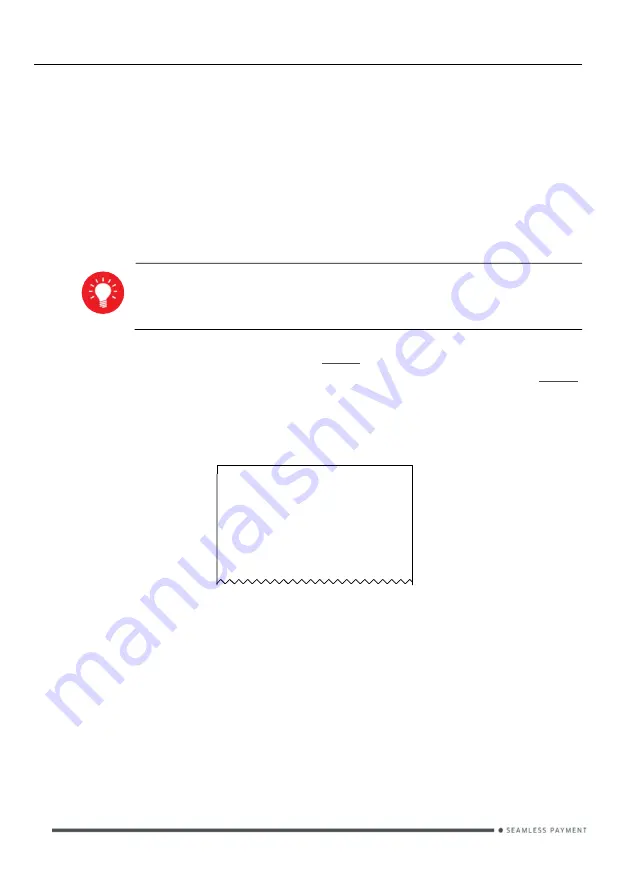
Example X Balance report 

X BALANCES 

Totals Not Reset 
 
Merchant Name 
Merchant Address 1 
Merchant Address 2 


Please refer to the following section entitled Z balance report


for more details on 

the contents of the X Balances report. 


Summary of Contents for iWL 251

Page 1: ...iWL 25x Wireless Series User Guide www ingenico co uk 13 Ridge Way Donibristle Industrial Park Dalgety Bay KY11 9JU 0131 478 8800...

Page 2: ...Day Process 6 Paper Rolls 6 Starting to Use Your Terminal 7 Your Terminal 8 Contents of Box 8 Terminal Model 9 Terminal Overview 9 Base Overview 10 Battery Installation 12 Terminal Keypad Display 14 M...

Page 3: ...nsactions Customer Not Present 36 Mailorder Transaction 37 Hotel Mode 39 Pre Auth 40 Completion 41 Reversals 42 Duplicate Receipts 42 Cash advance 43 Authorisation only transaction 45 Declined Transac...

Page 4: ...opyright 2019 Ingenico Stored Transaction Report 71 TMS Report 71 Supervisor Functions 73 Supervisor password 73 Troubleshooting 82 Screen Messages 85 Diagnostic Codes 88 Menu Structure 90 Reccomendat...

Page 5: ...is a button on the terminal i e the Enter key in this case THIS IS A SHORTCUT TO A MENU OPTION This is a piece of important advice Keeping Records Copies of all transaction receipts and your correspon...

Page 6: ...amper evident seals detecting any interruption to these seals your terminal will enter a tampered state In this state the terminal will repeatedly flash the message Alert Irruption and further use of...

Page 7: ...gured so that a change of this password is required before you process any transactions If you wish to do this before performing a transaction you should refer to the section entitled Supervisor Passw...

Page 8: ...n the receipt header is correct Your Merchant Number is correct No acquirers such as American Express or Diners that you requested are missing Set up your terminal in a convenient location and familia...

Page 9: ...own below Your terminal comes pre installed with A rechargeable battery pack A paper roll A SIM card mobile terminals only This User Guide iWL25x Payment Terminal iWL25x Base Unit UK Power Supply Unit...

Page 10: ...Mobile terminal with GSM GPRS communications iWL 252 Bluetooth terminal with PSTN and IP communications iWL 258 Wi Fi terminal with Wi Fi communications This User Guide covers all variants so you shou...

Page 11: ...your base unit in a convenient location close to a power source and for Bluetooth terminals either a telephone socket and or an Ethernet socket as required To open the base unit cover located on the...

Page 12: ...cable into the Ethernet socket on your base unit the other end should be connected to a corresponding socket on your LAN router Finally connect the UK Power Supply Unit into the power socket on your b...

Page 13: ...way the connector 2 If the terminal displays a battery status icon with a cross in it then a battery pack is not installed or is installed incorrectly You will not be able to perform transactions if t...

Page 14: ...nstalled or installed incorrectly normal use of your terminal will not be possible until the battery is installed correctly If the battery power is low you may find that the terminal turns itself off...

Page 15: ...isation code for example you may need to enter letters as well as number Where you see the F4 123 graphic on screen you can toggle the input mode by pressing F4 key To enter uppercase letters use the...

Page 16: ...READY status message then your terminal is not initialised Press menu once and choose the SETUP menu option by pressing the F4 key You should contact the terminal Helpdesk if the problem persists aft...

Page 17: ...r current supervisor password and confirm this by pressing the enter key Press the menu key and choose SHORT CUT by pressing the F1 key followed by the BLUETOOTH by pressing the F4 key MENU MENU F3 pa...

Page 18: ...ssing the F3 key again Type in the PSTN prefix typically 9 followed by the enter key MENU MENU F3 password ENTER F3 F3 If your telephone line is shared with other equipment such as a telephone or fax...

Page 19: ...ed SIM Take care to ensure that the SIM card is inserted in the correct manner the chip should be facing downwards with the cut out corner of the SIM card as shown DO NOT use any tools when installing...

Page 20: ...se SHORT CUT by pressing the F1 key press the menu key once more and choose WIFI SETUP by pressing the F1 key MENU MENU F3 password ENTER MENU F1 MENU F101 01 19ou can use the up down and enter keys t...

Page 21: ...eys to select Automatic Scan and press the enter key to begin Your terminal will scan for all available Wi Fi networks that are in range All available Wi Fi networks that are in range will be displaye...

Page 22: ...ted Wi Fi network and press the enter key to confirm If accepted enter the priority weighting you wish to associate to this Wi Fi connection profile and press the enter key You will receive a confirma...

Page 23: ...Fi network to be used based on availability and the priority weighting associated to each Wi Fi connection profile Editing a Wi Fi Connection Profile If you need to change the security type cypher pas...

Page 24: ...ion Profile If you need to delete a saved Wi Fi connection profile you should select REMOVE PROFILE Use the up and down keys to select the Wi Fi connection profile that you wish to delete and press th...

Page 25: ...er roll into the printer compartment 3 Holding the free end of the paper and your terminal close the printer cover carefully and push firmly until it locks 4 While your terminal is displaying the idle...

Page 26: ...n order to ensure a reliable card reading Chip Card Insert the card horizontally into the terminal with the chip facing upwards Leave the card in position throughout the transaction Contactless Card B...

Page 27: ...idle screen Contactless card transactions are performed by this method and when the transaction value is under the contactless card limit e g 30 00 Your terminal will only prompt for a card to be pres...

Page 28: ...e contactless logo will be displayed on your terminal for all transactions rather than just those under the contactless card limit e g 30 00 Acceptance of normal contactless cards for transactions bel...

Page 29: ...ed in a wallet with other contactless payment cards or other contactless cards such as public transport smart cards An alert tone will sound and the customer will be prompted to re present the card In...

Page 30: ...rt Swipe Present screen is shown Present the contactless card Terminal will print the merchant receipt tear off when complete Contactless read is successful when all four status lights are lit and con...

Page 31: ...ed by the acquirer The card is read and will then proceed to the sale screen Enter the sale amount and press green key Terminal will print the merchant receipt Tear off when complete Cardholder to ent...

Page 32: ...d on the receipt press F4 Insert Swipe screen is shown The terminal connects to the acquirer Once the card has been read by the Terminal enter the sale amount and press green key Auth code is returned...

Page 33: ...available for all account types From the idle screen start the transaction by keying in the amount inserting or swiping the customer s card or alternatively press menu key and select sale from the ava...

Page 34: ...d the final transaction amount This is unaffected by the method of entering the gratuity for inserted cards If you wish your terminal can be configured to allow the entry via the choosing of set monet...

Page 35: ...pay per couple VARIABLE SPLIT Allows the bill to be split unequally between multiple customers Surcharging Your terminal is not pre configured to allow for Surcharging If you would like the Surcharge...

Page 36: ...password and press the green key Refund is accepted by the acquirer Enter the sale amount and press green key Terminal will print the merchant receipt Ask the customer to sign the receipt Insert Swipe...

Page 37: ...VS checking you will be prompted to input only the digits from the customer s postcode and address For American Express cards there is a four digit Card Security Code printed on the front of the card...

Page 38: ...he card s billing address postcode e g 119 for KY11 9JU and press the green key Select Sale If you see this prompt enter the numbers from the card s billing address e g 221 for 221b Baker Street and p...

Page 39: ...er 2017 If the transaction has been authorised then an auth code will be displayed together with the CSC AVS check result You must decide whether to continue with the transaction Enter three digit cod...

Page 40: ...transaction If the customer s card number is keyed in then you will be asked to confirm if the customer is present These transactions do not include gratuities The transaction details are not captured...

Page 41: ...host via the mobile network Insert or Swipe card screen is displayed Pre Auth is accepted by the acquirer Enter the amount and press green key Terminal will print the merchant receipt Terminal will c...

Page 42: ...oved declined message If customer is not present start keying in the card number Terminal will print the merchant receipt Enter the final amount Remove the customers Card Key in sum of all pre auths t...

Page 43: ...saction and the Reversal will not appear on the customer s bank statement The original transaction and the Reversal will appear on your Banking and X Z Balance reports Reversals are recorded as the op...

Page 44: ...igured to allow for Cash Advance If you would like Cash Advance mode enabled on your terminal please contact the terminal Helpdesk Press the menu key then F3 to select a Cash Advance transaction Selec...

Page 45: ...press the menu key three times then choose ACC VERIFY Insert swipe or key the customer s card Customer to enter Pin The terminal will continue as per a normal sale with the exception that an amount i...

Page 46: ...transaction value is NOT added to the terminal totals When an Authorisation Only transaction is done the available credit on the customers bank account will be reduced by the amount authorised Author...

Page 47: ...rom the acquirer if such message is present Transactions with an inserted chip card may be declined by the card without the terminal contacting the acquirer s host system You should advise the custome...

Page 48: ...erral request in order to do further visual checks on the card at all other times you should only remove the card when prompted to do so by your terminal If the transaction is authorised by the author...

Page 49: ...sactions authorised by means other than your terminal For example card transactions authorised using paper vouchers and calls to the authorisation centre during a power cut or transactions previously...

Page 50: ...12 17 ISS 1 ICC SALE AMOUNT 21 34 TOTAL 21 34 SIGN BELOW PLEASE DEBIT MY ACCOUNT 01 01 19 12 00 AUTH CODE 123ABC TXN 0002 DIAG 8282 MERCHANT COPY PLEASE RETAIN RECEIPT Merchant ID Sequence Number Ter...

Page 51: ...OUNT 21 34 GRATUITY TOTAL SIGN BELOW PLEASE DEBIT MY ACCOUNT 01 01 19 12 04 AUTH CODE 123ABC TXN 0003 DIAG 4141 MERCHANT COPY PLEASE RETAIN RECEIPT Merchant ID Sequence Number Terminal ID Transaction...

Page 52: ...1 ICC SALE AMOUNT 21 34 TOTAL 21 34 PIN VERIFIED PLEASE DEBIT MY ACCOUNT 01 01 19 12 11 AUTH CODE 123ABC TXN 0004 DIAG 8241 MERCHANT COPY PLEASE RETAIN RECEIPT Merchant ID Sequence Number Terminal ID...

Page 53: ...T 21 34 GRATUITY 2 00 TOTAL 23 34 PIN VERIFIED PLEASE DEBIT MY ACCOUNT 01 01 19 12 13 AUTH CODE 123ABC TXN 0005 DIAG 8282 MERCHANT COPY PLEASE RETAIN RECEIPT Merchant ID Sequence Number Terminal ID Tr...

Page 54: ...CONTACTLESS SALE AMOUNT 1 23 TOTAL 1 23 NO CARDHOLDER VERIFICATION 01 01 19 12 30 AUTH CODE 123ABC TXN 0006 DIAG 52 MERCHANT COPY PLEASE RETAIN RECEIPT Merchant ID Sequence Number Terminal ID Transact...

Page 55: ...CUSTOM 01 01 19 12 32 AUTH CODE 123ABC TXN 0007 DIAG 8241 CUSTOMER COPY PLEASE RETAIN RECEIPT For security reasons the full card number is not shown on the customer copy Merchant ID Sequence Number T...

Page 56: ...R CUSTOM 01 01 19 12 11 AUTH CODE 123ABC TXN 0004 DIAG 8241 MERCHANT COPY PLEASE RETAIN RECEIPT For security reasons the full card number is not shown on the customer copy Merchant ID Sequence Number...

Page 57: ...ons the full card number is not shown on the customer copy Please Note Only the merchant copy is printed during a contactless transaction If the customer requires a receipt then the customer copy can...

Page 58: ...241 MERCHANT COPY PLEASE RETAIN RECEIPT For security reasons the full card number is not shown on the customer copy Please Note The Pre Paid Card available balance is shown only on the customer copy M...

Page 59: ...34 D E C L I N E D THANKYOU FOR YOUR CUSTOM 01 01 19 12 40 NOT AUTHED TXN 0008 DIAG 41 CUSTOMER COPY PLEASE RETAIN RECEIPT For security reasons the full card number is not shown on the customer copy I...

Page 60: ...for use by Waiters operator and Tables location The labels for these references are completely customisable for your needs so you could have Room Number in a Hotel or Invoice ID in an office based bus...

Page 61: ...you receiving funds If you have had any voided transactions you must perform an End of Day report to ensure that the acquirer receives confirmation that the transaction s have been voided There are se...

Page 62: ...You will be asked to type your supervisor password then press enter choose END OF DAY Reports performed by the End of Day function will look exactly the same as if they were done separately however a...

Page 63: ...ions the PREVIOUS SESSION on today s reports will be the same as the CURRENT SESSION on yesterday s report and so on If these totals do not match then you may be doing your report outside of the acqui...

Page 64: ...oking to select acquirer to be banked select SINGLE If you selected SINGLE you will be asked to choose an acquirer from the list The terminal will contact the acquirer and display confirmation screen...

Page 65: ...te Time Acquirer Name Acquirer Result TOTALS CONFIRMED The totals were agreed for this acquirer Transaction Range Current Session relates to the Transaction breakdown on the Z Balance Report Issuer Br...

Page 66: ...e reconciliation is attempted again and the terminal again fails to contact the acquirer the report will indicate CANNOT CONFIRM TOTALS This acquirer has only one issuer so no breakdown by issuer is s...

Page 67: ...Unconfirmed 1 REPORT COMPLETE Merchant ID Acquirer Name Acquirer Result TOTALS NOT AGREED The terminal totals did not match the host s totals for this acquirer Disputed Totals Only shown when totals a...

Page 68: ...nabled by each operator A list of all transactions done since the last Z Balance was completed is also shown The totals within the terminal will not be reset after printing an X Balance To perform an...

Page 69: ...als within the terminal will be reset after printing a Z Balance To perform a Z Balance report press the menu key twice then choose REPORTS You will be asked to type your supervisor password then pres...

Page 70: ...3 Refunds 1 5 00 SUB TOTAL DR 519 23 oooo Date Time Grand Totals Summarises all transactions performed since the last Z Balance Report was printed Terminal ID Issuer Breakdown The breakdown of all tra...

Page 71: ...when the last Z Balance Report was printed Transaction Log Detail of all transactions performed since the last Z Balance Report was printed For each transaction the Sequence Number of the transaction...

Page 72: ...menu key twice then choose REPORTS You will be asked to type your supervisor password then press enter press the menu key once more choose STORED then choose SINGLE Select from the list the required a...

Page 73: ...Address 1 Merchant Address 2 TID 22160001 S N 01234WL12345678 01 01 19 02 36 CONNECTED OK CONIG DATA OK REPORT COMPLETE The status of CONNECTED may be OK if successfully connected to the TMS or FAIL i...

Page 74: ...l be able to reset the code back to the default The following codes are not valid choices for your Supervisor password 01483 1234 0000 or 9999 Any other numerical code of four or more digits will be a...

Page 75: ...ssword change initial transaction If you have not changed the Supervisor password before you process your first transaction the terminal will prompt you to change the code from the default during the...

Page 76: ...another member s of staff the ability to perform the Supervisor functions Supervisor Menus The Supervisor menus allow access to various management functions in your terminal To be able to access the S...

Page 77: ...the terminal Do not use this feature unless instructed to do so by the terminal Helpdesk Second Supervisor Menu Screen press Menu once SHORT CUT Allows access to advanced configuration options Enters...

Page 78: ...s instructed to do so by the terminal Helpdesk UPGRADE Immediately sets off a software upgrade call to the Terminal Management System TMS Do not use this feature unless instructed to do so by the term...

Page 79: ...do Some Supervisor functions MUST only be used when instructed to do so by the terminal Helpdesk Password Menu Screen DELETE ACQ Deletes all datasets for one or all acquirers from the terminals memory...

Page 80: ...VISOR and press green key You will be asked to type your current supervisor password and confirm this by pressing the green key and choose CONFIG Below is a summary of the functions within the Config...

Page 81: ...e network Do not use this feature unless instructed to do so by the terminal Helpdesk SEL GSM N W Allow the selection of a different mobile network Do not use this feature unless instructed to do so b...

Page 82: ...ot use this feature unless instructed to do so by the terminal Helpdesk EPOS INTERF Configures the EPoS till Interface functionality Do not use this feature unless instructed to do so by the terminal...

Page 83: ...act the terminal Helpdesk Q What should I do if I have forgotten my Supervisor password You should first try the default code of 01483 if this is not the code then please contact the terminal Helpdesk...

Page 84: ...ase unit and then place the terminal on that base unit and wait for the Bluetooth status to update You should refer to the section entitled Bluetooth Base Setup for further details If the problem pers...

Page 85: ...all acquirers on the Banking to try to reconcile with the Z Balance total The current session totals on the Banking shows all transactions for that session if you perform the Z Balance and Banking at...

Page 86: ...led the transaction DECLINED The card card issuer or acquirer has declined to authorise the transaction you should ask for another means of payment BAD READ The inserted card could not be read check o...

Page 87: ...ETRY continued The first two dial attempts have failed resolve the issue e g ensure that the telephone line is not in use and press enter to continue for the third and final dial attempt For mobile te...

Page 88: ...ve the card until prompted to do so PLEASE PRESENT ONLY ONE CARD The card was presented with another contactless card and the card read has failed The cardholder should re present the card ensuring th...

Page 89: ...Check the telephone line and retry the transaction If the problem persists contact the terminal Helpdesk quoting the diagnostic code 31 Line busy Check the telephone line is not in use and retry the...

Page 90: ...ly 73 Terminal and host totals do not agree Do a Banking report and contact the acquirer if advised to do so If the problem persists contact the terminal Helpdesk quoting the diagnostic code 76 Termin...

Page 91: ...Terminal User Guide Page 90 iWL250 User Guide Copyright 2019 Ingenico Menu Structure...

Page 92: ...ations The terminal shall be protected by a specially fitted and certified cover enabling use in proximity to a fuel pump Electronic health appliances The handset is a radio transmitter which may inte...

Page 93: ...ordance with European Directives 2001 01 19 concerning Waste Electrical and Electronic Equipment WEEE and 2001 01 19 concerning Batteries and Accumulators Those provisions are requiring producers and...

Page 94: ...card reader or any other part of the terminal Such checks would provide warning of any unauthorised modifications to the terminal and other suspicious behaviour of individuals that have access to you...

Page 95: ...ld their PIN during PIN entry d The device must be deployed so that oversight from other customers either in different payment lanes or in other areas of the shopping environment is prevented This may...

Page 96: ...The protection requirements with respect to electromagnetic compatibility EU Directives According to harmonised EU standards Product Product Type Standards Issue date 1999 5 EC R TTE Directive IWL250...

Page 97: ...for any loss damage or injury that may be incurred as a result of any such errors or inaccuracies The product is varied to suit acquirer s requirements and as such some features may vary or be disabl...

Reviews: