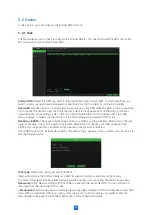
5.5.1.1 S.M.A.R.T
This function can be used to display technical information on the hard drive installed inside your NVR. You
can also perform a test (there are three types available) to evaluate and detect potential drive errors.
Whole Evaluation not passed, continue to use the disk: If for some reason the hard drive has developed a
fault (such as one or more bad sectors), you can instruct your NVR to continue saving to the drive.
Self-check Type:
There are three types available:
Short:
This test verifies major components of the hard drive such as read/write heads, electronics and
internal memory.
Long:
This is a longer test that verifies the above as well as performing a surface scan to reveal
problematic areas (if any) and forces bad sector relocation
Conveyance:
This is a very quick test that verifies the mechanical parts of the hard drive are working.
Note:
When performing a test, your NVR will continue to work as normal. If an HDD S.M.A.R.T error
found, the HDD can be continued to use, but there will be a risk to lose recording data. It is
recommended to replace a new HDD.
5.6.1 General
Device Name:
Enter the desired name for your NVR. The name can include both letters and numbers.
Device ID:
Enter the desired ID for your NVR. The device ID is used to identify the NVR, and can only be
composed of numbers. For example, 2pcs NVRs are installed in the same place, the Device ID is 000000
for one of the NVRs, and 111111 for another NVR. When you want to operate the NVR with a remote
controller, both of the NVR may receive the signal from controller & act at the same time. If you want to
control only the NVR with ID 111111, you can input the Device ID 111111 in login page with remote
controller for further operations.
Language:
Select a language you would like the system menus to be displayed in. Multiple languages
are available.
Video Format:
Select the correct video standard for your region.
Menu Timeouts:
Click the drop-down menu to select the time your NVR will exit the Main Menu when
idle. You can also disable this by selecting “OFF” (password protection will be temporarily disabled).
Show Wizard:
Click the checkbox if you would like to display the Startup Wizard each time you turn on
or reboot your NVR.
5.6 System
Change general system information such as date, time and region, edit passwords and permissions, and
more.
35


