iGage
iG8 User Manual
49
2.
If you choose to use the iGage Supplied DAC card: set the APN to ‘dac.com.attz’
If you use a ‘True ATT’ SIMC card: set the APN to ‘broadband’. If you use another type of SIM card enter the
appropriate APN for the card.
3.
Set the Dial String to ‘*99#’, leave the User Name and Password empty. Click Save.
4.
Turn off the GPRS Modem by clicking OFF, wait 10 seconds then turn on the GPRS Modem by clicking ON.
5.
Click on Dial to attempt to connect. After about 30 seconds, the Dialing Status will be ‘Connected’ when the
iG8 is registered on the cellular network.
Alternatively you can configure the Cellular modem with SurvCE when setting the iG8 as a network rover as described in
the next section.
Network (NTRIP and DIP) Rover Configuration
1.
Setup the Rover:
a.
Attach the receiver to the range pole.
b.
Attach the UHF antenna to the receiver
head.
c.
Put one or two charged batteries into the
head.
d.
Turn on the Rover receiver.
e.
Attach the Data Collector to the range
pole.
2.
If you have not already started a new job, refer to
the section ‘
Starting a New SurvCE Job
’ on Page 20
to start and configure a new SurvCE job.
3.
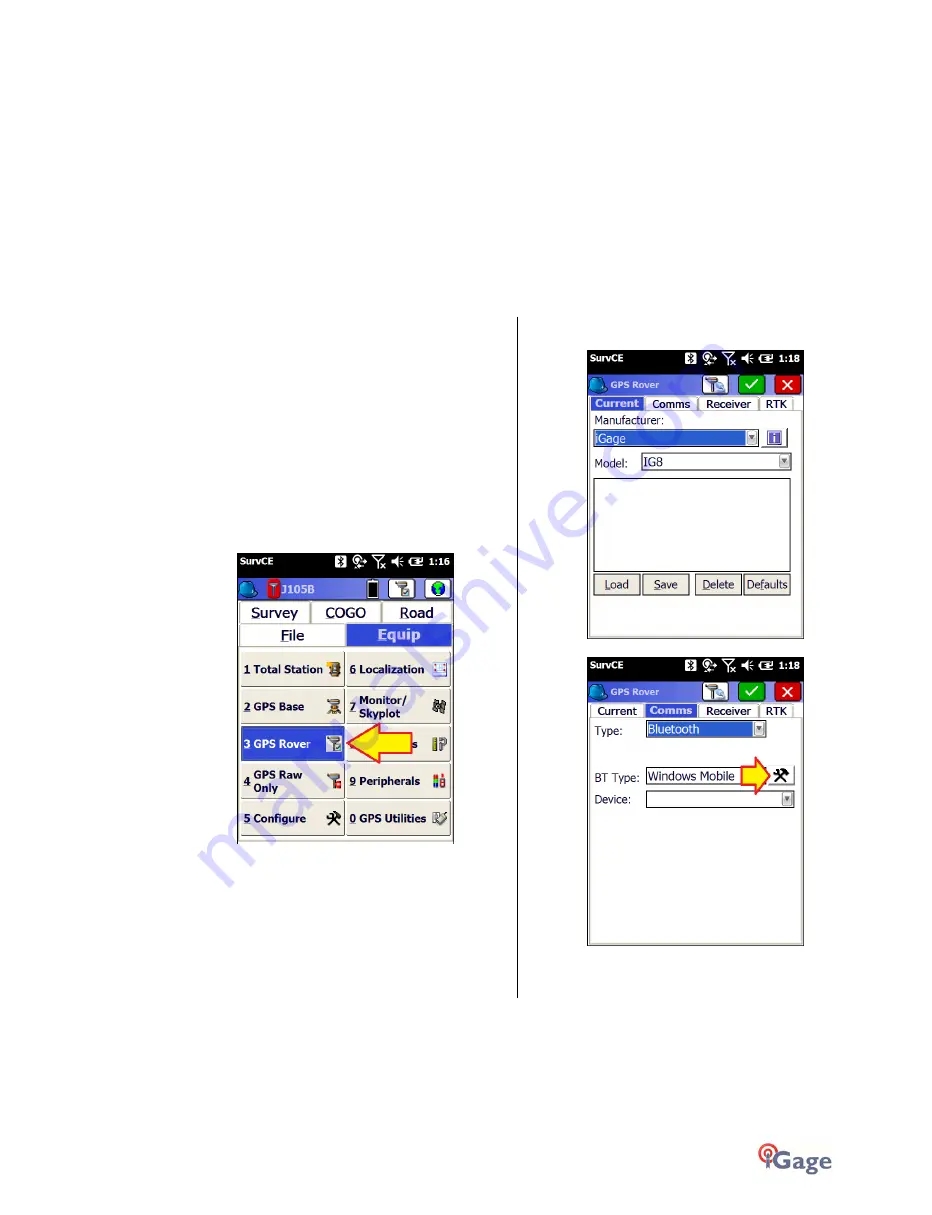
From the main SurvCE menu click on the Equip tab:
Then click on ‘3 GPS Rover’
4.
Choose the correct Manufacturer ‘iGage’ and Model
‘iG8’:
5.
Select the Comms tab:
Choose ‘Type’ = ‘Bluetooth’, ‘BT Type’ = ‘Windows
Mobile’, then click on the Settings button
(hammer/wrench) button to the right of ‘BT Type’.


