INSTALLATION
4
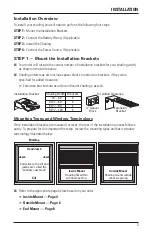
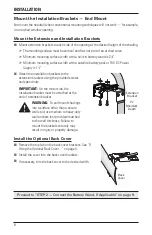
Mount the Installation Brackets — Inside Mount
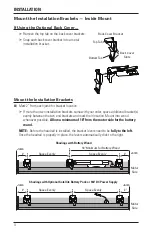
If Using the Optional Back Cover ...
■
➤
Remove the top tab on the back cover brackets.
■
➤
Snap each back cover bracket into a metal
installation bracket.
Mount the Installation Brackets
■
■
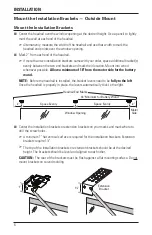
Mark 2" from each jamb for bracket location.
■
➤
If more than two installation brackets came with your order, space additional bracket(s)
evenly between the two end brackets and mark their location. Mount into wood
whenever possible.
Allow a minimum of 18" from the motor side for the battery
wand.
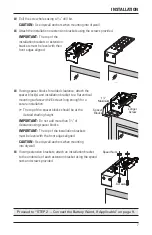
NOTE:
Before the headrail is installed, the bracket levers need to be
fully to the left.
Once the headrail is properly in place, the levers automatically click to the right.
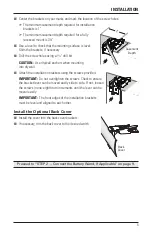
Back Cover Bracket
Top Tab
Bottom Tab
Back Cover
Slots
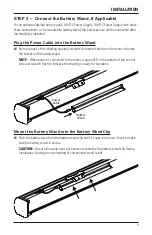
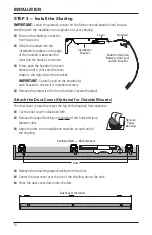
Shadings with Battery Wand
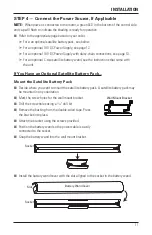
Shadings with Optional Satellite Battery Pack or 18V DC Power Supply
Jamb
Jamb
18" Minimum for Battery Wand
Space Evenly
Space Evenly
2"
2"
Jamb
Space Evenly
Space Evenly
2"
2"
Motor
Side
Motor
Side
Jamb
Summary of Contents for Pirouette PowerView
Page 1: ...Installation Operation Care Pirouette Window Shadings PowerView Motorization...
Page 29: ...Notes...
Page 30: ...Notes...
Page 31: ......


