

INSTALLATION
8
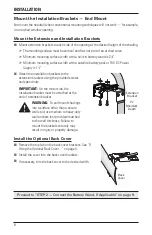
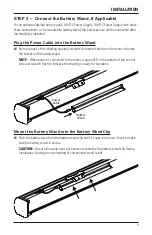
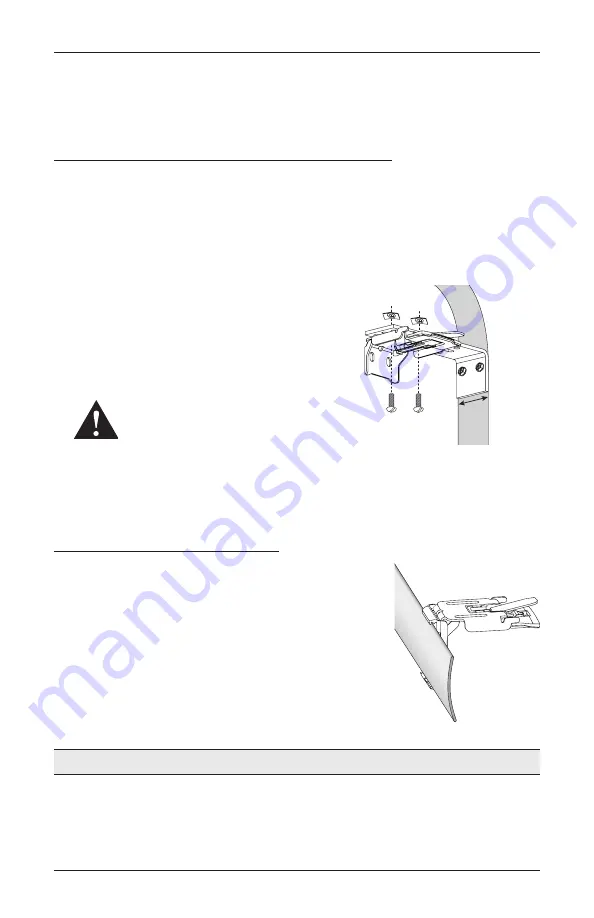
Mount the Installation Brackets — End Mount
End mount the headrail when conventional mounting techniques will not work — for example,
in an arched window opening.
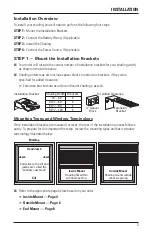
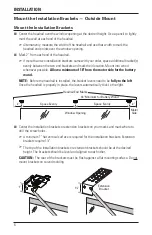
Mount the Extension and Installation Brackets
■
■
Mount extension brackets to each side of the opening at the desired height of the shading.
■
➤
The mounting surface must be vertical and flat, not part of an arched curve.
■
➤
Minimum mounting surface width with a built-in battery wand is 2
1
⁄
8
".
■
➤
Minimum mounting surface width with a satellite battery pack or 18V DC Power
Supply is 1
1
⁄
2
".
■
■
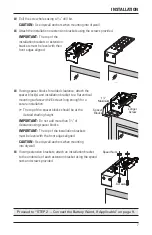
Attach the installation brackets to the
extension brackets using the provided screws
and speed nuts.
IMPORTANT:
On the motor side, the
installation bracket must be attached at the
end of extension bracket.
WARNING:
To end mount shadings
into a surface other than a secure
wall stud, use medium to heavy-duty
wall anchors (not provided) matched
to the wall thickness. Failure to
mount the brackets securely may
result in injury or property damage.
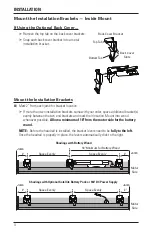
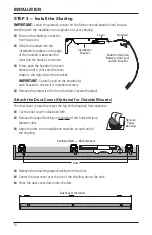
Install the Optional Back Cover
■
■
Remove the top tab on the back cover brackets. See “If
Using the Optional Back Cover ...” on page 4.
■
■
Install the cover into the back cover brackets.
■
■
If necessary, trim the back cover to the desired width.
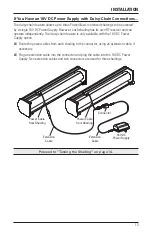
Proceed to “STEP 2 — Connect the Battery Wand, If Applicable” on page 9.
Extension
Bracket
1
1
∕
2
"
Minimum
Depth
Back
Cover
Summary of Contents for Pirouette PowerView
Page 1: ...Installation Operation Care Pirouette Window Shadings PowerView Motorization...
Page 29: ...Notes...
Page 30: ...Notes...
Page 31: ......


