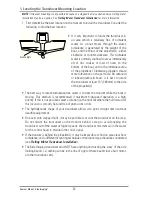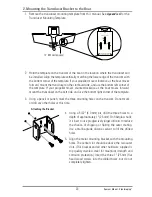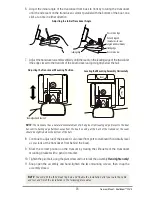
6. Adjust the initial angle of the transducer from back to front by rotating the transducer
until the side seam on the transducer is almost parallel with the bottom of the boat, one
click at a time in either direction.
7. Adjust the transducer assembly vertically, until the seam on the leading edge of the transducer
(the edge closest to the transom of the boat) is level and just slightly below the hull.
NOTE:
The transducer has a natural downward slant of 4-5 degrees from leading edge (closest to the boat
transom) to trailing edge (farthest away from the boat). Looking at the back of the transducer, the seam
should be slightly below the bottom of the hull.
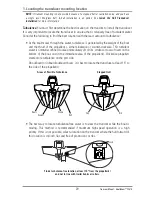
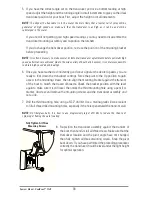
8. Continue to adjust until the bracket is also level from port to starboard (horizontally level
as you look at the transducer from behind the boat).
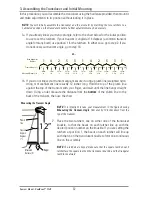
9. Mark the correct position on the transom by tracing the silhouette of the transducer
mounting bracket with a pencil or marker.
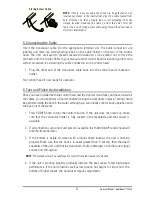
10. Tighten the pivot bolt, using the pivot screw and nut to lock the assembly.
Hand tighten only!
11. Snap open the assembly and hand-tighten the two mounting screws, then snap the
assembly closed.
NOTE:
You will drill the third mounting hole and finalize the installation after you route the cable
and test and finish the installation in the following procedures.
Adjusting the Transducer Mounting Position
Seam aligned with boat hull
Leveling the Mounting Assembly Horizontally
Level
Le
ve
l
Adjusting the Initial Transducer Angle
Leading edge
One click too high
Correctly aligned
(transducer side seam
aligned with boat bottom)
Trailing edge
One click too low
35
Transom Mount - DualBeam
™
PLUS
Summary of Contents for 1158c Combo
Page 1: ...Installation and Operations Manual 1158c Combo 1198c SI Combo Product Manual...
Page 73: ...61 to your boat including the following items What s on the Sonar Display 7 10 3 4 5 6 11...
Page 146: ...Sonar Tab Normal Mode Sonar Tab Advanced Mode Menu Quick Tips 134...


