

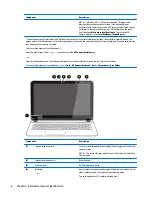


Labels
The labels affixed to the computer provide information you may need when you troubleshoot system
problems or travel internationally with the computer.
IMPORTANT:
Check the following locations for the labels described in this section: the bottom of the
computer, inside the battery bay, or on the back of the display.
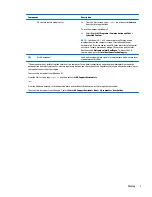
●
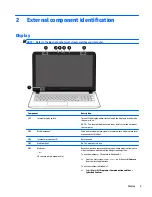
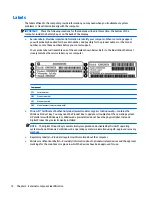
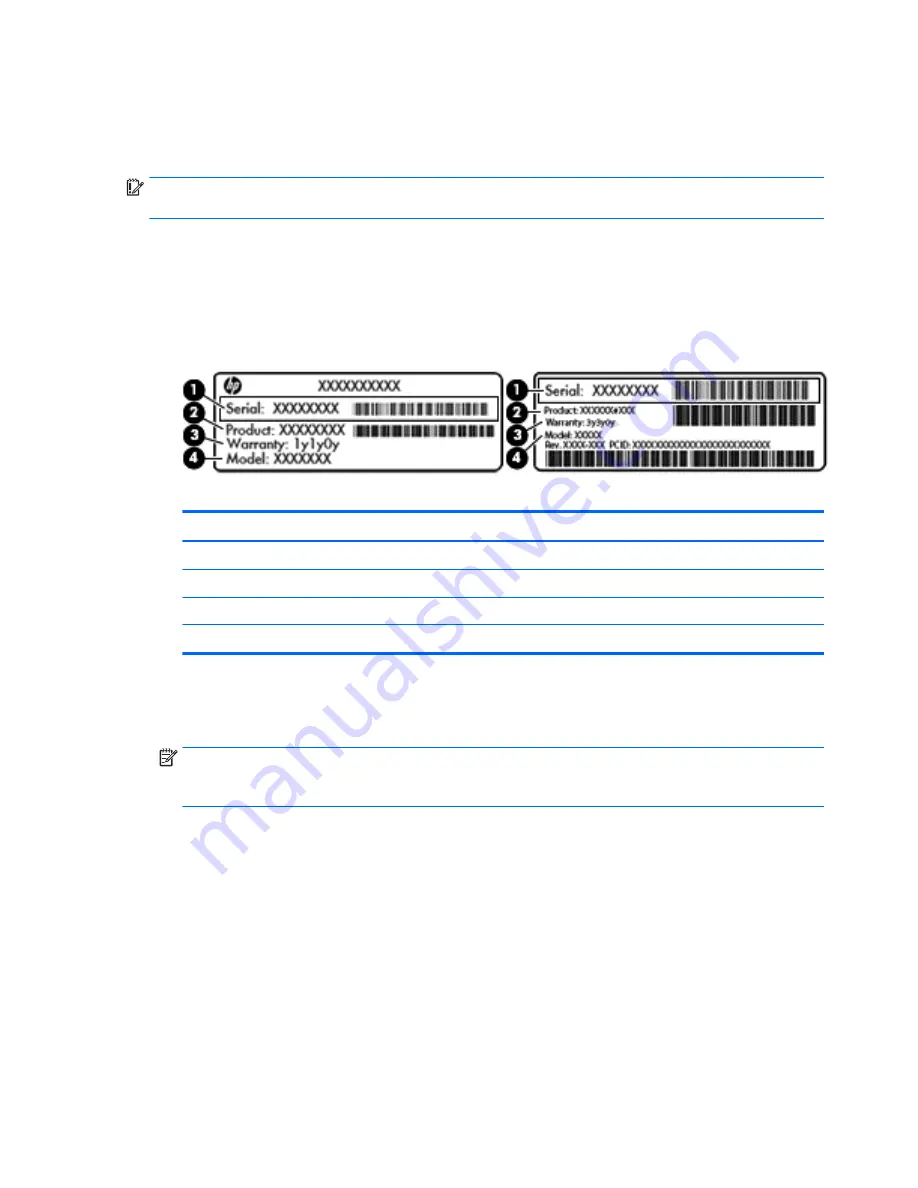
Service label—Provides important information to identify your computer. When contacting support,
you will probably be asked for the serial number, and possibly for the product number or the model
number. Locate these numbers before you contact support.
Your service label will resemble one of the examples shown below. Refer to the illustration that most
closely matches the service label on your computer.
Component
(1)
Serial number
(2)
Product number
(3)
Warranty period
(4)
Model number (select models only)
●
Microsoft® Certificate of Authenticity label (select models only prior to Windows 8)—Contains the
Windows Product Key. You may need the Product Key to update or troubleshoot the operating system.
HP platforms with Windows 8 or Windows 8.x preinstalled do not have the physical label. Instead a
Digital Product Key is electronically installed.
NOTE:
The Digital Product Key is automatically recognized and activated by Microsoft operating
systems when a Windows 8 or Windows 8.x operating system is reinstalled using HP-approved recovery
methods.
●
Regulatory label(s)—Provide(s) regulatory information about the computer.
●
Wireless certification label(s)—Provide(s) information about optional wireless devices and the approval
markings for the countries or regions in which the devices have been approved for use.
14
Chapter 2 External component identification
Summary of Contents for Pavilion 2159m
Page 1: ...HP Pavilion Notebook AMD Maintenance and Service Guide ...
Page 4: ...iv Safety warning notice ...
Page 8: ...14 Recycling 97 Index 99 viii ...
Page 12: ...4 Chapter 1 Product description ...
Page 32: ...24 Chapter 3 Illustrated parts catalog ...
Page 40: ...32 Chapter 5 Removal and replacement procedures for Customer Self Repair parts ...
Page 80: ...72 Chapter 8 Using Setup Utility BIOS in Windows 8 1 ...
Page 88: ...80 Chapter 10 Backing up restoring and recovering in Windows 8 1 ...
Page 100: ...92 Chapter 12 Specifications ...
Page 104: ...96 Chapter 13 Power cord set requirements ...
Page 106: ...98 Chapter 14 Recycling ...
Page 110: ...102 Index ...


