background image

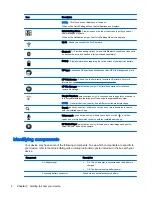
Icon

Description

NOTE:

This icon does not display on all screens.

When on the Quick Settings Menu, the Notifications icon displays.

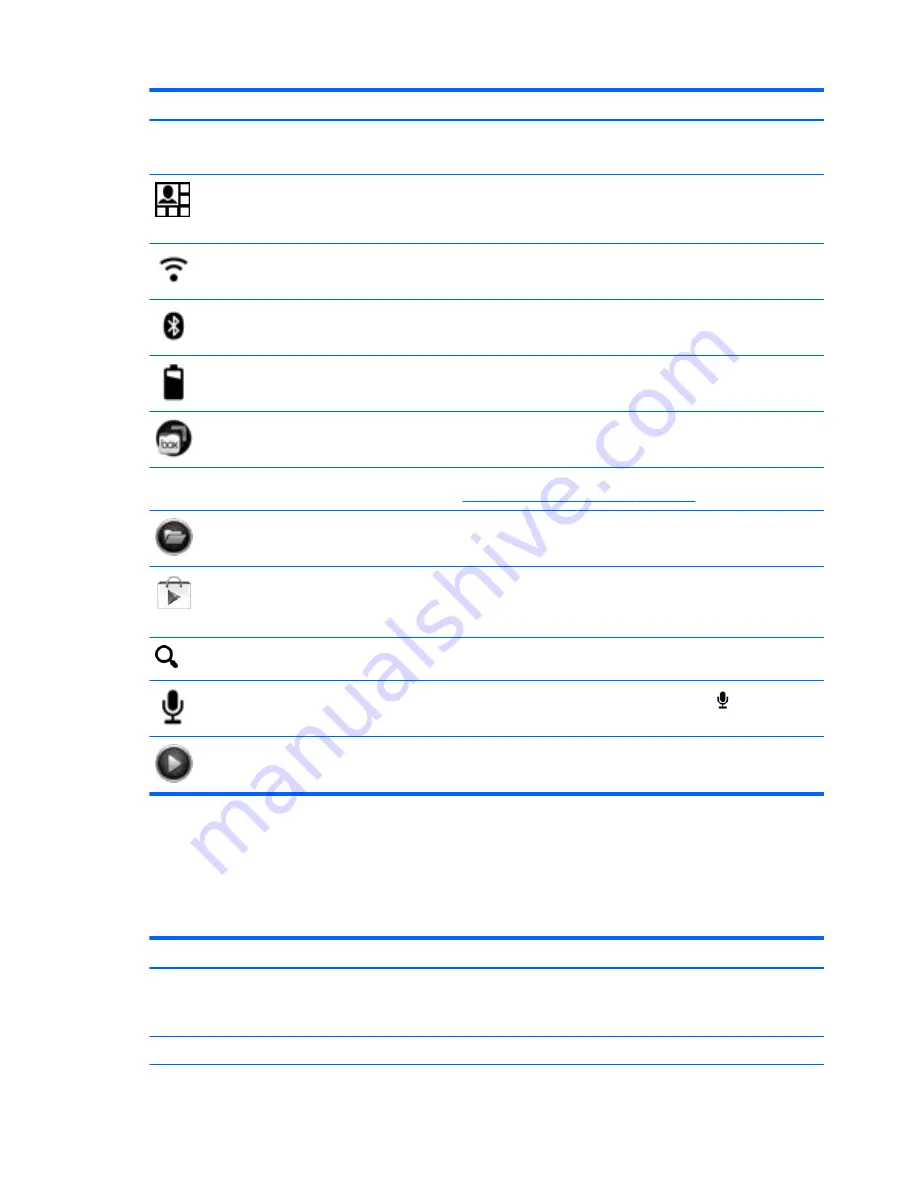
Quick Settings Menu—Display icons on the top of the screen to notify you about

new messages or events.

When on the Notifications menu, the Quick Settings Menu icon displays.

Wi-Fi—Allows you connect to a Wi-Fi network.

Bluetooth™—Provides pairing options for use with Bluetooth-capable devices such

as keyboards, mice, and headsets (all purchased separately).

Battery—Displays information regarding the current state of your device's battery.

HP Apps—Accesses HP-specific applications such as HP File Manager and more.


HP Print Service—Allows you to print directly to certain HP printers. For more

information, see 

Enjoying entertainment features on page 16

.

HP File Manager (select devices only)—Controls file operations for local and

removable storage.

Google Play store (select devices only)—Accesses Android apps for your device in

this online marketplace featuring both free and paid downloadable content.

NOTE:

On select devices, you may find a different online marketplace app.

Search (varies by country)—Allows you to type one or more keywords to search

with the installed search app.

Voice search (voice devices only)—Allows you to touch or click 

, and then

speak one or more keywords to search with the installed search app.

HP Media Player (select devices only)—Allows you to view images and photos,

listen to music, and use the camera.

Identifying components

Your device may have some of the following components. To see which components are specific to

your device, refer to the 

Quick Start guide or Setup Instructions poster included in the box with your

device.

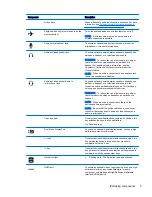
Component

Description


AC adapter light

On: The AC adapter is connected and the battery is

charged.

Off: The device is using battery power.


Accessory battery connector

Connects an optional accessory battery.

4

Chapter 2   Getting to know your device

Summary of Contents for 1028705233

Page 1: ...User Guide ...

Page 2: ...or technical or editorial errors or omissions contained herein First Edition August 2014 Document Part Number 784241 001 Product notice This guide describes features that are common to most models Some features may not be available on your device Software terms By installing copying downloading or otherwise using any software product preinstalled on this computer you agree to be bound by the terms...

Page 3: ...ting to a Windows device select devices only 13 Streaming content to a high definition TV or monitor select devices only 13 Tips and recommendations for best performance 13 Connecting to a wireless display select devices only 14 Improving the display resolution 14 Improving the connection speed to improve performance 15 4 Enjoying entertainment features 16 Using a camera select devices only 16 Tak...

Page 4: ...e 22 Top right edge swipe 22 Top edge swipe and bottom edge swipe 22 One finger slide touch screen only 23 6 Using apps and widgets 24 Organizing apps on the Home screen 24 Using the on screen keyboard select devices only 25 Using email 25 Using the calendar 25 Using the clock 25 Downloading apps 25 Uninstalling apps 26 7 Voice device features voice devices only 27 Using voice calling features voi...

Page 5: ...a file based update 37 Resetting with the device powered off 37 11 Managing power 38 Running on battery power 38 Factory sealed battery select devices only 38 Charging the battery 38 Conserving battery power 38 Running on AC power 39 Troubleshooting power problems 39 Powering off turning off the device 40 12 Using an external or attached keyboard and mouse select devices only 41 13 Maintenance 43 ...

Page 6: ...Power button lockout select devices only 46 On screen display OSD lockout select devices only 46 15 Accessibility features 47 Index 48 vi ...

Page 7: ...guage and connect to a wireless network Best practices To get the most from your smart investment we recommend the following steps If you haven t already done so connect to a wired or wireless network See details in Connecting to a network on page 10 Become familiar with the device hardware and software For more information see Getting to know your device on page 3 and Using apps and widgets on pa...

Page 8: ...p www google com mobile android Access Google online help and support Quick Start guide or Setup Instructions poster The Quick Start guide or Setup Instructions poster is located in the device box Basic operating instructions Regulatory Safety and Environmental Notices Product Notices This document is provided in the box with your device Important regulatory notices Limited Warranty This document ...

Page 9: ... see a left or right Home screen swipe to the left or right To quickly return to the Home screen touch or click the Home icon Recent apps Opens a list of apps that you have used recently Touch or click an app to open it To remove an app from the list swipe it to the left or right Settings Alllows you to connect to networks set preferences and find information about your device To display settings ...

Page 10: ...able storage Google Play store select devices only Accesses Android apps for your device in this online marketplace featuring both free and paid downloadable content NOTE On select devices you may find a different online marketplace app Search varies by country Allows you to type one or more keywords to search with the installed search app Voice search voice devices only Allows you to touch or cli...

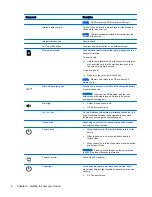
Page 11: ... connects an optional headset microphone This jack does not support optional microphone only devices WARNING To reduce the risk of personal injury adjust the volume before putting on headphones earbuds or a headset NOTE When a device is connected to the jack the device speakers are disabled NOTE Be sure that the device cable has a 4 conductor connector that supports both audio out headphone and au...

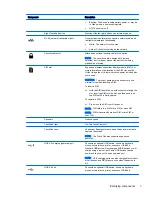
Page 12: ...ttery or power the device CAUTION Insert a micro USB adapter with the icon embossed on the plug facing up Failure to do so may damage the charging port Mute light Amber Device sound is off Off Device sound is on num lock key On select devices with external or attached keyboards this key will alternate between the navigational and numeric functions on the integrated numeric keypad Optical drive Dep...

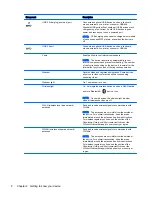
Page 13: ...rting a SIM To insert a SIM Hold the SIM label side up with connectors facing the slot insert the SIM into the slot and then push in on the SIM until it is firmly seated To remove a SIM Press in on the SIM it until it pops out NOTE SIM refers to a SIM micro SIM or nano SIM NOTE SIM size varies by product SIM micro SIM or nano SIM Speakers Produce sound TouchPad light On The TouchPad is off TouchPa...

Page 14: ...ng video Webcam light On The webcam is in use Wireless light On An integrated wireless device such as a WLAN device and or a Bluetooth device is on NOTE On some devices the wireless light is amber when all wireless devices are off WLAN wireless local area network antennas Send and receive wireless signals to communicate with WLANs NOTE The antennas are not visible from the outside of the device Fo...

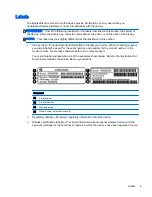
Page 15: ...our device When contacting support you will probably be asked for the serial number and possibly for the product number or the model number Locate these numbers before you contact support Your service label will resemble one of the examples shown below Refer to the illustration that most closely matches the service label on your device Component 1 Serial number 2 Product number 3 Warranty period 4...

Page 16: ... to a wireless network before you can connect to the Internet To connect to a wireless network 1 Touch or click the All Apps icon and then touch or click the Settings icon or On a touch screen swipe down from the top right edge and then touch or click the Settings icon 2 Under Wireless and networks be sure that Wi Fi is turned on 3 Touch or click the Wi Fi icon and then touch or click one of the a...

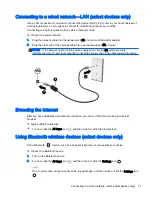
Page 17: ...events interference from TV and radio reception orient the circuitry end of the cable toward the device Browsing the Internet After you have established an Internet connection you can surf the Internet using an Internet browser To begin surfing the Internet Touch or click the All Apps icon and then touch or click the browser icon Using Bluetooth wireless devices select devices only Pair a Bluetoot...

Page 18: ...e Networks 3 If your device has multiple SIM slots select SIM1 or SIM2 4 Touch or click Access Point Names 5 Swipe down from the top of the screen touch or click Select New APN and then follow the on screen instructions Activating data transfer select devices only To enable data transfer over a mobile network 1 Touch or click the All Apps icon and then touch or click the Settings icon or On a touc...

Page 19: ...ows device 1 Connect the USB cable to your device and to a Windows device The USB storage unit drive or other Windows device appears as a drive on your device You can copy files back and forth as you would with any other external device 2 When you are finished eject the device from Windows and disconnect the USB cable Streaming content to a high definition TV or monitor select devices only Cast sc...

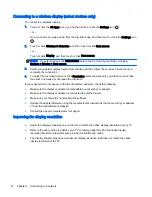
Page 20: ...lider to increase or decrease the resolution If your adapter does not appear in the list of detected adapters check the following Make sure the display or adapter is compatible to work with your adapter Make sure the display or adapter is connected to external power Make sure your firewall is not blocking the software Update the adapter firmware using the manufacturer s instructions that came with...

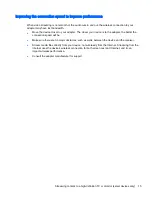
Page 21: ...he better the connection speed will be Make sure there are no major obstacles such as walls between the device and the receiver Stream media files directly from your device not wirelessly from the Internet Streaming from the Internet uses the device s wireless connection for both screen cast and Internet and it can impact wireless performance Consult the adapter manufacturer for support Streaming ...

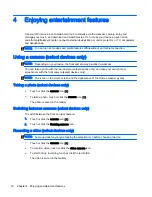
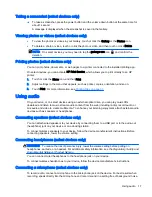
Page 22: ...to or screenshots with the front camera select devices only NOTE The icons on the Home screen and the appearance of the Home screen may vary Taking a photo select devices only Touch or click the camera icon To take a photo touch or click the camera icon The photo is saved in the Gallery Switching between cameras select devices only To switch between the front and rear camera 1 Touch or click the c...

Page 23: ...music CDs download and listen to music stream audio content from the web including radio record audio or mix audio and video to create multimedia To enhance your listening enjoyment attach external audio devices such as speakers or headphones Connecting speakers select devices only You can attach wired speakers to your device by connecting them to a USB port or to the audio out headphone jack on y...

Page 24: ...ou are not connected to a network To enhance your viewing enjoyment use one of the video ports on your device to connect an external monitor projector or TV IMPORTANT Be sure that the external device is connected to the correct port on your device using the correct cable Check the device manufacturer s instructions Connecting video devices using an HDMI cable select devices only HDMI is the only v...

Page 25: ...layPort DP DP cable sold separately The DisplayPort connects a digital display device such as a high performance monitor or projector 1 Connect one end of the DisplayPort cable to the DisplayPort on your device 2 Connect the other end of the cable to the digital display device 3 The device screen image now appears on your display device Using video 19 ...

Page 26: ...hPad helps you navigate the device screen and control the pointer using simple touch gestures To navigate the touchscreen you can use the left and right TouchPad buttons as you would use the corresponding buttons on an external mouse You can also customize gestures and view demonstrations of how they work NOTE Most of the gestures shown here can be used on either the TouchPad or touchscreen TouchP...

Page 27: ...n moving your fingers together Zoom in by placing two fingers together on the TouchPad zone or touch screen and then moving your fingers apart Left edge swipe Use the left edge swipe to reveal your open apps move through home screens and move through photos so that you can access them quickly Gently swipe your finger inward from the left edge of the TouchPad or touch screen to switch between apps ...

Page 28: ... Quick Settings Menu Gently swipe your finger from the top right edge to reveal the Quick Settings Menu Top edge swipe and bottom edge swipe Use the top edge swipe or bottom edge swipe to display command options that allow you to customize an open app IMPORTANT When an app is open the top edge swipe varies depending on the app Gently swipe your finger from the top edge or the bottom edge to reveal...

Page 29: ...croll through lists and pages or to move an object To scroll across the screen lightly slide one finger across the screen in the direction you want to move To drag press and hold an object and then drag the object to move it Using the TouchPad and touch screen gestures 23 ...

Page 30: ...ouch or click the Widgets tab or On a touch screen touch and hold the home screen to display the Set Home Screen menu and then select Widgets To open a widget touch or click the icon To return to the Home screen touch or click the Home icon On a touch screen to add a widget to the Home screen touch and hold the widget icon until the Home screen appears and then slide it to the location where you w...

Page 31: ...touch screen swipe down from the top right edge and then touch or click the Settings icon 2 Under Accounts touch or click Add account 3 Touch or click the installed email app and then follow the on screen instructions 4 To access your email account touch or click the email icon Using the calendar Touch or click the Calendar icon and then follow the on screen instructions NOTE When you add an email...

Page 32: ...ch or click the All Apps icon and then touch or click the Settings icon or On a touch screen swipe down from the top right edge and then touch or click the Settings icon 2 Under Device touch or click Storage and then touch or click Apps 3 Touch or click the app that you want to uninstall and then touch or click Uninstall 4 Touch or click OK and then touch or click OK again 26 Chapter 6 Using apps ...

Page 33: ...le Allows you to manage your contacts and if enabled synchronizes with your Google account Also allows you to store frequently called phone numbers The phone numbers that you contact most often are listed first Connecting to a mobile network voice devices only If a SIM is not preinstalled a SIM can be purchased from a mobile carrier To insert the SIM see the Setup Instructions poster or theQuick S...

Page 34: ...eless network to check email search the Web or access social media websites Cast screen select devices only Enable or disable connection to a wireless Cast screen When a Cast screen is enabled you can stream content from your device to a wireless display device Miracast select devices only Enable or disable Miracast When Miracast is enabled you can connect to a wireless network to stream content f...

Page 35: ...k box to enable or clear the check box to disable Screen lock sound Select the check box to enable or clear the check box to disable Vibrate on touch Select the check box to enable or clear the check box to disable Display Select display brightness wallpaper and font size for your device Brightness Touch or click the slider to select the desired brightness Wallpaper To select an image to be displa...

Page 36: ...e check box to disable it Device administrators Touch or click to view or deactivate device administrators Unknown sources Touch or click the check box to allow installation of apps from unknown sources or clear the check box to disable this feature Verify apps Touch or click the check box to disallow or warn before installation of apps that may cause harm or clear the check box to disable this fe...

Page 37: ...a preferences for your device For more information see Backing up and recovering your data on page 34 Accounts Existing accounts are displayed Add account To add an email account or another type of account touch or click Add account and then follow the on screen instructions Sync an account To sync an account touch or click the name of the account touch or click it again and then touch or click Sy...

Page 38: ... file from your email the Internet or any other location and it will automatically be saved to your downloads folder Check the status of the download in your Notifications by swiping down from the top left edge of the screen To open the Downloads folder and access your downloaded files Touch or click All Apps and then open the Downloads folder Opening files You can open files with the app or apps ...

Page 39: ...p Cloud storage and file sharing Your device includes an online file sharing and cloud content storage service that allows you to access view edit and manage files on the cloud from your device With a preinstalled drive you can store all your files in one place so you can access them from anywhere and share them with others Transferring files NOTE On select devices an external storage location suc...

Page 40: ...tically and notify you when it is ready to install these updates For more information 1 Go to http www hp com support and follow the on screen instructions to select your country and your product 2 Follow the on screen instructions to access your Android operating system software Back up and reset HP strongly encourages that you periodically back up your personal data on your device to another dev...

Page 41: ...mplete the device starts Resetting with the device turned off If the device does not start normally or if you do not remember the lock screen password you can reset the device without turning it on CAUTION All data saved on your device is deleted when you perform a factory reset All apps are uninstalled but it may be possible to restore data in your email account Back up all important files with a...

Page 42: ...is displayed 3 Move the arrow up or arrow down key to highlight wipe data factory reset and then press the enter key to confirm the selection 4 Move the arrow up or arrow down key to highlight Yes delete all user data and then press the enter key to confirm the selection 5 Move the arrow up or arrow down key to highlight reboot system now and then press the enter key to confirm the selection Updat...

Page 43: ...vice without turning it on CAUTION All data saved on your device is deleted when you perform a factory reset All apps are uninstalled but it may be possible to restore data in your email account Back up all important files with an external storage device or to the cloud using one of several commercially available solutions before resetting the device 1 If a battery powered device disconnect the AC...

Page 44: ...ge contact support When a battery has reached the end of its useful life do not dispose of the battery in general household waste Follow the local laws and regulations in your area for battery disposal Charging the battery 1 Connect the power adapter to the device 2 Verify that the battery is charging by checking the AC adapter light 3 While the battery is charging keep the AC adapter connected un...

Page 45: ...y When you connect the device to external AC power The battery begins to charge The screen brightness increases When you disconnect external AC power the following events occur The device switches to battery power Depending on your device the screen brightness may automatically decreases to save battery life Troubleshooting power problems Test the AC adapter if the device exhibits any of the follo...

Page 46: ...components inside the device When you are connecting an external hardware device that does not connect to a USB or video port When the device will be unused and disconnected from external power for an extended period Although you can turn off the device with the power button follow the recommended Android shutdown procedure If the device is unresponsive and you are unable to use the Android shutdo...

Page 47: ...factory On some devices you can disable this feature in Setup Utility BIOS Refer to Help and Support for additional information If you have disabled the action key feature on some devices you can still perform each function by pressing the fn key or esc key in combination with the appropriate action key Depending on your device your keyboard may have some of the following action key features Icon ...

Page 48: ...network must be set up before a wireless connection is possible Opens a list of apps that you have used recently Touch or click an app to open it On a touch screen to remove an app from the list swipe it up or down Returns you to the home screen Go to the previous page in your browser history Go to the next page in your browser history Reload your current page Open your page in full screen mode Sw...

Page 49: ...m chloride methylene chloride and hydrocarbons are not included in the product Fibrous materials such as paper towels can scratch the device Over time dirt particles and cleaning agents can get trapped in the scratches Cleaning procedures Follow the procedures in this section to safely clean your device WARNING To prevent electric shock or damage to components do not attempt to clean your device w...

Page 50: ...ING To reduce the risk of electric shock or damage to internal components do not use a vacuum cleaner attachment to clean the keyboard A vacuum cleaner can deposit household debris on the keyboard surface CAUTION To prevent damage to internal components do not allow liquids to drip between the keys To clean the keyboard or mouse use a soft microfiber cloth or a chamois moistened with one of the cl...

Page 51: ...ck the screen by swiping in any direction Password Enter four or more letters or numbers This option provides the most protection if a strong password is selected Pin Enter four or more numbers to unlock the screen Pattern Draw a simple pattern to unlock the screen Face Unlock select devices only Unlock the screen by looking at the screen 4 In Owner info enter text to be displayed when the screen ...

Page 52: ...ume up button at the same time and hold them down for 10 seconds while the monitor is powered On Upon locking the power button an on screen display OSD message Power Button Lockout is displayed for 10 seconds When the power button is locked and pressed the OSD message Power Button Lockout is displayed for 10 seconds When the power button is locked holding down the power button and volume down butt...

Page 53: ...ce processes As part of that initiative we are constantly refining the accessibility of our products and services and welcome active feedback from users If you have an issue with a product or would like to tell us about accessibility features that have helped you please contact us at 888 259 5707 Monday through Friday 6 00 a m Mountain Time until 9 00 p m Customers who are deaf or hard of hearing ...

Page 54: ...Port connecting 19 identifying 5 download 24 E email 24 25 esc key identifying 5 external AC power using 39 F Face Unlock 45 factory data reset 34 file sharing 33 file transfer 33 fn key identifying 5 Fun things to do 1 G getting to know your device 3 H hard drive light identifying 5 HDMI 10 HDMI port connecting 18 identifying 5 headphones connecting 17 headsets connecting 18 high definition devic...

Page 55: ...up Instructions Poster 2 shutdown 40 SIM slot identifying 7 slots memory card reader 6 security cable 7 SIM 7 sound 28 sounds 28 speakers connecting 17 speakers identifying 7 Starting right 1 storage 28 T tap TouchPad and touch screen gesture 20 testing an AC adapter 39 tethering 12 time 31 top edge swipe and bottom edge swipe TouchPad and touch screen gesture 22 top right edge swipe TouchPad and ...

Page 56: ...wi fi 10 28 widgets 24 wireless certification label 9 wireless light 8 WLAN antennas identifying 8 WLAN device 9 WLAN label 9 WWAN antennas identifying 8 50 Index ...

Reviews: