background image


6.7 

VECTORSCAN (VIDEO TOUR), CONTINUED 

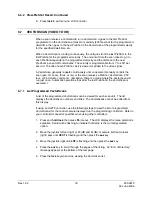
6.7.4  Run VectorScan Continuously 

“Continuously” means the scan unit runs the VectorScan from beginning to end;  

then repeats the list until halted by an operator. 


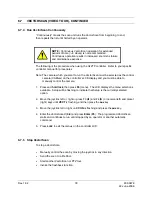
NOTE:  

Continuous VectorScan operation for extended 

periods of time (> 8 Hours) is not recommended.  
Continuous operation results in increased zoom lens failure 
and maintenance expense. 

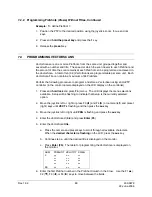
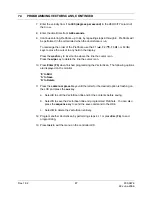
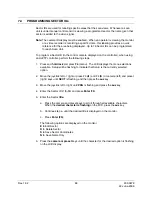
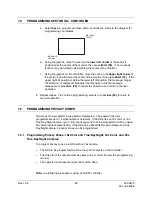
The following is the procedure when using the HJZTP controller.  Refer to your specific 
controller manual for procedures. 

Note: The camera which you want to run the VectorScan must be selected as the control 

camera (CAMxxx) on the controller’s LCD display and you must be able to 
manually control the camera. 

1. Press 

and 

hold lock

, then press 

F6

 (menu).  The LCD displays the menu selections 

available.  Setup will be flashing to indicate that Setup is the currently selected 
option.   

2.  Move the joystick left or  right or press F3 (

W

) and F4 (

X

) or camera (left) and preset 

(right) keys until 

VECT

 is flashing, and then press the 

aux

 key. 

3.  Move the joystick left or right until 

CON 

is flashing and press the 

aux

 key. 

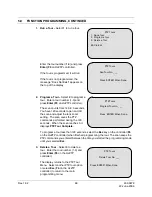
4.  Enter the VectorScan# (

0-9

) and press 

Enter

 (

F5

).  The programmed VectorScan 

starts and continues to run until stopped by an operator or another automatic 
command. 

5. Press 

Lock

 to exit the menus on the controller LCD. 


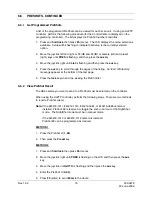
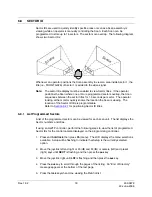
6.7.5 Stop 

VectorScan 

To stop a VectorScan: 

• 

Manually control the scan by moving the joystick in any direction. 

• 

Send the scan to a PreShot. 

• 

Start another VectorScan or PTZ tour. 

• 

Invoke the flashback function. 

Rev. 1.02 

78 

900.0679 


22-June-2006 

Summary of Contents for HD6 Series

Page 1: ...HD6 Series PTZ Camera in a Dome User Manual 900 0679 June 2006 Rev 1 02 ...

Page 2: ... 00 November 2005 Initial Release 1 01 December 2005 Add CE Declaration of Conformity 1 02 June 2006 Remove references to camera manufacturer removed Manchester interface option removed references to Burle removed references to UltraDome changed CAT5 to UTP ...

Page 3: ...y to cause harmful interference in which case the user will be required to correct the interference at his own expense CAUTION Changes or modifications not expressly approved by the party responsible for compliance could void the user s authority to operate the equipment CANADIAN COMPLIANCE STATEMENT This Class A digital apparatus complies with Canadian ICES 003 Cet appareil numérique de la Classe...

Page 4: ...Rev 1 02 iv 900 0679 22 June 2006 ...

Page 5: ... product and cart combination should be moved with care Quick stops excessive force and uneven surfaces may cause the product and cart combination to overturn 10 VENTILATION Slots and openings in the cabinet and the back or bottom are provided for ventilation and to ensure reliable operation of the equipment and to protect it from overheating These openings must not be blocked or covered The openi...

Page 6: ...ntrols may result in damage and will often require extensive work by a qualified technician to restore the unit to its normal operation e If the unit has been dropped or the enclosure has been damaged f When the unit exhibits a distinct change in performance this indicates a need for service 18 REPLACEMENT PARTS When replacement parts are required be sure the service technician has used replacemen...

Page 7: ...product CAUTION CAUTION TO REDUCE THE RISK OF ELECTRIC SHOCK DO NOT REMOVE COVER OR BACK NO USER SERVICEABLE PARTS INSIDE REFER SERVICING TO QUALIFIED SERVICE PERSONNEL C A U T I O N RISK OF ELECTRIC SHOCK DO NOT OPEN WARNING WARNING TO REDUCE THE RISK OF FIRE OR ELECTRIC SHOCK DO NOT EXPOSE THIS PRODUCT TO RAIN OR MOISTURE WARNING DO NOT INSERT ANY METALLIC OBJECT THROUGH VENTILATION GRILLS THIS ...

Page 8: ...uccess We recommend purchasing a single unit for bench testing prior to purchasing and installing this product in quantity Should any problems occur we will provide technical support at the user s expense to analyze the interface protocols of your system The end user must agree to provide reasonable access to the system in order to study and correct the protocol incompatibility In the event that w...

Page 9: ...1 2 4 SCAN INSTALLATION 12 2 5 LINER INSTALLATION 14 SECTION 3 HD6 LOWER DOME 15 3 1 LOWER DOME INSTALLATION 15 3 1 1 Indoor Dome with Safety Lanyard Installed on Housing at Factory 15 3 1 2 Indoor Dome with Safety Lanyard Installed on Lower Dome at Factory 16 3 1 3 Rugged Dome 17 3 1 4 Outdoor Weather Dome 17 SECTION 4 NAVIGATING MENUS 19 4 1 INTRODUCTION 19 4 2 MENU STRUCTURE 20 SECTION 5 SETUP ...

Page 10: ...efault Settings 40 5 4 7 Reset Scan and Camera 40 5 4 8 Upload New Firmware to HD6 40 5 5 CAMERA OPTIONS 18X COLOR AND 18X TRUE DAY NIGHT CAMERAS 41 5 5 1 Zoom and Focus 41 5 5 2 Exposure Control 42 5 5 3 NightShot Control 42 5 5 4 White Balance 44 5 5 5 Still PreShot 46 5 5 6 Vertical Phase 46 5 6 CAMERA OPTIONS 23X WIDE DYNAMIC RANGE AND TRUE DAY NIGHT CAMERA 47 5 6 1 Maximum Digital Zoom 47 5 6...

Page 11: ...ASHBACK OPERATION 73 6 6 PRESHOTS 74 6 6 1 List Programmed PreShots 75 6 6 2 View PreShot Recall 75 6 7 VECTORSCAN VIDEO TOUR 76 6 7 1 List Programmed VectorScans 76 6 7 2 List Contents of a VectorScan 77 6 7 3 Run VectorScan Once 77 6 7 4 Run VectorScan Continuously 78 6 7 5 Stop VectorScan 78 6 8 SECTOR ID 79 6 8 1 List Programmed Sectors 79 6 9 PRIVACY ZONES 80 6 10 ALARM OPERATION 80 SECTION 7...

Page 12: ...K OPERATION 96 8 6 PRESHOTS 97 8 7 VECTORSCANS VIDEO TOUR 99 8 7 1 List Programmed VectorScans 99 8 7 2 List Contents of a VectorScan 99 8 7 3 Run VectorScan 99 8 7 4 Run VectorScan Continuously 100 8 7 5 Stop a VectorScan 100 SECTION 9 PROGRAMMING USING HONEYWELL MAXPRO MODE HONEYWELL VCL PELCO P CODE OR PELCO D CODE CONTROL SYSTEM 101 9 1 INTRODUCTION 101 9 2 PROGRAMMING PRESHOTS 101 9 3 PROGRAM...

Page 13: ...G PTZ TOURS 109 11 7 PTZ TOUR OPERATION 110 SECTION 12 TROUBLESHOOTING 111 12 1 TROUBLESHOOTING PROCEDURES 111 12 2 NO VIDEO 111 12 3 VIDEO PROBLEMS UNSHIELDED TWISTED PAIR UTP OPTION ONLY 112 12 4 VIDEO BUT NO CONTROL 112 12 5 SCAN OPERATES BY ITSELF 113 12 6 ERRATIC SCAN OPERATION 114 12 7 LENS OUT OF OPTICAL FOCUS 114 12 8 CANNOT FIND HOME OR DOES NOT GO TO PRESHOT 115 12 9 SCAN IS JERKY 115 SE...

Page 14: ...igure 1 Receiver Board Part Number 519541 1020 6 Figure 2 Video Board Part Number 519539 1020 NTSC 11 Figure 3 Installation Lower Dome with Safety Lanyard Installed at Factory on Housing 13 Figure 4 Liner Installation 14 Figure 5 Installation Lower Dome with Safety Lanyard Installed at Factory on Lower Dome 16 Figure 6 Installation Lower Dome with Safety Lanyard Installed on Lower Dome 17 LIST OF ...

Page 15: ...l s indoor pendant ceiling dome mount or indoor wall dome mount The weather dome can be mounted on Honeywell s outdoor wall mount pendant mount or parapet mount Cameras available with the HD6 are Part Description 120 0060 23x Color NTSC Camera w 3 8 87 4mm 120 0061 23x Color PAL Camera w 3 8 87 4 120 0062 25x True Day Night NTSC Camera w 3 8 95mm 120 0063 25x True Day Night PAL Camera w 3 8 95mm 1...

Page 16: ...d 5 video board Do not attempt to remove the camera from the scan assembly If a camera or lens requires service the entire scan assembly must be sent back to the factory CAUTION The receiver board and power supply board on the scan assembly have static sensitive devices The HD6 assembly is shipped in a pink bag that is static dissipating The unit should be handled in this bag until installed If th...

Page 17: ...lation Manual for recommended power supplies Additional Lower Dome Trim ring options available as requested Contact Local Account Executive Lower Dome and Trim Ring Options Format Transmission Outdoor HD6 Camera Type Housing Type W E R Drop Hard Ceiling Pendant Rugged Smoked Lower Dome Clear Lower Dome 1 4 PAL NTSC P N Weather Nitro RS 485 Transmission Rugged RS 485 Transmission Weather Nitro Unsh...

Page 18: ...Rev 1 02 4 900 0679 22 June 2006 Notes ...

Page 19: ...w the detailed instructions under each section subsection referenced Installation Process 1 Set switches on the HD6 receiver board for correct protocol baud rate and parity Refer to Section 2 2 2 Set W8 jumper on the video board for standard interface board or optional UTP interface board Jumper W8 enables or disables the 12V auxiliary power provided to the housing interface board required by the ...

Page 20: ...1 W4 1 Set the jumpers and switches as required on the HD6 receiver board Refer to Section 2 2 1 and Section 2 2 2for switch settings Refer to Section 2 2 3 for addressing Figure 1 Receiver Board Part Number 519541 1020 Rev 1 02 6 900 0679 22 June 2006 ...

Page 21: ... to American Dynamics protocol HD6 with a Sennetech Code Translator Model SCT 1036 Set the HD6 to Honeywell Maxpro Mode protocol HD6 with the Digital Interface Set the HD6 protocol to Honeywell VCL if using with Honeywell s DVM Digital Video Manager Set the HD6 to standard Honeywell Diamond protocol when controlling the dome with a web browser NOTE If the switches are set to something other than t...

Page 22: ...00 Baud No Parity 8 data bits OFF OFF OFF OFF 2400 Baud Even Parity 8 data bits OFF OFF ON OFF 4800 Baud No Parity 8 data bits ON OFF OFF OFF 4800 Baud Even Parity 8 data bits ON OFF ON OFF 9600 Baud No Parity 8 data bits OFF ON OFF OFF 9600 Baud Even Parity 8 data bits OFF ON ON OFF 19 2K Baud No Parity 8 data bits ON ON OFF OFF 19 2K Baud Even Parity 8 data bits ON ON ON OFF NOTE Settings for th...

Page 23: ... 255 Note If the control system is set for MUX 100 19 2K protocol addresses 256 512 and 768 cannot be used These are unattainable values in a MUX 100 control packet Note The three address switches S1 S2 and S3 must be set to 0 0 0 when the HD6 is installed in a housing with the digital interface board and is installed in a network Note If you are using the HD6 with control equipment other than Hon...

Page 24: ...1 NOTES The camera number transmitted in the protocol for control purposes must be one less than the number shown in column two above For example if the rotary switches are set for camera address 1 on the HD6 the command packet sent to the HD6 for control purposes must contain camera address 0 to control the HD6 If the switches are set for camera address 513 the command packet sent to the HD6 for ...

Page 25: ...shown in Figure 2 For the UTP option the housing must have the UTP interface board part number 518753 1030 CAUTION The black jumper must be on pin 1 of W8 for standard interface boards or equipment damage may occur UTP OPTION REMOVE AND DISCARD BLACK JUMPER CONNECTOR P10 FROM SCAN WIRING HARNESS W8 CAUTION FOR STANDARD HD6 UNITS BLACK JUMPER AND CONNECTOR P10 MUST BE ON W8 AS SHOWN CONNECTOR P10 F...

Page 26: ...g slot aligns with the two large scan alignment studs in the housing The connector on the top of the scan aligns with the connector in the top of the housing Push the HD6 scan into the housing until both latches click into the holes on the housing You should hear two clicks Press firmly on both latches to ensure proper installation Gently tug on the scan to verify it is locked in position NOTE The...

Page 27: ...R DOME MOUNTING POST FOR SAFETY CABLE FROM HOUSING MOUNTING TABS HOOK ON POSTS IN HOUSING 3 PLACES 2 56 CAPTIVE SCREW FOR SECURING LOWER DOME MOUNTING SLOT LATCH LOCKED POSITION MOUNTING SLOT LATCH LOCKED POSITION SEE DETAIL A LINER BRACKET LOOK FOR YELLOW STICKER WITH BLACK DOT IN CENTER ON ONE OF LATCHES ALIGN WITH SAME STICKER IN HOUSING LOCKED POSITION RELEASED POSITION DETAIL A Figure 3 Insta...

Page 28: ...tches counterclockwise to release the liner 2 Slide the liner out of the U bend of the liner mounting bracket To reinstall the liner 1 Insert the edge of the liner into the U bend of the liner mounting bracket 2 Line up the two turn latches on the liner with the holes on the liner mounting bracket 3 Insert the turn latches into the holes and turn clockwise to secure the liner to the mounting brack...

Page 29: ...rew Ensure safety cable is positioned as shown in drawing Ensure cable is perpendicular to bracket and parallel to lower dome trim ring 2 To secure the lower dome so it has to be removed with a tool perform the following step otherwise go to step 3 a Locate the bag containing a lock screw and 5 64 hex key supplied with the lower dome b Insert the 2 56 lock screw through the hole in the lower dome ...

Page 30: ...rt the 2 56 lock screw through the hole in the lower dome trim ring and screw it into the lower dome inner ring 4 Align the lower dome with the top and twist to lock the lower dome brackets over the mounting posts If you installed the lock screw in step 3 tighten the lock screw in the lower dome with the 5 64 hex key until it is snug DO NOT OVERTIGHTEN SAFETY LANYARD CLIP SAFETY CABLE TRIM RING LO...

Page 31: ...he lower dome with the metal clips in the holes on the housing and align the safety cable on the housing with the mounting hole on the lower dome 2 Using a Phillips screwdriver push the quarter turn fasteners up through the holes in the housing and turn turn clockwise until locked 3 Insert the screw on the safety cable into the hole on the lower dome and tighten LOWER DOME 1 4 TURN FASTENERS 3 PLA...

Page 32: ...Rev 1 02 18 900 0679 22 June 2006 Notes ...

Page 33: ...ome Menu key Press until Dome Setup Menu is displayed on the LCD then press Enter to access the HD6 setup menu Use the numeric keys to access the menu options Press Clear Manual to send an Esc command to the HD6 and exit the HD6 menu Press the Dome Menu Key to exit the HD6 menu mode on the HEGS5000 controller When using the HSX3208 and an HEGS5002 controller press Aux then PTZ Call then Enter to a...

Page 34: ...nu options use the numeric hard or soft keys on the controller The Esc soft key sends an ESC command and exits the HD6 menu The EXIT soft key removes the Ultrakey from the HD6 menu mode The menu options either toggle between the available choices or call up another menu 4 2 MENU STRUCTURE The following setup tree shows the options under each menu in the main setup menu Use of specific menus settin...

Page 35: ...FF Find Home on Startup ON OFF Pan Offset 4 Clear the Error Table 4 White Balance High Light WB Mode Low Light WB Mode Low Light Level 2 28dB 1 4s 1 60s 3 Manual White Balance 5 Start Up Screen Msg ON OFF 5 Set Default Function PreShot VectorScan Tour Delay Enabled Disabled 5 Display Error Table Codes 5 Still PreShot ON OFF OFF default 6 Change Camera Name Location 6 Auto Focus Z PTZ OFF 6 Restore...

Page 36: ...nual Speed 400 200 100 Pan Reverse ON OFF Tilt Reverse ON OFF 2 Degree Tilt Limit ON OFF Find Home on Startup ON OFF Pan Offset 4 Clear the Error Table 4 White Balance Manual White Balance On Off Red Gain Blue Gain 5 Start Up Screen Msg ON OFF 5 Set Default Function PreShot VectorScan Tour Delay Enabled Disabled 5 Display Error Table Codes 5 Still PreShot ON OFF OFF default 6 Change Camera Name Lo...

Page 37: ...Tilt Options Manual Speed 400 200 100 Pan Reverse ON OFF Tilt Reverse ON OFF 2 Degree Tilt Limit ON OFF Find Home on Startup ON OFF Pan Offset 4 Clear the Error Table 4 White Balance White Balance Mode Auto Manual Manual White Balance Set Red Blue Gain 5 Start Up Screen Msg ON OFF 5 Set Default Function PreShot VectorScan Tour Delay Enabled Disabled 5 Display Error Table Codes 5 Auto Slow Shutter ...

Page 38: ...Rev 1 02 24 900 0679 22 June 2006 Notes ...

Page 39: ...creen and counts down from 15 to 0 The standard start up message screen can be turned ON or OFF from the main menu If the start up screen message is ON the following screen is displayed Note The protocol line displays the protocol set by DIP switch S4 If the start up screen message is OFF this screen is displayed After the countdown the scan accepts control commands Refer to the controller users m...

Page 40: ...djust several basic settings that allow customization of the display Each setting on the MAIN MENU is explained in detail in this section UltraDome HD6 519543 1980 1 Language English 2 Display Options 3 Control Options 4 Diagnostic Options 5 Camera Options 6 Function Programming ESC to Exit To make these settings and adjustments access the MAIN MENU Refer to section 4 1 for examples to accessing t...

Page 41: ...he controller to perform these functions 5 2 1 Camera Message From the DISPLAY OPTIONS menu select 1 to turn the camera ID display ON or OFF Selecting 1 toggles the value between ON and OFF DISPLAY OPTIONS 1 Camera Msg ON 2 Sectors ON 3 PreShot Names ON 4 Digital Zoom Msg ON 5 Startup Screen Msg ON 6 Change Camera Name Loc 7 Change Sector Name Loc 8 Crosshairs ESC to Exit 5 2 2 Sectors From the DI...

Page 42: ...ys to position the Name Hit Enter when done From the DISPLAY OPTIONS menu select 6 to change the position of the ID display Use and keys to position the camera ID then select Enter F5 on HJZTP controller when done When using the HJZTP controller use F1 S and F2 T to position the camera ID 5 2 7 Change Sector Name Location Cam nnn Sector Use keys to position the Name Hit Enter when done From the DI...

Page 43: ...imum pan and tilt speeds are reduced and the low speed control is expanded CONTROL OPTIONS 1 PASS ON 2 Auto Pivot ON 3 Program Alarms 4 Set Pan and Tilt Options 5 Set Default Function 6 Auto Focus Z 7 VectorScan Auto Focus OFF ESC to Exit Note At 12X zoom the scan moves very slowly To enable disable PASS select 1 to toggle between ON enable and OFF disable 5 3 2 Auto Pivot If the Auto Pivot featur...

Page 44: ...m occurs CONTROL OPTIONS 1 PASS ON 2 Auto Pivot ON 3 Program Alarms 4 Set Pan and Tilt Options 5 Set Default Function 6 Auto Focus Z 7 VectorScan Auto Focus OFF ESC to Exit Note If an alarm is disabled the HD6 does not respond to a change of state in the alarm contact The HD6 does not perform the programmed PreShot VectorScan or PTZ If a PreShot VectorScan or PTZ Tour is not programmed for an alar...

Page 45: ... Tour ENA enable Enter Y to enable or N to disable the alarm If Then Alarm is disabled The scan ignores a change of state in the alarm input Alarm is enabled and not programmed The scan ignores a change of state in the alarm input Alarm is enabled and programmed The scan performs the action programmed for the alarm input when a change of state occurs Scan adds AL and the alarm number to the video ...

Page 46: ...d the number 3 is removed from the alarm display and the scan performs the programmed action for alarm 4 Note An alarm can be acknowledged before the contact returns to normal however the HD6 will not respond to the alarm again until the contact has reopened and closed again 5 3 4 Pan and Tilt Options Select 4 to set the pan and tilt manual control options CONTROL OPTIONS 1 PASS ON 2 Auto Pivot ON...

Page 47: ...factory set mechanical HOME position The receiver board uses the home position as a reference point for the pan and tilt positions EXTREME CAUTION This will cause the scan to move immediately on startup Are you sure that you want to do this Y N ESC to Exit Select 5 to turn Find Home on Startup ON or OFF If changing from OFF default to ON press Y when prompted To leave Find Home on Startup OFF pres...

Page 48: ...of the scan to the programmed pan offset the offset must be set to ON Pan Offset Setup 1 Offset ON 2 Set Pan Offset ESC to Exit 2 Set Pan Offset Once Offset is ON perform the following steps to set pan offset You must know the original positioning of PreShot 0 1 Esc F6 on the HJZTP controller out of the HD6 setup menus until you have manual control of the scan 2 Send the scan to PreShot 0 If it do...

Page 49: ...is manner before performing the default function Field Usage FUN function Enter the function to perform after being idle for the specified delay time P PreShot V VectorScan T Tour See instructions below for entering these functions in the FUN field NUM number Enter the PreShot number 0 99 VectorScan number 0 9 or Tour number 1 3 Depending on the control system being used specific PreShots may be u...

Page 50: ...t Options 5 Set Default Function 6 Auto Focus Z 7 VectorScan Auto Focus OFF ESC to Exit The minimum focus distance is set at 1 0 meter 3 3 feet from the camera lens in both manual and automatic focus mode Note If the 23x color or 25x True Day Night camera is installed the OFF option is disabled Value Usage OFF Turns the Auto Focus feature OFF The lens must be manually focused Z The lens auto focus...

Page 51: ...guage English 2 Display Options 3 Control Options 4 Diagnostic Options 5 Camera Options 6 Function Programming ESC to Exit Refer to the controller user s manual for operation of the controller to perform these functions 5 4 1 Coordinates DIAGNOSTIC OPTIONS 1 Coordinates OFF 2 Error Table OFF 3 Clear the Memory 4 Clear the Error Table 5 Display Error Tbl Codes 6 Restore Default Settings 7 Reset Sca...

Page 52: ... the Error Table Display ON or OFF 5 4 3 Clear the Memory Select 3 to clear the memory Select Y to clear the memory N to cancel and Esc F6 on HJZTP controller to exit Rev 1 02 38 900 0679 22 June 2006 Clearing the memory does not clear the language selection or programmed privacy zones To send the Yes or No command from the HJZTP controller press the camera and preset keys to scroll through the av...

Page 53: ...o camera 11 Camera data queue overrun 21 Command queue overrun 22 Packet framing error C0 Receive queue overrun Cx bit0 Byte parity error bit1 Byte framing error bit2 Byte noise error bit3 Byte overrun error D0 Byte timeout error D8 Packet parity error EE RESET following byte gives type of reset bit1 System Reset bit2 Loss of Clock Reset bit4 Bus Fault Reset bit5 Watchdog Reset bit6 Power ON Reset...

Page 54: ...isplayed CAUTION THIS WILL RESTORE ALL USER DEFINED SETTINGS TO THEIR DEFAULT VALUES ARE YOU SURE THAT YOU WANT TO DO THIS Y N 5 4 7 Reset Scan and Camera DIAGNOSTIC OPTIONS 1 Coordinates OFF 2 Error Table OFF 3 Clear the Memory 4 Clear the Error Table 5 Display Error Tbl Codes 6 Restore Default Settings 7 Reset Scan and Camera 8 Upload new firmware to HD6 ESC to Exit Select 7 to reset the scan an...

Page 55: ...nusable Restore the default settings to bring video back 5 5 1 Zoom and Focus CAMERA OPTIONS 1 Zoom and Focus 2 Exposure Control 3 NightShot Control 4 White Balance 5 Still PreShot OFF 6 Vert Phase Edge POS 7 Vert Phase 1 180 180 ESC to Exit Select 1 to set the lens zoom and focus options Rev 1 02 41 900 0679 22 June 2006 1 Max Digital Zoom Select 1 to set the maximum digital zoom setting Selectin...

Page 56: ... EXPOSURE CONTROL 1 NA 2 Exposure Level _7 3 NA 4 NA a Enter a value from 0 dark outdoor application to 14 bright indoor application Default 7 5 NA 6 NA 7 NA 8 Backlight Comp OFF ESC to Exit b Select Enter F5 on the HJZTP controller 2 Backlight Compensation Select 8 to turn backlight compensation ON or OFF Backlight compensation is only operational when the unit is in auto exposure mode 5 5 3 Nigh...

Page 57: ...ate NightShot 0dB 1 60s 3 Activate NightShot Select 3 to set available gain and shutter speed values for activating NightShot mode To be functional NightShot must be in the AUTO mode Activation setting cannot be greater than the deactivation setting This guarantees that there will always be some deadband between the activate and deactivate levels The amount of deadband can be adjusted to prevent t...

Page 58: ... Indoor and Outdoor values 4 Enter Low Lght 6dB 1 60s 5 Manual White Balance OFF 6 NA 7 NA ESC to Exit Auto Auto Tracing White Balance with limitations on R and B gain 3 200 K to 6 000 K Use this setting to avoid fixing single color scenes as white ATW Auto Tracing White Balance 2 000 K to 10 000K The camera tries to turn the dominant color within the temperature color range to white Indoor The in...

Page 59: ...itches to low light level white balance mode Selecting 4 toggles between available gain settings 0 28dB and shutter speeds Shutter Speed Settings PAL cameras 1 3 sec 1 6 sec 1 12 sec 1 25 sec or 1 50 sec NTSC cameras 1 4 sec 1 8 sec 1 15 sec 1 30 sec or 1 60 sec The low light level mode cannot be set higher than the high light level mode 5 Manual White Balance Select 5 to choose between ON and OFF...

Page 60: ...PreShot function is disabled until the scan is sent to another PreShot Still PreShot is OFF Video is unfrozen Video returns to normal operation 5 5 6 Vertical Phase 1 Select 6 to select the vertical phase edge for line locking the camera Selecting 6 toggles between POS positive NEG negative or NONE If you select POS or NEG you can set the vertical phase from 1 to 180 CAMERA OPTIONS 1 Zoom and Focu...

Page 61: ...nging the camera options can make the video unusable Restore the default settings to bring video back 1 Language English 2 Display Options 3 Control Options 4 Diagnostic Options 5 Camera Options 6 Function Programming ESC to Exit 5 6 1 Maximum Digital Zoom Select 1 to set the lens maximum digital zoom Selecting 1 toggles through the available values 1x 2x and 4x CAMERA OPTIONS 1 Max Digital Zoom M...

Page 62: ... Mode Features NightShot Control MAN Auto NS Sensitivity NA Digital Slow Shutter OFF ESC to Exit a Auto AE Mode Settings NightShot Control MAN Auto NightShot Sensitivity NA Digital Slow Shutter OFF b Auto AER1 Mode Settings NightShot Control AUTO Auto Night Sensitivity HIGH Digital Slow Shutter OFF c Auto AER2 Mode Settings NightShot Control AUTO Auto Night Sensitivity MID Digital Slow Shutter OFF...

Page 63: ...nd the camera controls the iris and shutter automatically Shutter the shutter is controlled manually and the camera controls the iris and gain automatically 5 6 3 Video Setup Select 3 to access the video setup menu CAMERA OPTIONS 1 Max Digital Zoom Mag 4X 2 Exposure Control 3 Video Setup 4 White Balance 5 Still PreShot OFF 6 Vert Phase Edge NA 7 Vert Phase 1 180 NA ESC to Exit 1 Select 1 to change...

Page 64: ...ng is 140 VIDEO SETUP 1 Exposure Level _91 0 no color 255 color is saturated 2 Max AGC Level 0 255 216 3 Chroma Level 0 255 140 4 Backlight Comp OFF 5 Auto Slow Shutter Lim 6 Wide Dynamic Range OFF 7 Privacy Zone Color Black ESC to Exit Enter a number between 0 and 255 then press Enter F5 on HJZTP controller Enter Chroma level 216 4 Select 4 to turn the backlight compensation on or off Selecting 4...

Page 65: ...if the camera is in auto iris mode The wide dynamic range scans the video and sets the exposure level so it is balanced between the bright areas and dark areas in the video VIDEO SETUP 1 Exposure Level _91 2 Max AGC Level 0 255 216 3 Chroma Level 0 255 140 4 Backlight Comp OFF 5 Auto Slow Shutter Lim 6 Wide Dynamic Range OFF 7 Privacy Zone Color Black ESC to Exit 7 Select 7 to select the color of ...

Page 66: ...lance on or off Pressing 1 toggles between on and off If the manual white balance is set to on the red gain and blue gain settings cannot be changed White Balance 1 Manual White Balance OFF 2 Red Gain 0 511 128 3 Blue Gain 0 511 128 ESC to Exit White Balance 2 Select 2 to change the red gain setting The default setting is 128 1 Manual White Balance OFF 2 Red Gain 0 511 128 3 Blue Gain 0 511 128 ES...

Page 67: ...en done setting up the white balance press Esc F6 on HJZTP controller 5 6 5 Still PreShot Select 5 to turn Still PreShot ON or OFF CAMERA OPTIONS 1 Max Digital Zoom Mag 4X 2 Exposure Control 3 Video Setup 4 White Balance 5 Still PreShot OFF 6 Vert Phase Edge POS 7 Vert Phase 1 180 180 ESC to Exit If Then Still PreShot is ON Video is frozen Video is frozen between PreShots The video remains at the ...

Page 68: ... Vert Phase 1 180 180 ESC to Exit 2 Select 7 to change the vertical phase CAMERA OPTIONS 1 Zoom and Focus 2 Exposure Control 3 NightShot Control 4 White Balance 5 Still PreShot OFF 6 Vert Phase Edge POS 7 Vert Phase 1 180 180 ESC to Exit Enter a number from 1 to 180 and press Enter F5 on HJZTP controller Vertical Phase 180 Enter number from 1 to 180 and press Enter When done setting up the camera ...

Page 69: ...era Options 6 Function Programming ESC to Exit Note Camera Option 5 is not available NA for this camera model CAMERA OPTIONS 1 Zoom and Focus 5 7 1 Zoom and Focus 2 Exposure Control 3 Video Setup 4 White Balance Select 1 to set the lens zoom and focus options 5 NA 6 Vert Phase Edge NONE 7 Vert Phase 1 180 180 1 Max Digital Zoom Select 1 to set the maximum digital zoom setting Selecting 1 toggles t...

Page 70: ... 4 Auto Exposure Level 50 ESC to Exit 2 Manual Backlight if the backlight mode is set to manual mode the manual backlight can be set to ON or OFF Select 2 to toggle the manual backlight on or off If the backlight mode is set to Auto this manual backlight does not apply NA 3 Backlight Level 0 80 This setting selects the brightness level of the Backlight feature when it is ON either automatically or...

Page 71: ...e This feature is not available on the GMC 655 camera VIDEO SETUP 1 NightShot Mode NA 2 NightShot This feature is not available on the GMC 655 camera 2 NightShot NA 3 Video Sharpness 0 15 10 4 NA ESC to Exit 3 Video Sharpness 0 15 The video sharpness can be set from 00 less sharp to 15 sharp Video Sharpness 10 Enter number from 0 to 15 and press Enter Select 3 to set the video sharpness Enter the ...

Page 72: ... White Balance mode is set to automatic control WHITE BALANCE CONTROL Manual If the manual setting is selected the red and blue gain can be set between 0 255 1 White Balance Mode AUTO 2 Red Gain 0 255 _80 3 Blue Gain 0 255 _80 4 ATW Red Point 0 40 20 5 ATW Blue Point 0 40 20 ESC to Exit Select 2 to change the Red Gain value Enter the desired value and press Enter Red Gain _80 Enter number from 0 t...

Page 73: ...nd blue gain to the desired settings If Auto is selected the red and blue gain can be set between 0 40 Select 4 to change the red gain value Enter the desired value and press Enter ATW Red Gain 20 Enter number from 0 to 40 and press Enter Select 5 to change the blue gain value Enter the desired value and press Enter ATW Blue Gain 20 Enter number from 0 to 40 and press Enter Indoor The indoor mode ...

Page 74: ...NE If you select POS or NEG you can set the vertical phase from 1 to 180 CAMERA OPTIONS 1 Zoom and Focus 2 Exposure Control 3 Video Setup 4 White Balance 5 NA OFF 6 Vert Phase Edge POS 2 Select 7 to change the vertical phase 7 Vert Phase 1 180 180 ESC to Exit Enter a number from 1 to 180 and press Enter Vertical Phase 180 Enter number from 1 to 180 and press Enter Rev 1 02 60 900 0679 22 June 2006...

Page 75: ...l Options 4 Diagnostic Options 5 Camera Options 6 Function Programming ESC to Exit 5 8 1 Zoom and Focus CAMERA OPTIONS Select 1 to set the lens zoom and focus options 1 Zoom and Focus 2 Exposure Control 3 Video Setup 4 White Balance 5 Auto SlowShutter Lim 1 4 6 Vert Phase Edge NONE 7 Vert Phase 1 180 180 ESC to Exit 1 Max Digital Zoom Select 1 to set the maximum digital zoom setting Selecting 1 to...

Page 76: ...manual backlight can be set to ON or OFF Select 2 to toggle the manual backlight on or off If the backlight mode is set to Auto this manual backlight does not apply NA EXPOSURE CONTROL 1 Backlight Mode MAN 2 Manual Backlight OFF 3 Backlight Level 0 80 32 4 Auto Exposure Level 50 ESC to Exit 3 Backlight Level 0 80 This setting selects the brightness level of the Backlight feature when it is ON eith...

Page 77: ... manually moves the IR block filter in and out If NightShot is in AUTO mode this feature is disabled 2 NightShot OFF 3 Video Sharpness 0 15 10 4 Still PreShot OFF ESC to Exit 3 Video Sharpness 0 15 The video sharpness can be set from 00 less sharp to 15 sharp Video Sharpness 10 Enter number from 0 to 15 and press Enter Select 3 to set the video sharpness Enter the desired value and press Enter 4 S...

Page 78: ...een MANUAL AUTO default INDOOR OR OUTDOOR Auto White Balance mode is set to automatic control Manual If the manual setting is selected the red and blue gain can be set between 0 255 WHITE BALANCE CONTROL 1 White Balance Mode AUTO 2 Red Gain 0 255 _80 3 Blue Gain 0 255 _80 4 ATW Red Point 0 40 20 5 ATW Blue Point 0 40 20 ESC to Exit Select 2 to change the Red Gain value Enter the desired value and ...

Page 79: ...he red gain value Enter the desired value and press Enter ATW Red Gain 20 Enter number from 0 to 40 and press Enter Select 5 to change the blue gain value Enter the desired value and press Enter ATW Blue Gain 20 Enter number from 0 to 40 and press Enter Indoor The indoor mode sets the white balance to 3200 K Outdoor The outdoor mode set the white balance to 5400 K 5 8 5 Auto Slow Shutter Select 5 ...

Page 80: ...u select POS or NEG you can set the vertical phase from 1 to 180 CAMERA OPTIONS 1 Zoom and Focus 2 Exposure Control 3 Video Setup 4 White Balance 5 Auto SlowShutter Lim 1 4 6 Vert Phase Edge POS 2 Select 7 to change the vertical phase 7 Vert Phase 1 180 180 ESC to Exit Enter a number from 1 to 180 and press Enter Vertical Phase 180 Enter number from 1 to 180 and press Enter Rev 1 02 66 900 0679 22...

Page 81: ...mera Options 6 Function Programming ESC to Exit 5 9 1 PTZ Tour PTZ Tour Select 1 to program run or delete a PTZ pan tilt zoom tour FUNCTION PROGRAMMING This menu option is a feature of the Honeywell Diamond protocol and is only displayed when standard or MUX 100 protocol is selected on the DIP switch on the scan 1 PTZ Tour 2 VectorScan Rev 1 02 67 900 0679 22 June 2006 ...

Page 82: ...ilt the scan and adjust the lens zoom setting The scan saves the PTZ commands performed during the 120 seconds When the scan reaches 0 it displays PTZ Tour Complete Press ENTER When Done To program a tour less than 120 seconds select the Esc key on the controller F6 on the HJZTP controller when finished programming the tour The scan saves the PTZ commands you entered between the time you started t...

Page 83: ...ris Open to activate Use the tilt up and down functions of the controller to change the value If the field is more than one digit each digit can be changed individually by placing the cursor on the digit and using the tilt up or down function PRESHOT Selectable from 0 to 79 PreShots 80 99 are reserved for special functions and cannot be entered in a VectorScan When the field has the desired number...

Page 84: ... To delete a PreShot place the cursor on the PreShot line and press Focus Far The entire PreShot line is deleted 5 When done entering PreShots press Iris Close The cursor moves to S Save 6 Press Iris Open to save the VectorScan To exit without saving use the Pan Left function to move the cursor to E Exit and press Iris Open 7 To delete a VectorScan use the pan left function to move the cursor to D...

Page 85: ...r wants to control must be selected as the control camera When an operator performs a command the controller sends out the control data with the control camera address Example The operator has camera 2 selected as the control camera on the controller The operator performs the tilt function on the controller The controller sends out the tilt command and camera address 2 All the Scan assemblies rece...

Page 86: ...ntrolling the camera features using the HEGS5000 HJZTP Keys Function Auto Press the auto key above the iris control keys to put the camera in auto iris mode Iris Press the open or close keys to manually open or close the camera lens iris 18x Color and True Day Night Camera Features When the scan is set to manual exposure control iris open on the controller lightens the scene iris close on the cont...

Page 87: ... scene the camera is viewing is outputted on the video signal Refer to your specific controller manual for sending PreShot commands to the HD6 6 5 FLASHBACK OPERATION When using an HJZTP controller and scan in standard Honeywell Diamond mode press and hold Fn then press F3 W or press auto 180 to operate the flashback function When the HD6 is set for Honeywell Maxpro mode Honeywell VCL Pelco P Code...

Page 88: ...he title of the PreShot to the video signal and adds the letter A automatic with the camera ID to the video signal The PreShot title and the letter A remain on the video until the scan gets another command When the scan is being manually controlled the letter M manual is added to the camera ID If Then PreShot title ON PreShot title is displayed Camera ID title ON Camera ID and the letter A or M ar...

Page 89: ...ing An End of Directory message appears at the bottom of the last page 5 Press the lock key when done viewing the PreShot list 6 6 2 View PreShot Recall The HD6 camera you want to send to a PreShot must be selected on the controller When using the HJZTP controller perform the following steps There are two methods to recall a PreShot view Note If the 843216 1011 843216 1013 843216 0984 or 843216 09...

Page 90: ...PTZ tour or Find Home command Exception there is a mode where the VectorScan will run just once Automatic operation stops after the last PreShot in the VectorScan is executed 6 7 1 List Programmed VectorScans A list of the programmed VectorScans can be viewed for each scan unit The list displays the VectorScan numbers and titles The VectorScans cannot be edited from this display If using an HJZTP ...

Page 91: ...a left and preset right keys until VECT is flashing and then press the aux key 3 Move the joystick right until VIEW is flashing and then press the aux key 4 Press Enter F5 to exit the display 5 Press the lock key when to exit the menu on the controller LCD 6 7 3 Run VectorScan Once If using an HJZTP controller perform the following procedure 1 Press and hold lock then press F6 menu The LCD display...

Page 92: ... control the camera 1 Press and hold lock then press F6 menu The LCD displays the menu selections available Setup will be flashing to indicate that Setup is the currently selected option 2 Move the joystick left or right or press F3 W and F4 X or camera left and preset right keys until VECT is flashing and then press the aux key 3 Move the joystick left or right until CON is flashing and press the...

Page 93: ... title is programmable Refer to Section 5 2 7 for positioning Sector ID titles 6 8 1 List Programmed Sectors A list of the programmed sectors can be viewed for each scan unit The list displays the Sector numbers and titles If using an HJZTP controller perform the following steps to view the list of programmed Sector IDs for the control camera displayed on the programming controller 1 Press and hol...

Page 94: ...can or PTZ Tour The alarms are sampled 16 times a second After the alarm has been accepted the HD6 will determine if a function has been programmed for that alarm and if that alarm is enabled If either of those conditions are not met the alarm will be discarded If both conditions are met however the alarm will be considered triggered If no other alarm is in service the alarm will be serviced The f...

Page 95: ...ms are active the HD6 will display AL in blinking letters After the blinking AL the HD6 will list all active alarms in order Thus if alarms 1 3 and 4 are active the HD6 would display AL 1 34 If an alarm number is blinking that means that the contact is still closed When the contact is opened the number will stop blinking There is no on screen indication as to which alarm is currently being process...

Page 96: ...Rev 1 02 82 900 0679 22 June 2006 Notes ...

Page 97: ...nus To view the programming menus the video from the scan unit must be called up on the monitor 3 The controller being used for programming must have manual control pan tilt zoom etc of the scan unit 4 The scan unit must be able to find its home position To find home the pan tilt and zoom feedback connections must all be functional If a unit has not found home and an attempt is made to program the...

Page 98: ...hot 99 is reserved for toggling the NightShot mode on and off PreShot 98 is reserved for the scan and camera reset function 7 2 1 Programming PreShots Views with Titles The following is an example of the programming procedure using an HJZTP controller Refer to your specific controller manual for programming PreShots Views 1 Adjust the pan tilt zoom and focus of the unit until the desired scene is ...

Page 99: ... scene displayed on the monitor Go to step 10 below d D to delete the PreShot Go to step 9 below e N to Save Name saves only the title of the PreShot coordinates are not saved Go to step 9 below 9 Program another PreShot or press Esc F6 to exit PreShot programming 10 Press lock to exit menu on LCD controller 7 2 2 Programming PreShots Views Without Titles The following is an example of the program...

Page 100: ...e control camera displayed on the LCD display on the controller 1 Press and hold lock and press F6 menu The LCD displays the menu selections available Setup will be flashing to indicate that Setup is the currently selected option 2 Move the joystick left or right or press F3 W and F4 X or camera left and preset right keys until VECT is flashing and then press the aux key 3 Move the joystick left o...

Page 101: ...ursor is on Press the wipe key to delete the line the cursor is on 10 Press Enter F5 when finished programming the VectorScan The following options are displayed on the monitor E to Edit S to Save D to Delete 11 Press the camera or preset keys until the letter for the desired option is flashing on the LCD and press the aux key a Select E to edit the VectorScan title and or the contents before savi...

Page 102: ...nu The LCD displays the menu selections available Setup will be flashing to indicate that Setup is the currently selected option 2 Move the joystick left or right or press F3 W and F4 X or camera left and preset right keys until SECT is flashing and then press the aux key 3 Move the joystick left or right until PRG is flashing and press the aux key 4 Enter the Sector ID 0 15 and press Enter F5 5 E...

Page 103: ... return to manual operation 8 Repeat steps 4 7 to continue programming sectors or press Esc F6 to return to manual operation 7 5 PROGRAMMING PRIVACY ZONES All privacy zone programming is password protected The password is user programmable up to 14 alphanumeric characters If the HD6 has an 18x color or 18x True Day Night camera up to 10 0 9 privacy zones can be programmed with a unique 24 characte...

Page 104: ...ue step a until the entire password is sent to the HD6 c Press Enter F5 6 Enter a Privacy zone number 0 9 and press Enter F5 7 Enter a Privacy zone title up to 24 characters a Press the camera and preset keys to scroll through all available characters When the desired character is flashing on the LCD press the aux key b Continue step a until the desired title is sent to the HD6 c Press Enter F5 Th...

Page 105: ... must be the control camera on the controller The video from the camera must be viewed on a monitor to view the programming menus The operator must have manual control of the Scan Note the following procedure is using an HJZTP controller 1 Press and hold lock and press F6 menu The LCD displays the menu selections available Setup will be flashing to indicate that Setup is the currently selected opt...

Page 106: ... Press the camera or preset keys until the character for the desired option is flashing on the controller LCD Note If you want to program zone coordinates you can also press the Sequence key to send the save command to the HD6 9 If you selected S or Sequence to program zone coordinates perform the following steps a Using the joystick move the block over the area to be hidden b Press the F1 S F2 T ...

Page 107: ...r the password The factory set password is blank Press Enter F5 to submit a blank password a Press the camera and preset keys to scroll through all available characters When the desired character is flashing on the LCD press the aux key b Continue step a until the password is sent to the HD6 c Press Enter F5 6 Press the camera or preset keys until the character P is flashing on the controller LCD ...

Page 108: ...ing mode Some controllers such as the HEGS5000 feature LCD menus that allow the operator to start tours from the controller without accessing the HD6 on screen menus Refer to your specific controller manual for starting tours 7 7 PTZ TOUR OPERATION A PTZ tour can be started from the on screen menu refer to Section 5 7 1 Some controllers such as the HEGS5000 feature LCD menus that allow the operato...

Page 109: ...through the setup menu Send the HD6 to PreShot 90 to access the setup menus then access the diagnostics menu the select the Reset Scan and Camera option Refer to Section 5 4 7 8 3 CONTROLLING SCAN ASSEMBLIES The lens iris is automatically controlled by the camera but can be controlled manually from a controller The camera lens auto exposure mode can be enabled or disabled using the controller PreS...

Page 110: ...tShot mode PreShot 94 is reserved for Honeywell Maxpro mode Honeywell VCL Pelco P Code or Pelco D Code Control Systems If Then The scan is set to manual control Iris Open on the controller lightens the scene Iris Close on the controller darkens the scene In manual exposure control mode the shutter first goes from 1 10000s to 1 60s 1 50s The iris then goes from F22 to F1 4 F3 1 and the gain goes fr...

Page 111: ...per second While a scan is going to a PreShot position the character generator adds the title of the PreShot to the video signal and adds the letter A automatic with the camera ID to the video signal The camera ID display must be enabled to view the camera number and letter A PreShot titles are not programmable using a Maxpro controller In this case the PreShot titles are PS 001 PS 002 etc If Then...

Page 112: ...tart VectorScan 2 PreShot 89 Start VectorScan 3 PreShot 90 Setup the Scan and Camera PreShot 91 Toggles the error table display PreShot 92 Toggles auto exposure ON and OFF Factory default is ON PreShot 93 Toggles backlight compensation ON and OFF The unit must be in auto exposure mode for backlight compensation to function PreShot 94 Toggles between standard operation and NightShot mode Camera mod...

Page 113: ...ans 0 and 4 9 can be assigned to alarms or the default function When a scan receives a command to run a VectorScan the scan goes to the first PreShot programmed in the VectorScan at maximum velocity 400 second for the programmed dwell time then goes to the next PreShot in the VectorScan at the programmed velocity for the specified dwell time etc When a VectorScan is running continuously the unit g...

Page 114: ...o changes or supplemental instructions are required Refer to information in Section 8 7 3 and Section 6 7 4 8 7 5 Stop a VectorScan Take manual control pan tilt zoom focus or iris of the scan Send the scan to a PreShot Start a PTZ tour or a different VectorScan Execute any other command addressed to that HD6 ...

Page 115: ...tements The section number corresponds to the numbering in Section 7 Therefore Section 9 6 provides additional or replacement information to that in Section 7 6 9 2 PROGRAMMING PRESHOTS Refer to your controller s user manual for programming presets or views 9 3 PROGRAMMING VECTORSCANS VectorScans must be programmed through the setup menu Send the HD6 to PreShot 90 to access the setup menu Refer to...

Page 116: ... programming mode The message PTZ Tour Complete is displayed The scan stores the PTZ commands in the order you entered them between the time you started the programming mode until you entered the PreShot 86 command 9 7 PTZ TOUR OPERATION PreShot commands 80 81 and 82 are reserved for running PTZ tours 1 2 and 3 respectively The scan where the PTZ tour is stored must be the control camera on the sy...

Page 117: ... 10 3 provides additional or replacement information to that in Section 6 3 10 2 RESET HD6 No changes or supplemental instructions are required Refer to Section 6 2 10 3 CONTROLLING SCAN ASSEMBLIES When using an American Dynamics control system there are several PreShots views or presets reserved for controlling the scan Refer to Table 3 for a listing of the preprogrammed PreShots and their functi...

Page 118: ...rator adds the title of the PreShot to the video signal and adds the letter A automatic with the camera ID to the video signal PreShot titles are not programmable using an American Dynamics or Maxpro controller The PreShot titles are PS 001 PS 002 etc If Then PreShot title ON PreShot title is displayed Camera ID title ON Camera ID and the letter A are displayed Operator sends the scan to a PreShot...

Page 119: ...reShot 30 Start VectorScan 1 PreShot 40 Start VectorScan 2 PreShot 50 Start VectorScan 3 PreShot 60 Toggles between standard operation and NightShot mode 18X True Day Night and 23X Wide Dynamic Range True Day Night cameras only PreShot 61 Main Setup Menu PreShot 62 Toggles the error table display PreShot 63 Toggles backlight compensation on or off Scan must be in auto exposure iris mode for backli...

Page 120: ...and 50 respectively To start a VectorScan stored in a scan unit the scan must be the control camera on the system controller Example To start VectorScan 2 send a PreShot 40 command When a scan receives a command to run a VectorScan the scan goes to the first PreShot programmed in the VectorScan at maximum velocity 400 second for the programmed dwell time then goes to the next PreShot in the Vector...

Page 121: ...Continuously No changes or supplemental instructions are required Refer to information in Section 10 7 3 and Section 6 7 4 10 7 5 Stop VectorScan To stop a VectorScan Take manual control pan tilt zoom focus or iris of the scan Send the scan to a PreShot Start a PTZ tour or a different VectorScan ...

Page 122: ...Rev 1 02 108 900 0679 22 June 2006 Notes ...

Page 123: ... s manual for programming views 11 3 PROGRAMMING VECTORSCANS VectorScans must be programmed through the setup menu Send the HD6 to PreShot 61 to access the setup menu Refer to Section 5 7 2 11 4 PROGRAMMING SECTOR IDS This feature is not available when using an American Dynamics control system 11 5 PROGRAMMING PRIVACY ZONES This feature is not available when using an American Dynamics control syst...

Page 124: ...reShot 24 command 11 7 PTZ TOUR OPERATION PreShot commands 11 12 and 13 are reserved for running PTZ tours 1 2 and 3 respectively The scan where the PTZ tour is stored must be the control camera on the system controller The scan continues to run the PTZ tour from beginning to end 1 Enter a PreShot 11 command on the system controller to run PTZ tour 1 Enter a PreShot 12 command to run PTZ tour 2 or...

Page 125: ...her are in the system a Make sure the camera is called up on a monitor at the controller b Bypass the switcher and connect the video from the HD6 to the monitor If video is present verify correct video connections to switcher 3 Power down all system components for 15 seconds and then return power 4 Check fuse F1 1 6A 250V Slo Blo 5mm x 20mm located on circuit board in the housing 5 On standard uni...

Page 126: ... receiver board are set to the proper camera number address S1 Ones Digit S2 Tens Digit S3 Hundreds Digit Note If scan is set to address 000 the scan responds to all address commands 3 Ensure DIP switch S4 is set for the correct control system 4 Diamond Series Controllers Ensure LED or LCD display is lit on the controller Unplug the controller wait 30 seconds and plug it back in 5 Power down all s...

Page 127: ...ol system the baud rate of the control unit must is set at 2400 Verify this value 8 The baud rate of the HD6 can be selected using the S4 DIP switches Verify that the HD6 and the controller are set for the same baud rate The same is true of parity no parity or even parity 9 Wiring Make sure the data wiring is connected at the terminal strip in the housing Make sure bare wires are not touching each...

Page 128: ...erly at the terminal strip in the housing Unshielded Twisted Pair UTP Option verify jumpers W3 W4 in housing are in positions 1 2 3 See 12 4 possible solution 8 12 7 LENS OUT OF OPTICAL FOCUS Possible solution 1 A function has been added to reset the camera lens zoom and focus Pre programmed PreShots activate this function If using Activate with Honeywell Diamond Honeywell Maxpro mode Honeywell VC...

Page 129: ... Verify the sensor tab moves freely through the optical sensor Tab and sensor are under the video board 4 Verify the pan motor connector is secured to connector J1 on the power supply board part number 518241 1030 5 Verify the tilt motor connector is secured to connector J2 on the camera adapter board part number 518107 1020 12 9 SCAN IS JERKY Possible solution 1 Verify both data lines are connect...

Page 130: ...Rev 1 02 116 900 0679 22 June 2006 Notes ...

Page 131: ...kit Do not use facial tissues paper toweling or clothing to clean the lens Use only a lens cleaning tissue 13 2 REMOVING LOWER DOME 13 2 1 Indoor Housings NOTE Handle the dome from the flange or trim ring 1 Remove power to the unit 2 If the lower dome was installed with the 2 56 lock screw remove the 2 56 lock screw on the lower dome trim ring using a 5 64 hex key 3 Rotate the lower dome countercl...

Page 132: ...wise and lower the lower dome 3 Loosen and remove the screw that secures the safety lanyard cable to the lower dome 13 3 REMOVING THE HD6 SCAN FROM THE HOUSING 1 Remove power to the unit 2 Remove the lower dome Refer to Section 13 2 and follow the instructions for your equipment 3 Remove the inner dome by turning the two turn fasteners counterclockwise Slide the liner out of the U bend on the line...

Page 133: ...side and outside surface of the dome can be cleaned with any non abrasive cleaning cloth and cleaning agent that is safe for use on acrylic plastic such as Windex Glass Plus or lens cleaner To polish the dome Meguiar s Mirror Glaze 6 Professional Cleaner Wax or equivalent mirror cleaner wax is recommended ...

Page 134: ...Rev 1 02 120 900 0679 22 June 2006 Notes ...

Page 135: ... 14 REPLACEMENT PARTS 14 1 INTRODUCTION The following drawings and partial material lists are provided to assist in installing and servicing the HD6 Qualified technicians who have attended a Honeywell training course must perform all servicing ...

Page 136: ...rface Board Replacement Parts Item Part Number Description 18 517082 7130 Dropped Ceiling Mount not shown used on 518563 2040 only A4 518245 1030 Interface Board Standard shown A4 518753 1030 Interface Board Unshielded Twisted Pair UTP Option not shown F1 842805 0052 Fuse Slo Blo 1 6A 250V 5x20mm Littelfuse 288 01 6 located on interface board Rev 1 02 122 900 0679 22 June 2006 ...

Page 137: ...ts Item Part Number Description 1 518466 1140 Housing 4 515676 1130 Slip Ring Support 8 518462 1120 Shroud A4 518245 1030 Interface Board Standard shown A4 518753 1030 Interface Board Unshielded Twisted Pair UTP option not shown F1 842805 0052 Fuse Slo Blo 1 6A 250V 5x20mm Littelfuse 218 01 6 located on interface board Rev 1 02 123 900 0679 22 June 2006 ...

Page 138: ... with Black Trim Ring HDB0DH00 Lower Dome Smoked with White Trim Ring HDB0D400 Lower Dome Clear with Black Trim Ring HDB0D500 Lower Dome Clear with White Trim Ring 700502 4130 Black Trim Ring 700502 3130 White Trim Ring 700515 2130 Smoked Lower Dome 700515 1130 Clear Lower Dome 518562 1140 Inner Dome 941508 0053 Tool Hex Key 5 64 ...

Page 139: ... DOME Part Number Description HDT0W000 HD6 Weather Housing fly lead connections HDT0W00A HD6 Weather Housing with 14 Pin Connector HDT0W003 HD6 Weather Housing Unshielded Twisted Pair UTP Option Rev 1 02 125 900 0679 22 June 2006 ...

Page 140: ...29 861807 0011 Clip for Turn Fastener 59 842701 0028 Blower 24Vdc 60 842805 0010 Fuse Slo Blo 5A 250V located on the heater blower assembly 64 848475 0043 Thermostat SPST Open 90 F Close 70 F A1 518245 1030 Interface Board Standard shown A1 518753 2030 Interface Board Unshielded Twisted Pair UTP Option not shown F1 842805 0052 Fuse Slo Blo 1 6A 250V 5x20mm Littelfuse 288 01 6 located on interface ...

Page 141: ...Unshielded Twisted Pair UTP Interface HDT0R00J Ruggedized Housing w Unshielded Twisted Pair UTP Heater Blower Rev 1 02 127 900 0679 22 June 2006 Item Part Number Description A4 518245 1030 Can Interface Board Assembly Standard Wiring A4 518753 1030 Interface Board for HD6 w Unshielded Twisted Pair UTP option A6 518088 3030 Heater Blower Assembly 24V ac A6 518088 4030 Blower Assembly 24V ac ...

Page 142: ...are HDSA00P1 Scan Assembly 18x PAL Camera Standard Firmware HDSB00P1 Scan Assembly 18x PAL IR Camera Standard Firmware HDSC00N1 Scan Assembly 23x NTSC IR Camera Standard Firmware HDSC00P1 Scan Assembly 23x PAL IR Camera Standard Firmware HDSD00N1 Scan Assembly 23x NTSC Camera Standard Firmware HDSD00P1 Scan Assembly 23x PAL Camera Standard Firmware HDSE00N1 Scan Assembly 25x NTSC IR Camera Standar...

Page 143: ...14 9 HD6 SCAN CONTINUED Rev 1 02 129 900 0679 22 June 2006 ...

Page 144: ...20 0067 Replacement Camera 18x True Day Night PAL w 4 1 73 8mm IR 44 843216 0984 Replacement Camera 23x Wide Dynamic Range True Day Night Color NTSC w 3 6 82 8mm IR 44 843216 0985 Replacement Camera 23x Wide Dynamic Range True Day Night PAL w 3 6 82 8mm IR 44 120 0060 23x Color NTSC Camera w 3 8 87mm 23x 44 120 0061 23x Color PAL Camera w 3 8 87 4 23x 44 120 0062 25x NTSC True Day Night NTSC Camer...

Page 145: ...utomatic Operation Continuously variable 0 1 s to 400 s per second Manual Operation Maximum speed is the maximum pan speed Braking 0 1 accuracy Mechanical Rail Mount Installation in Dome Electrical Terminal Block Mounting Dropped Ceiling Hard Ceiling Indoor or Outdoor Pendant Pendant Dome 6 6 lbs 3 0 kg Hard Ceiling Dropped Ceiling 5 5 lbs 2 50 kg Weather Dome 15 lbs 6 8 kg Weight including pan an...

Page 146: ...tal zoom selectable Focal Range Infinity to 1m near Angle of view H 48 degrees optical wide to 2 8 degrees optical tele 15 3 SCAN 23X WIDE DYNAMIC RANGE AND TRUE DAY NIGHT CAMERA Image Sensor 1 4 4 5mm Dia NTSC approx 380K pixels 758H x 504V Picture elements total pixels PAL approx 450K pixels 758H x 592V NTSC 470 400 TV lines Resolution Normal 1 60s 1 50s PAL 470 550 TV lines Sync System Internal...

Page 147: ...w H 56 2 degrees optical wide to 2 4 degrees optical tele 15 5 SCAN 25X TRUE DAY NIGHT CAMERA Image Sensor 1 4 Ex view HAD CCD NTSC 410K pixels 811H x 508V Picture elements total pixels PAL 470K pixels 795H x 596V NTSC 470 TV lines Resolution Normal 1 60s 1 50s PAL 450 TV lines Sync System Internal VD Pulse Lock Auto Detect Minimum Sensitivity all with clear lower dome 0 8 lux 30 IRE Color Camera ...

Page 148: ...Rev 1 02 134 900 0679 22 June 2006 Notes ...

Page 149: ...Rev 1 02 135 900 0679 22 June 2006 Notes ...

Page 150: ...Rev 1 02 136 900 0679 22 June 2006 Notes ...

Page 151: ...Rev 1 02 137 900 0679 22 June 2006 Notes ...
Page 152: ...curity France Parc Gutenberg 8 Voie La Cardon 91120 Palaiseau France www honeywell security fr TEL 33 01 64 53 80 40 Honeywell Security Poland Chmielewskiego 22a 70 028 Szczecin Polska www ultrak pl TEL 48 91 485 40 60 Honeywell Security Italia SpA Via Treviso 2 4 31020 San Vendemiano Treviso Italy www honeywell com security it TEL 39 04 38 36 51 Honeywell Security Czech Republic Havránkova 33 Brn...

Reviews: