Installing a physical SVP
The following describes how to install the physical SVP into a rack and configure it for
your network environment.
Caution: The physical SVP (Windows 7) is not supported in high-temperature
environments. Do not operate the SVP at temperatures above 95°F (35°C).
Caution: The SVP (Windows 10) is supported in high-temperature
environments. Do not operate the SVP at temperatures above 104°F (40°C).
Mounting the physical SVP
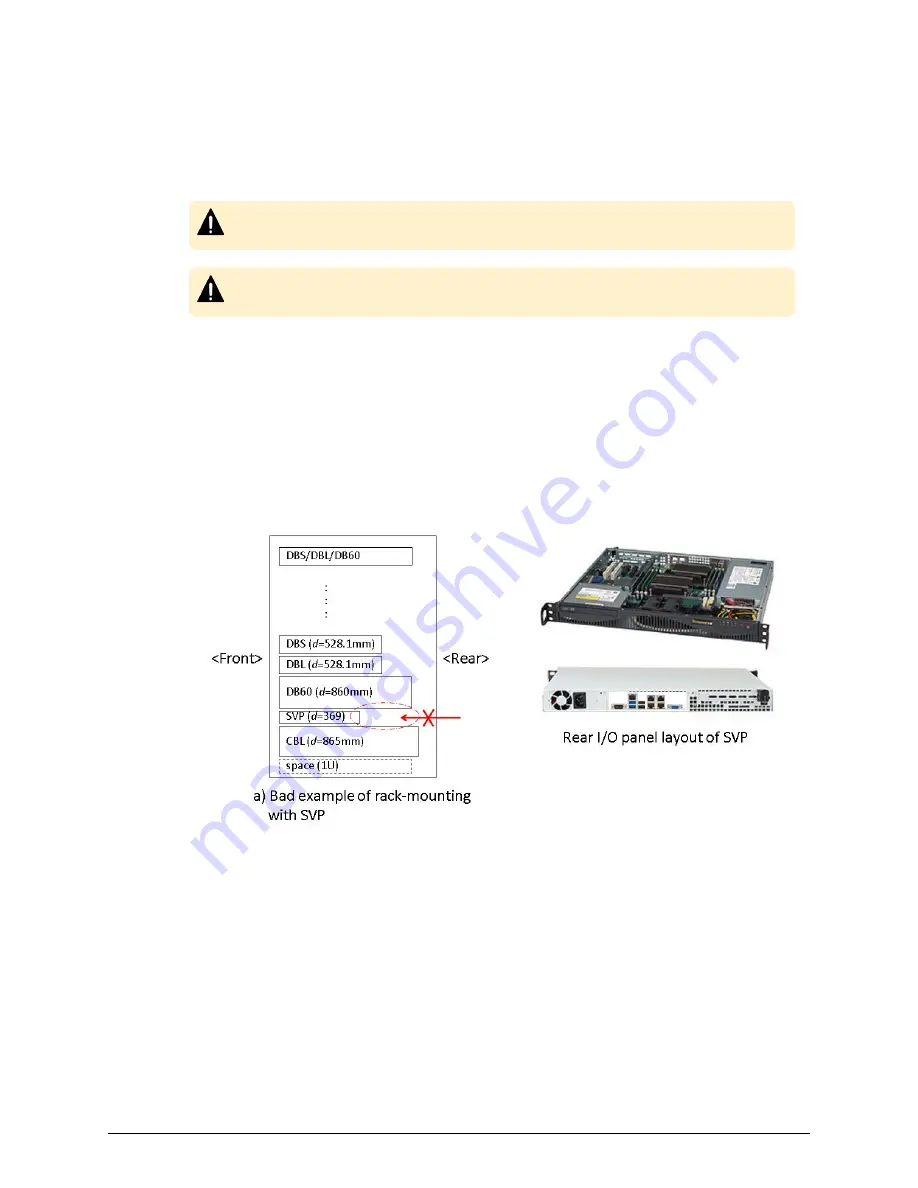
The physical SVP has a depth of 14.5 inches (369 mm). The 4U CBL controller and dense
intermix drive tray (DB60) have a depth of 34.1 inches (865 mm) and 33.9 inches (860
mm), respectively.
If the SVP is rack-mounted between a CBL and dense intermix drive tray, as shown in the
following figure, there is not enough space to access the rear I/O panel of the SVP.
To verify that the SVP can be accessed for maintenance:
■
Locate the SVP at the top of the rack or above the system.
■
If a small form factor drive tray (DBS) or dense intermix drive tray (DB60) is added at
the top of the rack, prepare a 1U space between the system and the small form
factor, large form factor, and dense intermix drive trays.
Installing a physical SVP
Chapter 4: Installing the Hitachi Vantara-supplied SVP
Service Processor Technical Reference
29


