


30_
live
live
to delete a registered preset
1.
Click < >.
2.
Click < >. "
delete preset
" window will appear.
3.
Click <
> to select the preset to delete.
4.
Click <
delete
>. The selected preset will be deleted.
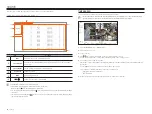
running Preset
1.
Click < >.
2.
Click the preset you want to run from the list.
The camera lens moves to the set position.
running Swing (auto pan), group (scan), tour, or trace (pattern)
The running method of each function is the same as the preset operation method. For details on how to use it, refer
to the camera's user manual.
`
Depending on the camera's capabilities, only some features may be available.
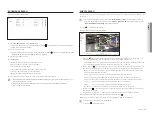
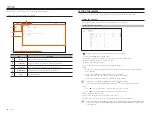
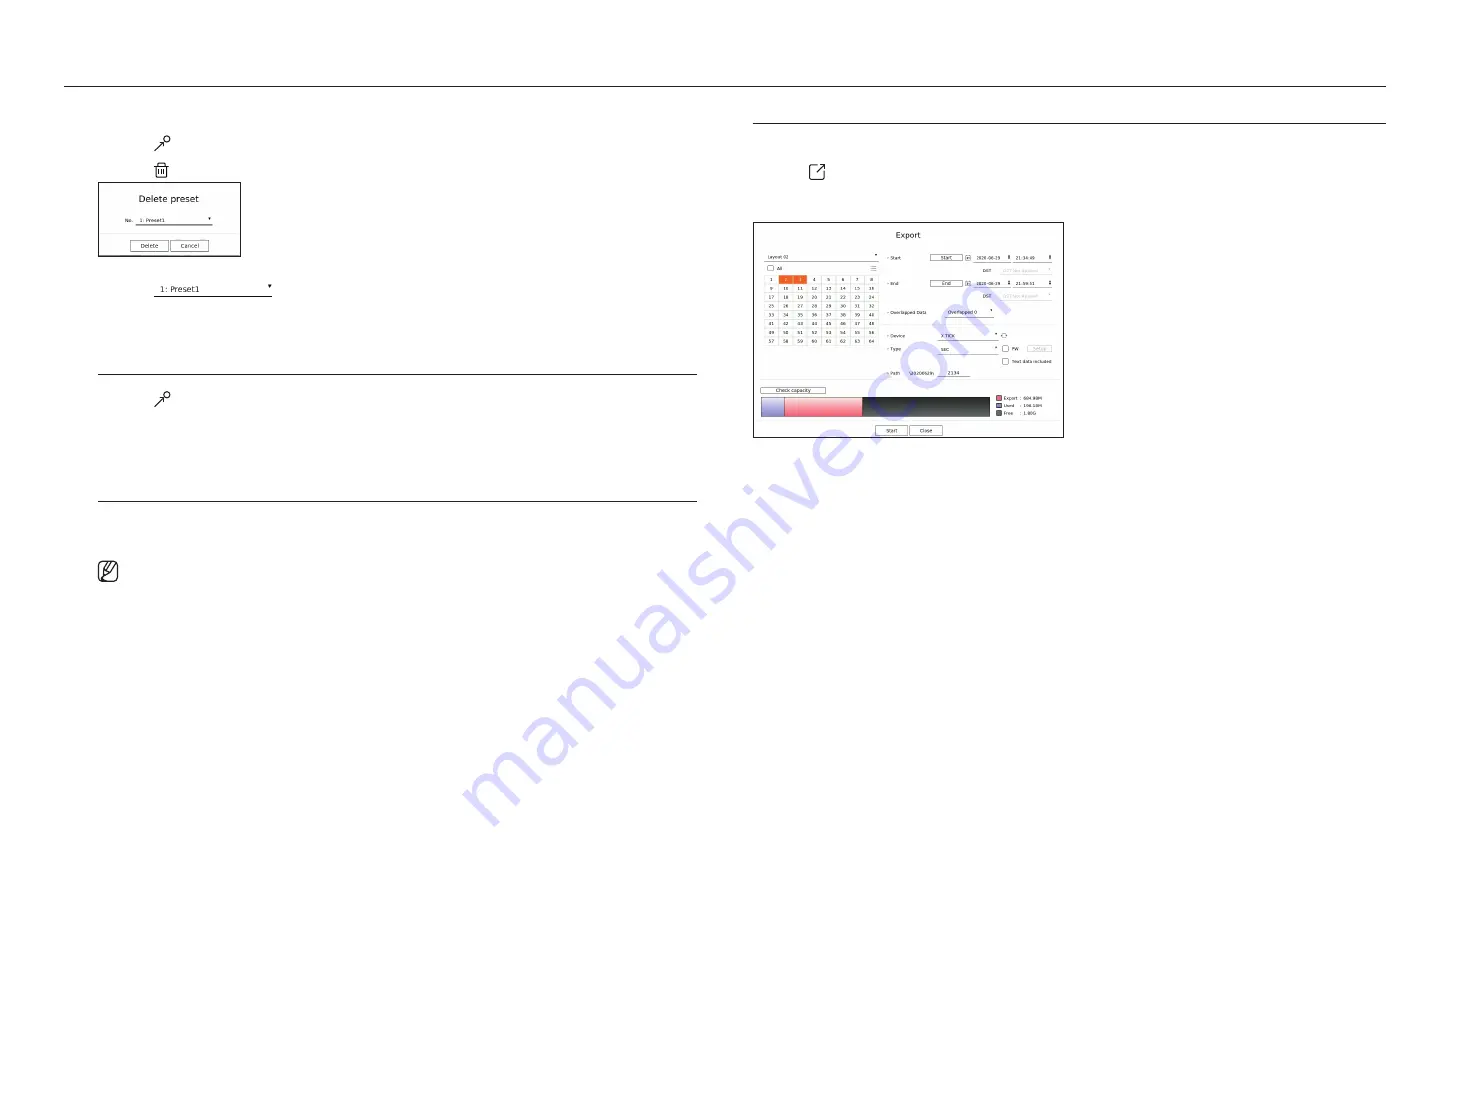
exPorting tHe recorded video
You can search the storage device to be exported and export the recorded video of the desired time by layout or channel.
1.
Click < > at the bottom of the screen.
2.
The export setup screen will appear.
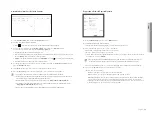
• Select a layout : Select a desired layout from the layout list.
• Channel : Select a channel to export.
`
You can select multiple channels. If you select <
All
>, all channels will be selected.
• Export section : Set the <
Start
> and <
End
> time to run the export select to.
- Start : You can set the start time for the export to the desired time.
Click <
Start
> to set the export start time to the first time the video was recorded.
- End : You can set the end time for the export to the desired time.
Click <
end
> to set the export end time to the last time the video was recorded.
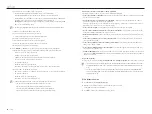
• Overlapped Data : Shows a list of overlapping data on a same time according to the number of data.
This is displayed when there are duplicate data in the same channel due to changes in the time or time zone.
`
For more details, refer to the "
Setup
>
Setting the System
>
Date/Time/Language
" page in the Table of Contents.
• Device : Select a device to export the among the searched devices.
• Type : Select the export format.
- SEC : You can export in your own file format that can be played directly on your PC. You can play with the viewer
included in the export folder.
`
If you select SEC format, you can choose whether to include
"PW Setup
" and "
Text Data Included
".
- Recorder : You can export to a file that can be played only on the recorder.
• Path : Displays the folder location where the export file will be saved. You cannot change the storage folder, only the
file name to be saved.
• Check capacity : You can check the selected export capacity and the current and remaining capacity of the export
device.
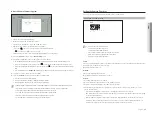
3.
After completing the export setup, select <
Start
>.
`
If there is no device to export, the <
Start
> button will be deactivated.
`
If you click <
Stop
> during the export progress, which is a the export will be canceled.
4.
Click <
oK
> on the export completion confirmation window to finish.
Summary of Contents for Wisenet XRN-6410DB4
Page 1: ...NETWORK VIDEO RECORDER User Manual Wisenet NVR...
Page 118: ......


