


93
3.
Install the chassis air filter to the correct position, and fasten the captive screws at both sides of the
chassis air filter. For more information, see "Installing the switch."
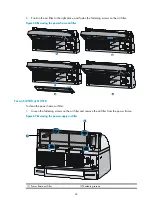
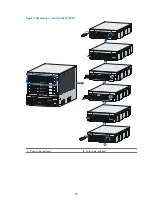
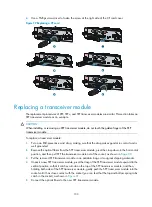
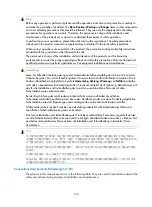
Figure 66
Removing the rear chassis air filter for an S12508
Cleaning the chassis air filter for an S12518
An S12518 has only one chassis air filter, which is horizontally inserted.
To clean the chassis air filter:
1.
Use a Phillips screwdriver to loosen the screws at both sides of the air filter, and slowly pull the air
filter out along the slide rails.
2.
Use clean water to wash the air filter, and air-dry the air filter.
3.
Install the air filter to the chassis, and fasten the screws at both sides of the air filter.
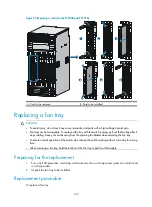
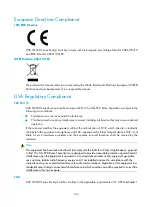
Figure 67
Removing the air filter for an S12518
Cleaning a power frame air filter
The power frame air filter of an S12500 switch is right behind the front panel of the power frame to
prevent dust from entering the power frame.
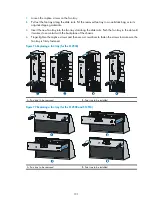
For an S12504
To remove, clean, and install the power frame air filter:
1.
Loosen the fastening screws on the air filter, push the air filter to the right most, and remove the air
filter from the power frame.
2.
Wash the air filter by using clean water, and then air-dry the air filter.
Summary of Contents for S12500 Series
Page 40: ...30 Figure 28 Installing an upper expansion cable management bracket 1 2 3 4 5 6 7...
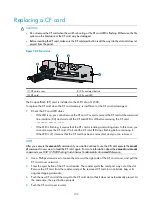
Page 109: ...99 Figure 74 Replacing a card for the S12504 A Card to be removed B Card to be installed...
Page 149: ...139 Figure 85 Loopback operation on an optical transceiver...
Page 164: ...154 Figure 100 Example of a device label...


