❏ ❏
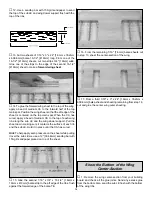
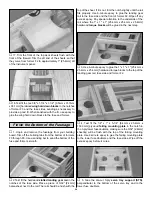
14. Glue the die-cut 3-ply stab saddle doubler (SSD)
to the aft fuse side. Align the stab saddle doubler and the
bottom of the fuse.
❏ ❏
15. Glue the 1/8" x 3/16" x 24" [3.2mm x 4.8mm x 609.6mm]
balsa fuse side doublers to the top and bottom of the fuse.
The bottom fuse doubler is flush with the bottom of the fuse
side. The top fuse doubler is flush with the bottom of the aft
fuse deck notches.
❏ ❏
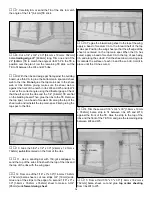
16. Glue the 1/8" x 3/16" x 24" [3.2mm x 4.8mm x
609.6mm] balsa fuse cross braces to the fuse side and the
stringers. Temporarily position the die-cut 3-ply fuse formers
F4 and F5 in the notches of the fuse side. Do not glue the
formers to the fuse side. They are only to position the cross
braces at this time.
❏ ❏
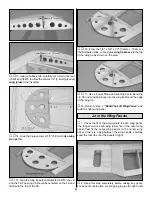
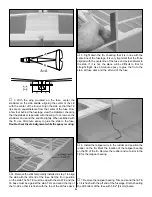
17. Draw a line perpendicular to the bottom edge of the
fuselage, 2-3/4" [69.8mm] from the aft end. Sand a taper
from the line to the aft edge of the fuse. Leave the aft edge
approximately 1/32" [.8mm] thick.
❏
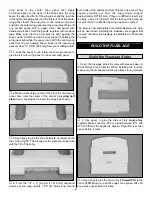
18. Return to step 12 and install the doublers on the left
fuse side.
❏
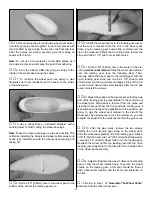
1. Cover the Aft Fuse Deck plan, at the bottom of the
fuse plan, with waxed paper or Great Planes Plan Protector.
❏
2. Glue the two die-cut 3/32" balsa aft fuse deck halves
together over the plan.
❏
3. From the 3/32" x 3/16" x 24" [2.4mm x 4.8mm x 609.6mm]
balsa stick, cut and glue stringers to the aft fuse deck.
❏
4. Lightly sand both sides of the aft fuse deck to remove
any excess glue.
Assemble the Aft Fuse Top
23
Summary of Contents for Old Timer
Page 6: ...6 DIE PATTERNS...
Page 7: ...7 DIE PATTERNS...
Page 44: ...TWO VIEW DRAWING Use copies of this page to plan your trim scheme...
Page 45: ...B C...
Page 46: ...D A...


