❏
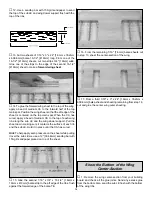
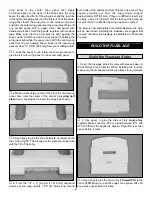
3. Position one of the main spars over the plan and pin it
to the building board. Because the wing uses a center shear
web, the main spar can only be pinned outboard of the
W4 ribs.
❏
4. Glue the die-cut 3/32" [2.4mm] balsa sub ribs W1A to
both sides of the die-cut 3/32" [2.4mm] balsa ribs W1.
❏
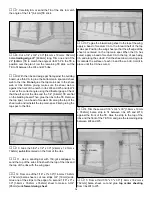
5. Position the die-cut 3/32" [2.4mm] balsa ribs W1 and
W3 and the die-cut 3-ply ribs W2 and W4 over the main
spar, perpendicular to the building board. Slide the die-cut
1/8" [3.2mm] balsa center wing panel shear web over
the ribs.
❏
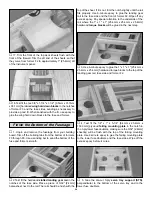
6. Install the 3/16" x 3/8" x 18" [4.8mm x 9.5mm x 457.2mm]
basswood top main spar.
❏
7. Insert the die-cut 3-ply wing dowel support at the
front of ribs W2.
❏
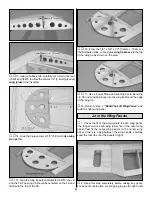
8. Cut one of the 1/4" x 3/4" x 30" balsa trailing edges
16-1/2" [419mm] long. Pin the TE in position over the plan.
❏
9. Pin the wing ribs to the building board.
❏
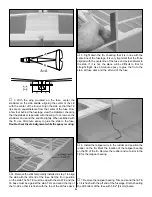
10. With the ribs and wing spar flat against the building
board, use thin CA to glue the bottom main spar and shear
web to the ribs. Do not glue the top main spar to the shear
web or ribs. Before gluing, make sure the shear web is
against the front of the notch in ribs W3 and W4 and rib W4
is perpendicular to the building board. Glue the wing dowel
support to ribs W2. Then, center the W1 ribs behind the two
1/4" holes and glue them to the wing dowel support. Check
that the aft ends of the ribs are flat on the building board.
Then, glue the ribs to the TE. Remove the top spar, run a
bead of medium CA along the top of the shear web and
reinstall the top main spar. Finish gluing the top spar to
the ribs.
❏
11. From the 3/32" x 1/2" x 30" (2.4mm x 12.7mm x
762mm] balsa stick cut two 6" long sub LE pieces. Glue the
sub LE, centered vertically on the front of ribs W2 through W4.
14
Summary of Contents for Old Timer
Page 6: ...6 DIE PATTERNS...
Page 7: ...7 DIE PATTERNS...
Page 44: ...TWO VIEW DRAWING Use copies of this page to plan your trim scheme...
Page 45: ...B C...
Page 46: ...D A...


