❏ ❏
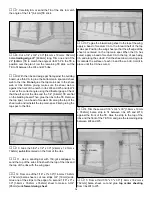
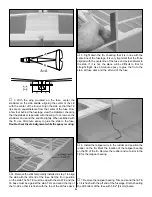
5. Use masking tape to join the two wheel pant halves.
Carefully spot glue them together in just a few places with
thin CA. Start by spot gluing the top, then the front and rear.
After the halves are joined, securely glue them along all
seams with thin CA.
Note: Do not use CA accelerator on the ABS plastic as it
may develop cracks and/or keep the paint from adhering.
❏ ❏
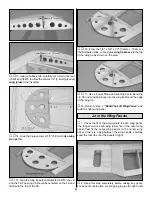
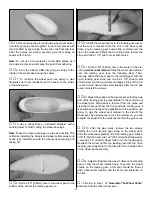
6. From the leftover ABS, trim and glue strips to the
inside of the wheel pant along the seams.
❏ ❏
7. To reinforce the wheel pant, use epoxy to glue
fiberglass cloth (not included) over the seam on the inside
of the wheel pant.
❏ ❏
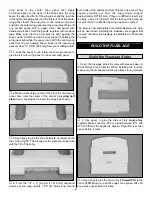
8. Use a hobby knife or a Dremel
®
Multipro
®
with a
sanding drum to finish cutting the wheel openings.
Note: Make the wheel openings as wide as possible. This
will make installing the wheels and wheel collars easier and
cause less interference with the wheels upon landing and
taking off.
❏ ❏
9. Drill a 3/16" [4.8mm] hole in the wheel pant at the
bottom of the slot for the landing gear wire.
❏ ❏
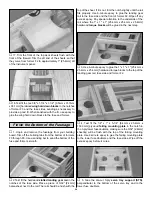
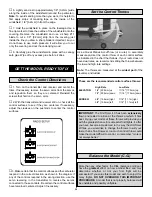
10. Slide the wheel pant over the landing gear wire so
that the wire is recessed into the slot in the wheel pant.
Place a nylon landing gear hump strap centered over the
slot in the wheel pant. Mark the mounting holes, remove the
strap and drill a 1/16" pilot hole at both marks.
❏ ❏
11. Drill a 3/16" [4.8mm] hole in the center of the die-
cut 3-ply wheel pant retainer. Slide the wheel pant retainer
over the landing gear (see the following step). Then,
securely attach the wheel pant to the landing gear with the
nylon landing gear strap and two #2 x 3/8" sheet metal
screws. Remove the two screws and apply a drop of thin CA
in each hole to harden the screw threads. After the CA has
cured, reinstall the screws.
❏ ❏
12. Adjust the position of the wheel pant so that the axle
part of the landing gear is perpendicular to the centerline of
the wheel pant. Stand back a few feet from the plane and
view the wheel pant from the front and side, making sure it
is positioned correctly. When satisfied with the position, use
epoxy to glue the wheel pant retainer to the side of the
wheel pant. By using epoxy to glue the retainer on, you can
readjust the position of the wheel pant before the glue cures.
❏ ❏
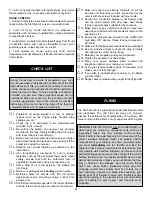
13. After the glue cures, remove the two screws
holding the nylon landing gear strap on the wheel pant.
Slide the wheel pant partially off of the landing gear. Slide a
3/16" [4.8mm] wheel collar, a 3" [76.2mm] wheel followed by
a second 3/16" [4.8mm] wheel collar onto the landing gear.
Reattach the wheel pant to the landing gear with the nylon
landing gear strap. Refer to the fuse plan for a detailed view
of the wheel pant assembly.
❏ ❏
14. Adjust and tighten the wheel collars on the landing
gear so that the wheel rotates freely. To secure the wheel
collars on the landing gear, a flat spot should be filed at
each wheel collar location and the set screw tightened on
the flat.
❏
15. Return to step 1 of
“Assemble The Wheel Pants”
and assemble the other wheel pant.
31
Summary of Contents for Old Timer
Page 6: ...6 DIE PATTERNS...
Page 7: ...7 DIE PATTERNS...
Page 44: ...TWO VIEW DRAWING Use copies of this page to plan your trim scheme...
Page 45: ...B C...
Page 46: ...D A...


