❏
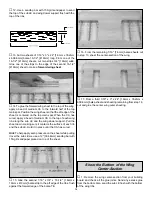
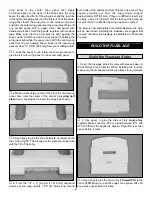
10. Use a Great Planes Power Plane
™
and sanding bar
to shape the LE to the shape shown on the wing plan.
❏
11. Use the Power Plane and sanding bar to shape the
TE to the shape shown on the wing plan.
❏
12. Use a hobby knife to carefully cut a slot in the root
ribs W4 and ribs W3 to allow the die-cut 1/8" [3.2mm]
plywood wing joiner to be inserted. Set the center-section
off to the side.
❏ ❏
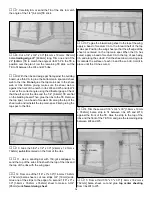
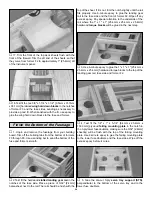
1. Cover the left wing panel plan from W-4 to the wing
tip with waxed paper or Great Planes Plan Protector. Note:
The outer wing panel will first be assembled without glue.
Then, in step 9, the wing panel will be glued together.
❏ ❏
2. Match two of the 3/16" x 3/8" x 30" [4.8mm x 9.5mm
x 762mm] basswood main spars so any warps will
counteract each other.
❏ ❏
3. Position one of the main spars over the plan and pin
it to the building board. Because the wing uses a center
shear web the main spar can only be pinned outboard of the
W4 and W10 ribs.
❏ ❏
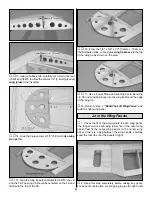
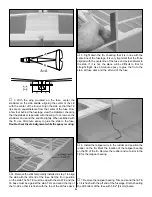
4. Position the die-cut 3/32" [2.4mm] balsa ribs W5
through W10 and the die-cut 3-ply rib W4 over the main
spar, perpendicular to the building board. Slide the die-cut
1/8" [3.2mm] balsa outer wing panel shear web over the
ribs. Use the die-cut 3-ply dihedral gauge to set the angle of
rib W4.
❏ ❏
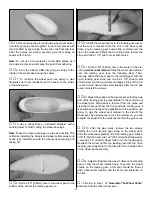
5. Install the 3/16" x 3/8" x 30" [4.8mm x 9.5mm x
762mm] basswood top main spar. Pin the wing ribs in
position over the plan, making sure that the bottom of the
ribs are against the building board.
❏ ❏
6. Glue the die-cut 3/32" [2.4mm] balsa rib doubler
W5A to the aft outboard side of rib W5.
Build the Left Wing Panel
BUILD THE OUTER WING PANELS
17
Summary of Contents for Old Timer
Page 6: ...6 DIE PATTERNS...
Page 7: ...7 DIE PATTERNS...
Page 44: ...TWO VIEW DRAWING Use copies of this page to plan your trim scheme...
Page 45: ...B C...
Page 46: ...D A...


