❏
3. Apply 6 drops of thin CA adhesive to both sides of
each hinge. Allow a few seconds between drops for the CA
to wick into the slot. Use a paper towel to wipe off any
excess CA that may have gotten onto the covering.
❏
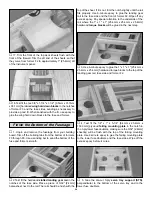
4. Wipe off the nylon tailwheel bearing with a paper towel
dampened with rubbing alcohol. Use 6-minute epoxy to glue
the tailwheel bearing in the aft end of the fuse. After the
epoxy has cured, pack the tailwheel wire hole in the rudder
with 6-minute epoxy. Install the rudder with its hinges.
Repeat the gluing technique described previously and allow
the epoxy to cure.
Hint: Apply a little petroleum jelly to the tail gear wire where
it passes through the nylon bearing. This will prevent the
wire from being glued to the bearing.
❏
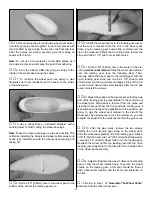
1. Install a 3/32" wheel collar (not included), a 1-1/4" tail
wheel (not included) and a second 3/32" wheel collar on the
tailwheel wire. Secure the wheel collars to the tailwheel wire
with 4-40 set screws (not included). Use thread locking compound
on the set screws to prevent them from loosening.
❏
2. Reinstall the landing gear and landing gear fairing on
the fuse and the wheel and wheel pants on the landing gear.
❏
1. Reinstall the elevator and rudder control horns. Insert
the elevator and rudder pushrods in the appropriate outer
pushrods. Slide a silicone clevis retainer over the pushrod
and reinstall the clevises. If you removed the servos,
receiver, receiver battery and receiver switch, reinstall them.
❏
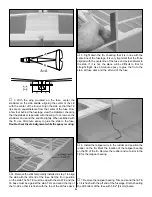
2. Make a strain relief from a cut-off servo arm and place
it on the antenna where the antenna exits the fuse. Route
the receiver antenna out of the fuse. Anchor the antenna to
the top of the fin with a rubber band and T-pin.
Note: Do not shorten the antenna! Leave any excess
trailing behind the model.
❏
3. Reinstall the engine and throttle pushrod.
❏
4. Assemble the fuel tank per the manufacturer’s instructions.
Connect approximately 6" [152.4mm] of fuel tubing to the
fuel pick-up fitting and the pressure fitting on the fuel tank.
Wrap the fuel tank in 1/4" [6.4mm] foam rubber. As you
insert the fuel tank into the fuel tank compartment, route the
fuel tubing out of the firewall. Attach the proper fuel tubes to
the carburetor and muffler. Position a leftover stick behind
the fuel tank and glue it to the fuse sides to hold the fuel
tank in position.
❏
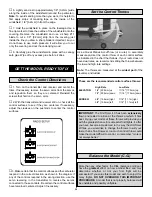
5. The side windows are cut from the 5-1/2" x 8-1/2"
[139.7mm x 215.9mm] butyrate sheet. Use the template on
the fuselage plan as a guide. Then, trim the side windows to
fit along the inside of the cabin side. After the windows have
been trimmed to fit, glue them in place with canopy glue,
such as Pacer Formula 560 Canopy Glue. We do not
recommend CA, as it may fog the plastic. Use masking tape
to hold it in position while the glue dries.
Finish the Model
Install the Wheels
38
Summary of Contents for Old Timer
Page 6: ...6 DIE PATTERNS...
Page 7: ...7 DIE PATTERNS...
Page 44: ...TWO VIEW DRAWING Use copies of this page to plan your trim scheme...
Page 45: ...B C...
Page 46: ...D A...


