❏
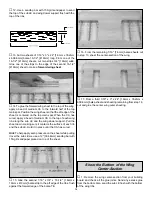
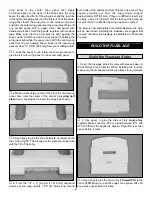
12. Use a sanding bar with 150-grit sandpaper to sand
the top of the sub LE and wing dowel support flush with the
top of the ribs.
❏
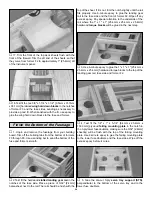
13. Cut two sheets of 1/16" x 3" x 24" [1.6mm x 76.2mm
x 609.6mm] balsa 16-1/2" [419mm] long. From one of the
16-1/2" [419mm] sheets, cut two strips 3/4" [19mm] wide.
Glue one of the strips to the edge of the second 16-1/2"
[419mm] sheet to make a forward wing sheet.
❏
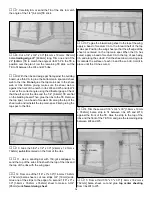
14. To glue the forward wing sheet to the top of the wing,
apply a bead of medium CA to the forward half of the top
main spar. Position the wing sheet so that the aft edge of the
sheet is centered on the top main spar. When the CA has
cured, apply a bead of medium CA to the top of each wing
rib, along the sub LE and the wing dowel support. Pull the
sheet down, making sure it contacts the surface of each rib
and the sub LE. Hold it in place until the CA has cured.
Hint: To help apply even pressure on the sheet while pulling
it over the sub LE, we use a 12" [304.8mm] sanding bar with
150-grit sandpaper placed on top of the sheet.
❏
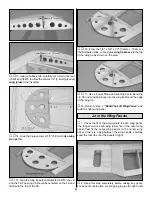
15. Glue the second 1/16" x 3/4" x 16-1/2" [1.6mm x
19mm x 419mm] balsa strip to the aft edge of the ribs, flush
against the forward edge of the balsa TE.
❏
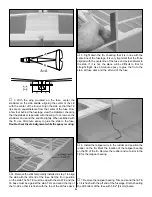
16. From the remaining 1/16" [1.6mm] balsa sheets cut
in step 13, sheet the center-section of the wing.
❏
17. From a third 1/16" x 3" x 24" [1.6mm x 76.2mm x
609.6mm] balsa sheet and sheeting remaining from step 16,
cut and glue the center wing outer sheeting.
❏
1. Remove the wing center-section from your building
board and check all the glue joints. Sand any excess glue
from the bottom. Also, sand the sub LE flush with the bottom
of the wing ribs.
Sheet the Bottom of the Wing
Center-Section
15
Summary of Contents for Old Timer
Page 6: ...6 DIE PATTERNS...
Page 7: ...7 DIE PATTERNS...
Page 44: ...TWO VIEW DRAWING Use copies of this page to plan your trim scheme...
Page 45: ...B C...
Page 46: ...D A...


