


356
Kayenne XL Package — User Manual
Section 5 — Menu Summaries
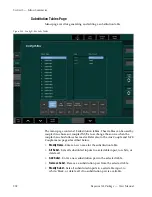
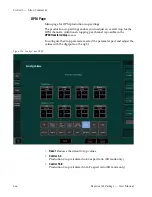
Transition Trigger
Transition Trigger Preset/Program Bus is used in combination with the
Input Event functionality and can be configured in the
Ebox/Install/Input
Menu (Menu number 040102)
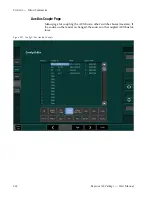
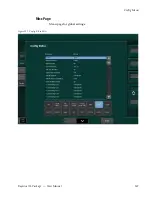
With
Input Event
you can assign an Event to each of the physical inputs. An
Event can be an auto start of a Tape Machine, Video Server, a complex time
lime, snap shot or DVE Effect.
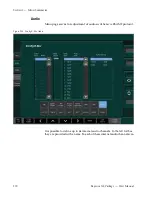
If you use an auto start of Video Server, the Kayenne XL can be configured
in a way where you just need to push the source button assigned to the
input which is used for the Video Server.
The
Cut/Auto
button or even the Transition Bar can be used to start the Video
Server and switch the source to the program output. The following
example explains how to configure an auto start of a Video Server config-
ured as Media Player 1 connected to video input 1, using the PP stage.
Example:
Auto Start of a Video Server using the Cut/Auto button or Transition Bar:
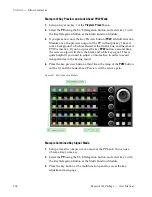
1.
Make sure that the used video server is connected through a serial cable
connection to the mainframe, the connection is established, and the
clips are also available and navigable using the Media Player (130100).
The configuration of the Video Server can be done in the
Installation/Ebox/Machine
menu (040110). For detailed information, refer
to
Machine Page
on page 313
.
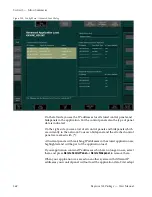
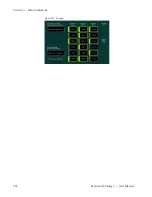
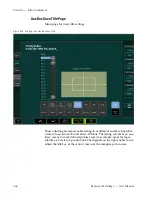
2.
Open the
Install/Machine
menu (040102). Double click on the
Event
tab
which is corresponding to the input. In this case input 1. Now you will
see the main group page of the event menu. Use the following path to
assign the play command for the video server to the corresponding
Video Input:
Machine Control/Media Player 1/Motion Command/set by value/Play
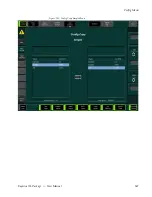
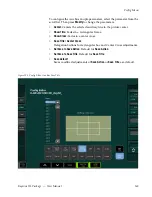
3.
Now open the
Config/Ebox/M/E/Misc
menu (050108). Switch
Cut Trigger
PGM Bus
to on in order to enable the event assigned to the input 1. Next
make sure that Input 1 is not selected at the Program Bus, and load an
existing clip from the server, using the
Media Player Clips
menu (130100).
Summary of Contents for Kayenne XL Package
Page 82: ...82 Kayenne XL Package User Manual Section 2 Concepts ...
Page 264: ...264 Kayenne XL Package User Manual Section 4 Menu Overview ...
Page 275: ...Kayenne XL Package User Manual 275 Status Menu M E Mapping Submenu In Preparation ...
Page 285: ...Kayenne XL Package User Manual 285 Install Menu Figure 217 Install E Box Tally In Assign ...
Page 347: ...Kayenne XL Package User Manual 347 Config Menu Figure 282 Config Copy Simple Menu ...
Page 352: ...352 Kayenne XL Package User Manual Section 5 Menu Summaries Figure 285 Example ...
Page 434: ...434 Kayenne XL Package User Manual Section 5 Menu Summaries Figure 345 Chroma Key Main ...
Page 435: ...Kayenne XL Package User Manual 435 Key Menu Figure 346 Chroma Key Main Cursor ...
Page 437: ...Kayenne XL Package User Manual 437 Key Menu Figure 348 Chroma Key Suppression Cursor ...
Page 462: ...462 Kayenne XL Package User Manual Section 5 Menu Summaries ...
Page 487: ...Kayenne XL Package User Manual 487 RamRecorder Menu Figure 405 Export Dialog 2 ...
Page 509: ...Kayenne XL Package User Manual 509 Scaler Menu ...
Page 583: ...Kayenne XL Package User Manual 583 EMEM Menu Figure 472 EMEM Edit Insert Trigger Macro Number ...
Page 590: ...590 Kayenne XL Package User Manual Section 5 Menu Summaries ...
Page 618: ...618 Kayenne XL Package User Manual Glossary ...


