GE M
EDICAL
S
YSTEMS
D
IRECTION
2392751-100, R
EVISION
3
V
IVID
™ 4 S
ERVICE
M
ANUAL
8-12
Section 8-2 - Cover Replacement Procedures
8-2-6-4
Top Cover Lower Section Installation Procedure
1) Return the gas spring cover section back to its original position in the top cover.
2) Align the opened gap of the gas spring cover to be in parallel with the opened gap of the top cover
collar.
3) Hold the top cover and the gas spring cover section so that they are at a 90-degree angle to the
front of the unit, then insert them from the
left
side of the unit through their opened gap.
4) Insert and screw the three screws located at the top edge of the top cover, shown in
5) Lift the gas cover spring cover from the top cover and fasten it with the three screws in its original
location.
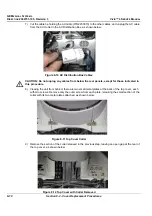
6) Return the rear section of the gas spring cover to its original position and fasten it with the two
screws shown in
7) Gently fit the left and right connector panels back to their original position on the top cover and
fasten each with its four screws.
8) Mount the small section of the top cover collar, closing the open gap at the rear of the top cover,
and fasten it to the top cover with the two screws shown in
9) Plug in the AC cable (P/N 2253013) to the AC Dis. Box, shown in
on page 8-10, and
secure the cable to the other cables with a tie-wrap.
10) Plug all peripheral cables into their original locations in the connector panels.
11) Return the connectors panels cover, as described in the
Connector Panels Cover Installation
12) Fasten the top cover with the two screws located in the brackets underneath the top cover, on either
side of the unit, as shown in
13) Return the rear cover, as described in the
Rear Cover Installation Procedure
14) Return the side covers, as described in the

