Viewing the Backup Camera
WARNING
This device is intended to enhance your situational awareness when used properly. If used improperly, you
could become distracted by the display, which could lead to an accident causing serious personal injury or
death. Only access the information displayed on the device with a glance. Always maintain awareness of your
surroundings and do not stare at the display or become distracted by the display. Focussing on the display
could prevent you from avoiding obstacles or hazards.
• If your camera is connected to a reverse lamp (recommended), place the vehicle into reverse.
• If your camera is connected to constant power, select
.
• To show or hide the camera view using voice commands, say OK Garmin, Show Video or Hide Video.
NOTE: voice commands are not available on all navigation devices. The voice commands may vary based on
your navigation device model. This feature is not available for all languages or may require additional
navigation device setup for some languages.
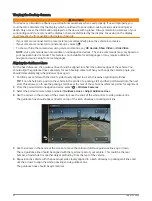
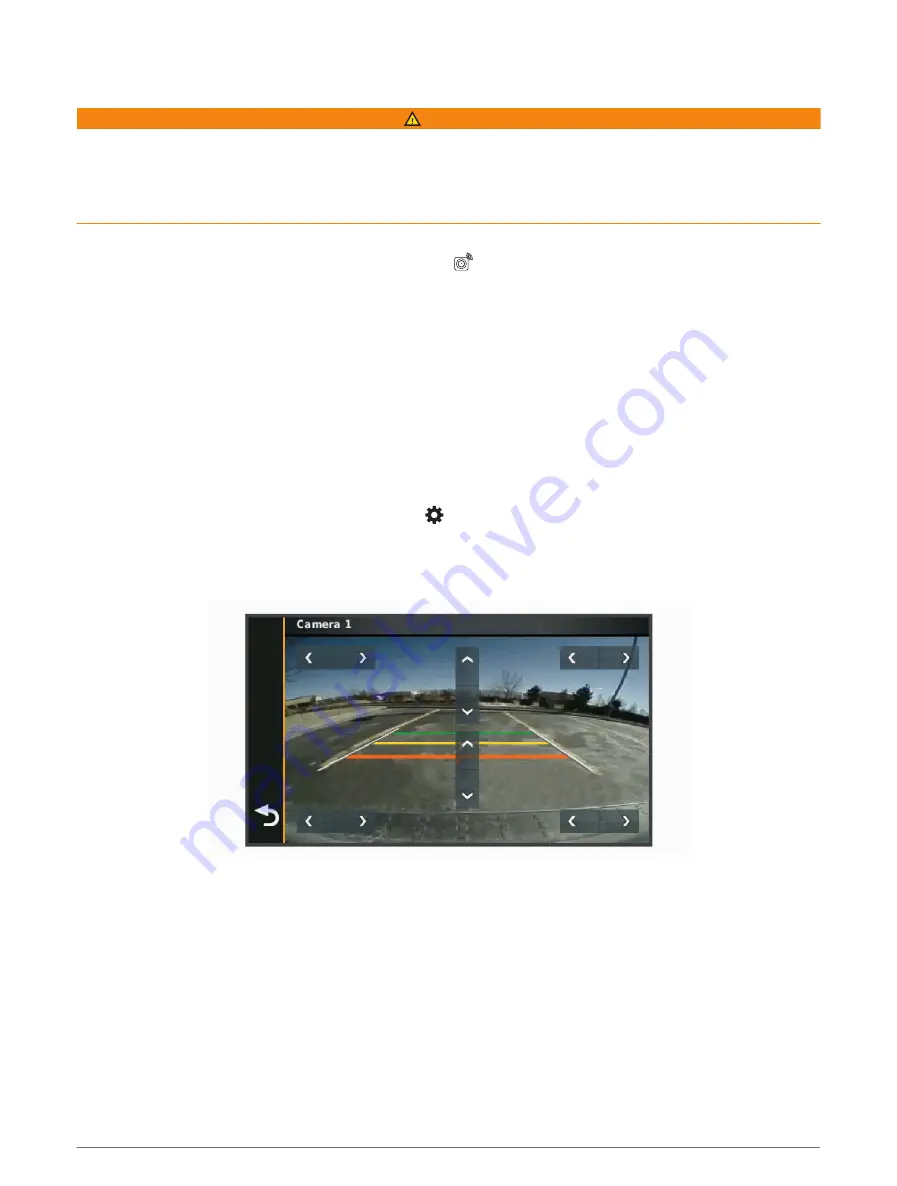
Aligning the Guidance Lines
For the best reference, the guidance lines should be aligned to reflect the outside edges of the vehicle. You
should align the guidance lines separately for each backup camera. When you change the camera angle, you
should immediately align the guidance lines again.
1 Position your vehicle with the driver's side closely aligned to a kerb, driveway or parking stall lines.
TIP: it can be helpful to position the vehicle in the centre of a parking stall and then pull forward into the next
stall. This allows you to use the parking stall lines at the rear of the vehicle as reference points for alignment.
2 From the paired Garmin navigation device, select > Wireless Cameras.
3 Select the paired camera name and select Guidance Lines > Adjust Guidance Lines.
4 Use the arrows in the corners of the screen to move the ends of the white, driver's-side guidance line.
The guidance line should appear directly on top of the kerb, driveway or parking stall line.
5 Use the arrows in the centre of the screen to move the coloured distance guidance lines up or down.
The red guidance line should be aligned with the rearmost part of your vehicle. This could be the rear
bumper, a trailer hitch or another object protruding from the rear of the vehicle.
6 Reposition the vehicle with the passenger side closely aligned to a kerb, driveway or parking stall lines and
use the arrows to align the white, passenger-side guidance line.
The guidance lines should be symmetrical.
42
Using the apps
Summary of Contents for DRIVECAM 76
Page 1: ...GARMINDRIVECAM 76 Owner smanual...
Page 11: ...Getting started 5...
Page 63: ......
Page 64: ...support garmin com GUID 234ECA7B 7147 4142 80ED C81970D02FF1 v2 August 2022...

