


Operating with HardBoot view
G&D HardBoot plus ·
22
Extended functions
Changing the configuration of the
HardBoot
system
If you change the IP address of the
HardBoot plus
, the new address has to be entered
in the software. That way, a connection to the
HardBoot s
ystem can be established.
You also have the possibility to change the system name the software displays or to
file slave devices.
How to change the configuration of the
HardBoot
system in the software:
1. Click on the entry
HardBoot configuration (HardBoot-Konfiguration)
in the
Settings
(Einstellungen)
menu.
2. Enter the administrator password and confirm your entry by clicking the
OK
button.
3. Select that
HardBoot
system from the overview whose settings you want to
change.
4. Click the
Change (Ändern
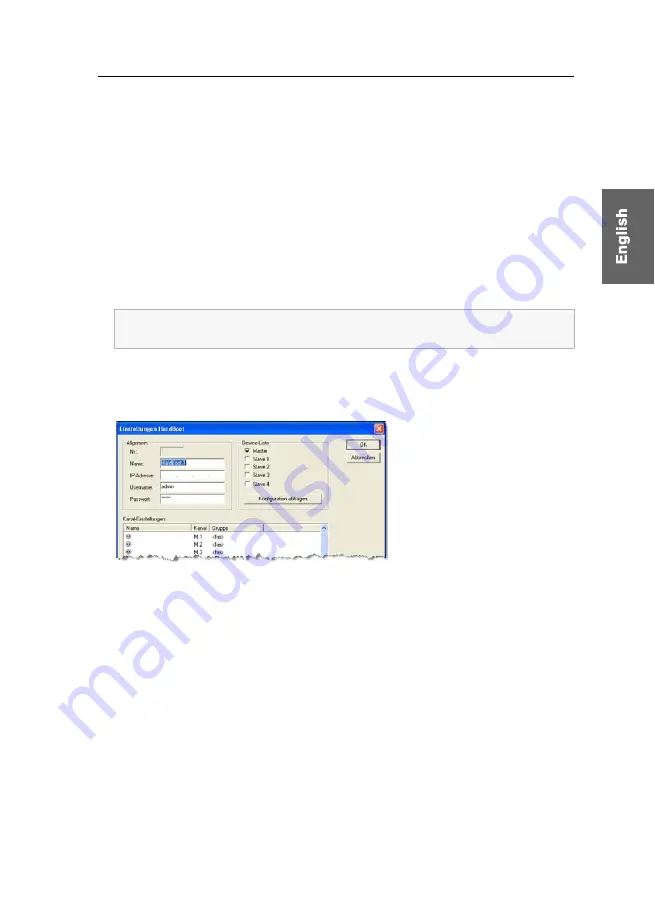
) button. Now, the following dialogue window appears:
5. Check and, if necessary, change the following data in the field
General (Allgemein)
of the dialogue window:
a.
Name
: Enter the desired name of the
HardBoot
system. This name is displayed
in the graphical interface of the software.
b.
IP-Adresse (IP address)
: Enter the IP address of the
HardBoot
system. If a perma-
nent IP address has been assigned to the
HardBoot plus
, you can read it out in
the configuration menu (see “Network configuration” on page 8 ff).
c.
Username
: Enter the username of the administrator‘s account of the
HardBoot
system (default setting:
admin
).
d.
Password (Passwort)
: Enter the password of the administrator‘s account of the
HardBoot
system (default setting:
admin
).
The administrator password only needs to be entered if no administrating func-
tion has been called up in the current session.
Figure 15: Dialogue window “Settings HardBoot” (“Einstellungen HardBoot”)


