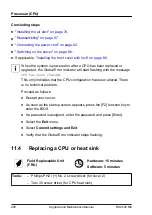
Concluding steps
▶
"Installing the air duct" on page 74
▶
.
▶
"Connecting the power cord" on page 62
.
▶
"Switching on the server" on page 66
.
▶
If applicable,
"Installing the front cover with lock" on page 66
.
▶
"Resuming BitLocker functionality" on page 93
After replacing memory modules, the
Memory Status
of them are reset
to
Enabled
automatically and CSS LED is off.
If CSS LED is blinking after they are replaced, check the
Memory
Status
in the
Configuration
menu of the BIOS.
10.6
Handling memory dummy modules
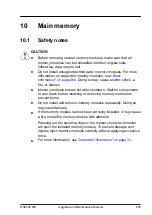
It is required to install dummy modules in all empty memory slots. For
example, if two memory modules are installed, the other 30 memory
slots must be equipped with memory dummy modules (32 memory slots
are available).
Removing a memory dummy module
▶
Eject the desired dummy module by pressing out the securing clips at each
end of the memory slot.
▶
Remove the ejected dummy module.
Installing a memory dummy module
▶
Press the securing clips on both sides of the memory slot concerned
outward.
Main memory
276
Upgrade and Maintenance Manual
RX2530 M6
Summary of Contents for PRIMERGY RX2530 M5
Page 18: ...Content Upgrade and Maintenance Manual RX2530 M6 ...
Page 194: ...Fans 194 Upgrade and Maintenance Manual RX2530 M6 ...
Page 262: ...Expansion cards and backup units 262 Upgrade and Maintenance Manual RX2530 M6 ...
Page 278: ...Main memory 278 Upgrade and Maintenance Manual RX2530 M6 ...
Page 324: ...Accessible drives 324 Upgrade and Maintenance Manual RX2530 M6 ...
Page 336: ...Front panel 336 Upgrade and Maintenance Manual RX2530 M6 ...
Page 344: ...Serial interface 344 Upgrade and Maintenance Manual RX2530 M6 ...
Page 480: ...List of all used screws for PRIMERGY Servers Assembled in Germany and Japan February 2019 ...


