After installing or removing an additional backplane, never forget to
change the system information using the Chassis ID Prom Tool.
Preliminary steps
▶
"Removing the front cover with lock" on page 48
.
▶
"Shutting down the server" on page 48
.
▶
"Disconnecting the power cord" on page 49
.
▶
"Getting access to the component" on page 52
▶
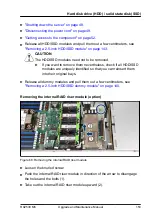
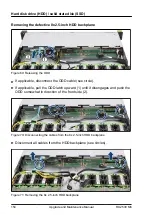
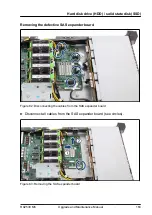
Remove the riser modules 2 and 3, see
A
A
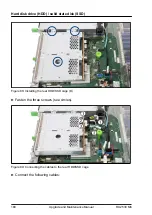
Figure 87: Installing the rear HDD/SSD cage (A)
▶
Insert the rear HDD/SSD cage. The two guide pins (A) must fit in the holes.
Hard disk drive (HDD) / solid state disk (SSD)
RX2530 M6
Upgrade and Maintenance Manual
167
Summary of Contents for PRIMERGY RX2530 M5
Page 18: ...Content Upgrade and Maintenance Manual RX2530 M6 ...
Page 194: ...Fans 194 Upgrade and Maintenance Manual RX2530 M6 ...
Page 262: ...Expansion cards and backup units 262 Upgrade and Maintenance Manual RX2530 M6 ...
Page 278: ...Main memory 278 Upgrade and Maintenance Manual RX2530 M6 ...
Page 324: ...Accessible drives 324 Upgrade and Maintenance Manual RX2530 M6 ...
Page 336: ...Front panel 336 Upgrade and Maintenance Manual RX2530 M6 ...
Page 344: ...Serial interface 344 Upgrade and Maintenance Manual RX2530 M6 ...
Page 480: ...List of all used screws for PRIMERGY Servers Assembled in Germany and Japan February 2019 ...

