31
4. Adjustment
FinePix F601 Zoom (U/E/EG) SERVICE MANUAL
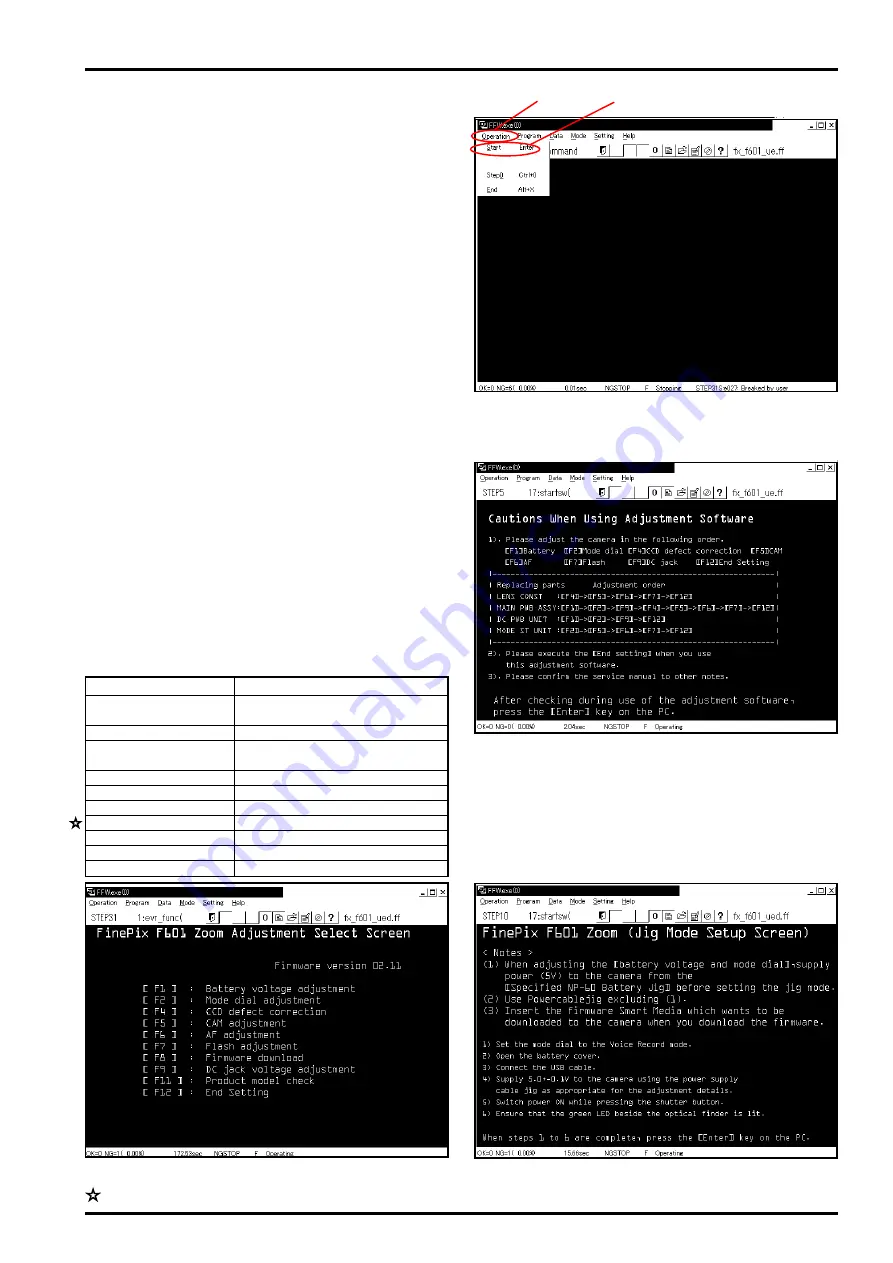
4-10. Starting the Adjustment Software
<Step 1>
Double-click on the adjustment software executable file
[FFWJ.exe].
---> The
[FFW217.EXE Start-up Screen (Fig.1)]
is displayed.
<Step 2>
Run [Operation] -> [Start] (Fig.1-(1)) -> (Fig.1-(2)).
---> The
[Cautions When Using Adjustment Software
(Fig.2)]
is displayed.
<Step 3>
After checking during use of the adjustment software,
press the [Enter] key on the computer.
---> The
[Jig Mode Setup Screen (Fig.3)]
is displayed.
<Step 4>
After setting the camera in the jig mode, press the [En-
ter] key on the computer.
---> The
[Adjustment Select Screen (Fig.4)]
is displayed.
* Jig mode setup
(1) Set the mode dial to the Voice Record mode.
(2) Open the battery cover.
(3) Connect the USB cable.
(4) Supply 5.0±0.1V to the camera using the power cable
jig as appropriate for the adjustment details.
(5) Switch power ON while pressing the shutter button.
(6) Ensure that the green LED beside the optical
viewfinder is lit.
(7) When steps (1) to (6) are complete, press the [Enter]
key on the computer.
* Adjustments
<Fig.1> FFW217.EXE Start-up Screen
<Fig.2> Cautions When Using Adjustment Software
<Fig.3> FinePix F601 Jig Mode Setup Screen
<Fig.4> Adjustment Select Screen
Selection
Press the [F1] key on the computer.
Press the [F2] key on the computer.
Press the [F4] key on the computer.
Press the [F5] key on the computer.
Press the [F6] key on the computer.
Press the [F7] key on the computer.
Press the [F8] key on the computer.
Press the [F9] key on the computer.
Press the [F11] key on the computer.
Press the [F12] key on the computer.
Adjustment
Battery voltage adjust-
men
Mode dial adjustment
CCD defect correction
adjustment
CAM adjustment
AF adjustment
Flash adjustment
Firmware download
DC jack voltage adjustment
Product model check
End Setting
(1)
(2)
Revised:01.Apr.2002


