Digital Certificates
195
Using Digital Certificates
The authentication feature using digital certificates upgrades security when sending print data or setting data.
To use digital certificates, set the digital certificate on the printer, and then enable various SSL/TLS communication.
NOTE:
•
For information about the digital certificate error, see "Understanding Printer Messages" on page 233 and "Digital Certificate
Problems" on page 231.
Setting a Digital Certificate
The following is a typical setup flow for setting digital certificates.
Preparing to Use HTTPS Communication
Before managing digital certificates, set HTTPS communication with a self-signed certificate.
1
Launch the CentreWare Internet Services by entering IP address of the printer in your web browser.
For more information, see "CentreWare Internet Services" on page 30.
2
Click the
Properties
tab.
3
Click
SSL/TLS Server Communication
under
Security
.
4
Click
Create New Certificate
.
The
Generate Certificate
page is displayed.
5
Select the size of the public key from the list of
Public Key Size
.
6
Specify the issuer of SSL self-signed certificate.
7
Click
Generate Certificate
.
Your request was successfully processed.
is displayed.
8
Click
Back
.
9
Select the
Enabled
check box of
SSL/TLS Server Communication
, and then click
Apply
.
Settings have been changed. Reboot system for new settings to take effect.
is displayed.
10
Click
Reboot Machine
.
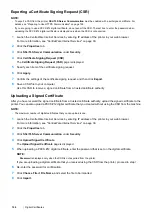
Prepare the printer for HTTPS Communication using a
self-signed certificate. For details, see "Preparing to
Use HTTPS Communication" on page 195.
Export the Certificate Signing Request (CSR) from the
printer. For details, see "Exporting a Certificate Signing
Request (CSR)" on page 196.
Receive a signed certificate from a certificate authority
using the Certificate Signing Request (CSR) exported
from the printer.
Upload a signed certificate. For details, see "Uploading
a Signed Certificate" on page 196.


