118
Touch the tick symbol
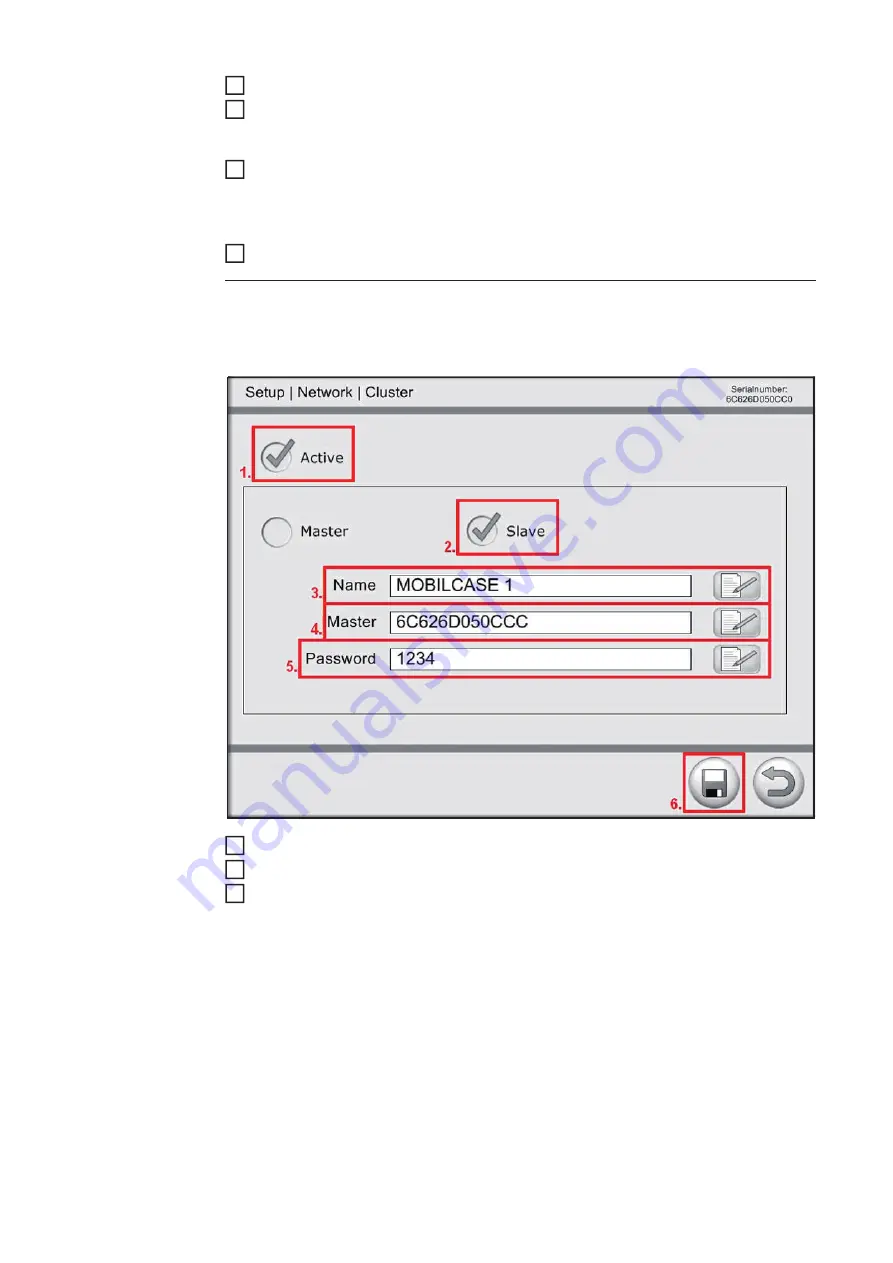
Once the Virtual Welding system has been defined as the master, the MAC ID auto-
matically appears in the "Master" field against a grey background and cannot be
changed.
To open the keyboard for entering the password, touch the "Edit" button to the right of
the password input field.
In the password input field, enter a password of your choosing, in the same way as
described for the name
Touch the "Save" button to save the settings
To activate the slave system, place a tick against "Active"
To declare the selected system as a slave, place a tick against "Slave"
To open the keyboard for entering a name, touch the "Edit" button to the right of the
name input field
Give the Virtual Welding system a name of your choosing. This will make it easier to
identify the system
4
5
6
7
Slave
Now that you have finished entering the cluster settings for the master, you can enter the
"slave" settings. It is necessary to carry out the following steps on all Virtual Welding sys-
tems connected via routers:
1
2
3
Summary of Contents for Virtual Welding
Page 2: ...2 ...
Page 4: ...4 ...
Page 18: ...18 ...
Page 19: ...General information ...
Page 20: ......
Page 27: ...Controls connections and mechani cal components ...
Page 28: ......
Page 33: ...Installation and commissioning ...
Page 34: ......
Page 48: ...48 ...
Page 49: ...Terminal management ...
Page 50: ......
Page 77: ...Terminal management Additional settings ...
Page 78: ......
Page 109: ...109 EN ...
Page 110: ...110 ...
Page 111: ...Setup settings ...
Page 112: ......
Page 115: ...115 EN ...
Page 140: ...140 ...
Page 141: ...Troubleshooting and maintenance ...
Page 142: ......
Page 150: ...150 ...
Page 151: ...Appendix ...
Page 152: ......
Page 166: ...166 ...
Page 167: ...167 EN ...


