


- 14 -
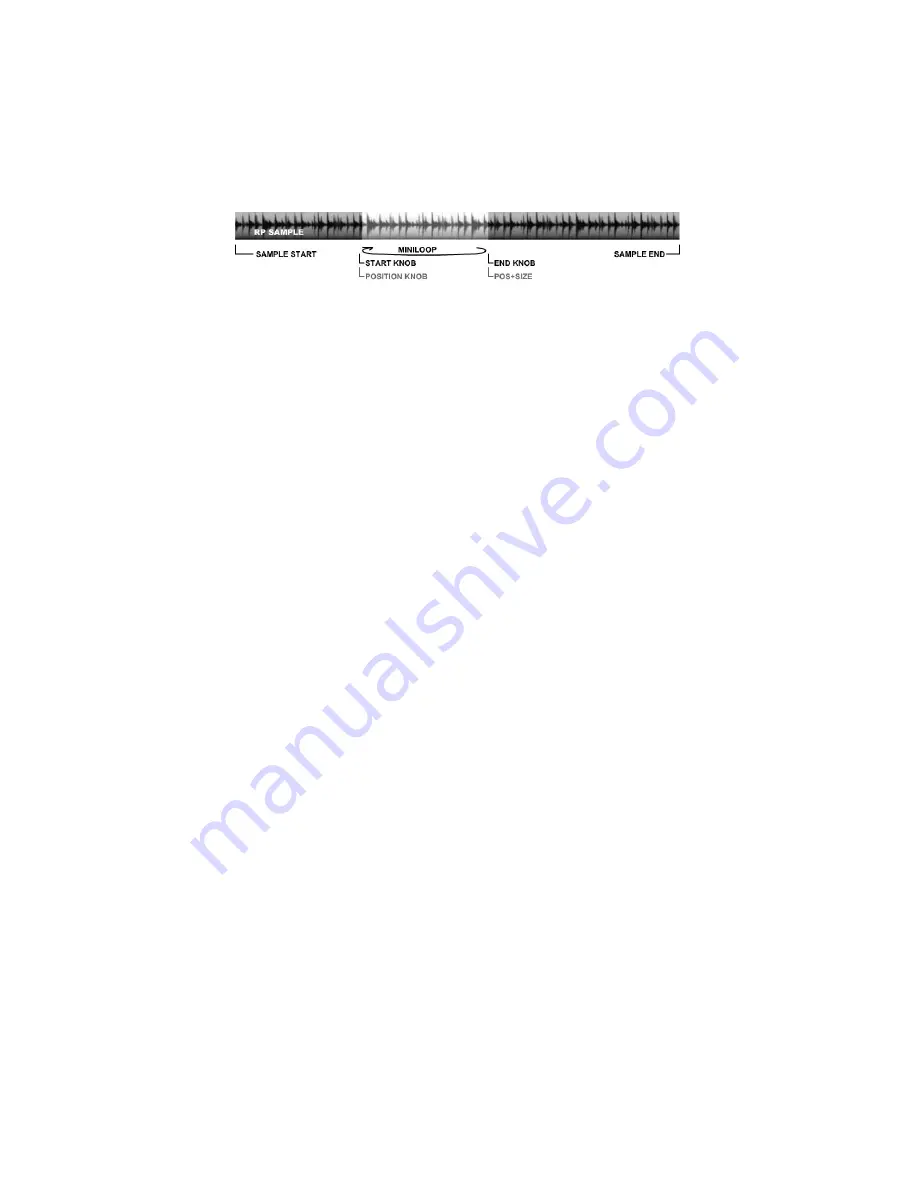
4) Positioning a MiniLoop in a Sample
POS PLAY FX Mode is similar to STart/END in that it's looping position is absolute. The difference is the POS
knob sets the relative point to start the MiniLoop in the sample, while the SIZE knob sets the size of the loop.
Note that, while the loop can approach grain size, it has a much wider range…to the whole size of the sample, so
would be fairly coarse to adjust at that end. This is normal and can't be helped.
Position and it's relationship to Size is how the MiniLoop is controlled (grey lettering in above diagram)
Adjusting POS will quickly move around the sample, sounding similar to a DJ Cue search, or skipping through a CD
if you remember the players that could do that. The loop tries to play, but if the POS knob is moved before it can
loop, it'll keep updating a new start position. This is also normal! As before, make sure you have a sample to work on
playing, then follow this procedure:
1
-Configure PLAY FX knobs (right side of panel) with the P.SEL button. Select the POS LED. (Pos/Size)
2
-Tap the PLAY button and POS will immediately jump to the relative position of the sample.
Options:
-Hold PLAY >1 second to exit. If RP playing/echoing, then will continue where it would be now.
PLAY LOOP on:
Causes a loop at the End point (set by knob) or Start point if playing in reverse.
PLAY LOOP off:
Acts as a 1-shot play. Stops at point set by End or Start if playing in reverse.
Once PlayFX exits this way, it saves the Position so can be recalled repeatedly!
Turning Loop back on after an exit will reset PlayFX start position, ready for new.
5) Granulizing "Freeze"
One very cool effect involving G-Move is the on-the-fly "Freeze" ability! This can be done manually or via the
Play trigger input, which should be set to Gate.
Switch to R/P mode and start Recording some audio. In R/P mode recording can be done indefinitely as part of the
"last 3 minute recall" feature, so take your time!
1
-Set PlayFX to G-Move with P.Sel button (blue LED) and set both knobs about half way
2
-Start a G-Move by tapping the PlayFX button
3
-Find the "Freeze" sweet-spot by adjusting the Start knob (Blue GM LED will go off)
4
-Hold to exit G-Move Freeze
5
-At any point in Recording, tapping PlayFX will freeze at that point in recording
Options:
-Set PLAY T/F/G input to GATE, then introduce a slow gate pulse to freeze automatically!
-Try different pulse widths on Gate and swinging Blend knob over to hear only G-Move.
6) Granulizing inside a Slice
It's pretty much the same method as Granulizing an RP Sample with PLAY FX, except the SLICE LOOP LED
controls whether or not G-Move is limited by the Slice boundaries. A Slice play is not affected by Start/End or
Position/Size knobs, but is affected if P.SEL is set to GM.
1
-Create slices on an RP Sample as described in Section C. below, (or try to use auto-slices if exist.)
2
-Tap SLICE SEL button to switch the RATE knob to select slices. (Green P LED will light)
3
-Select a Slice, indicated by LED Circle 1-8 (yellow LED off) or 9-16 (yellow LED on)
4
-Tap SLICE to play the selected Slice.
5
-Set GM knob (top FX knob) to center, so the grain will pause at start of slice to begin with.
-Set Size Knob (bottom FX knob) to the left, say 10 o'clock, so the grain size is fairly small.
-Set Play LOOP LED to your preference as follows:
On: G-Move will loop at Slice loop point
Off: G-Move will exit (if not in freeze setting) once it reaches the slice loop ( or start if reversed.)
-Tap PLAY button to start G-Move


