175
Location Recorder Model PD606
Chapter 8: MENU mode/BATTERY SETUP menu
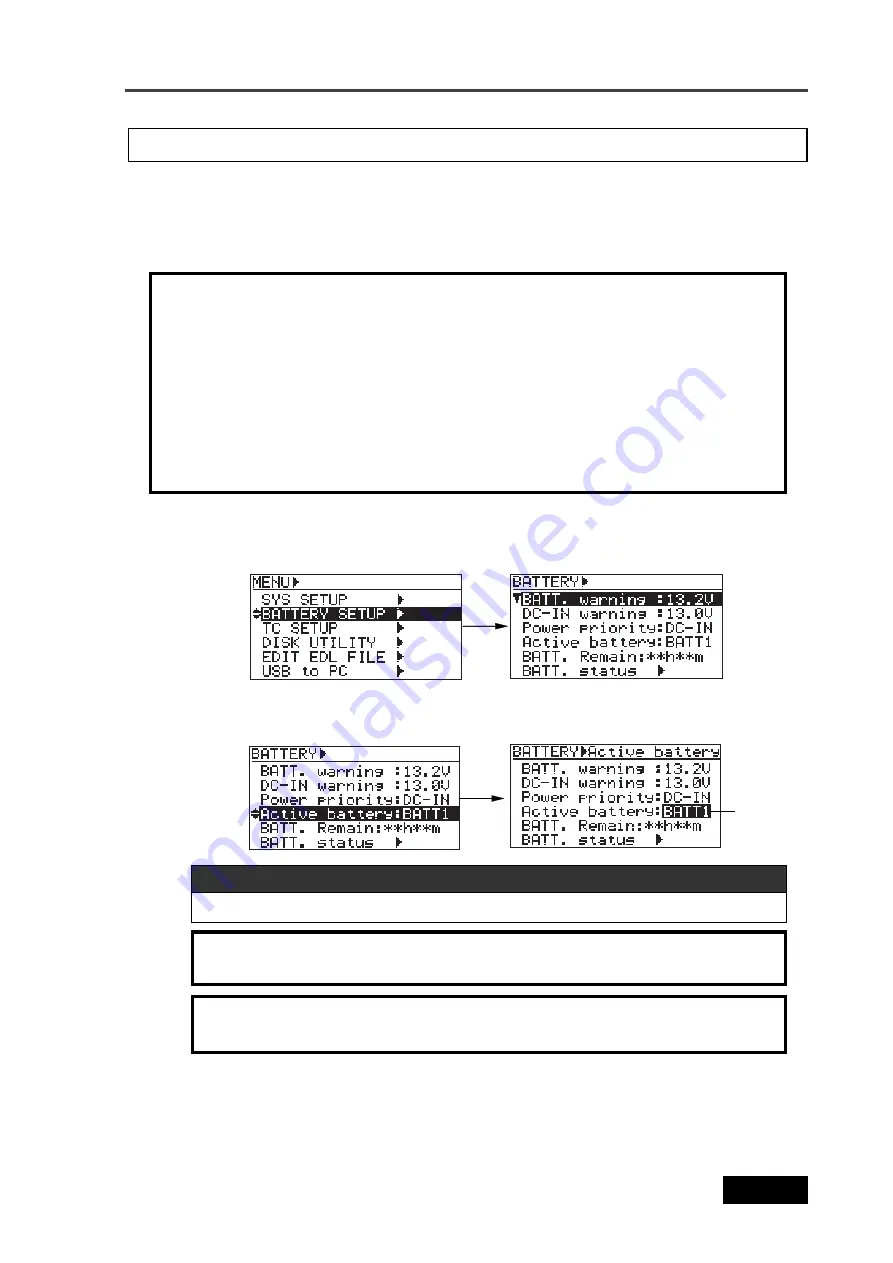
Using the "Active battery" item, you can select the prior battery (BATT1 or BATT2) when you
set batteries to both the BATT1 and BATT2.
See "Battery setting examples" on pages 176 and 177 for the examples of battery priority set-
ting. The setting you make using this item is reflected to the "POWER" area on the display.
You can also make the prior battery setting via the quick setup mode (see page 77).
3)
Use the [MENU] dial to select the "Active battery" menu item and press the [ENTER/YES] key.
The current setting starts flashing. You can now select the prior battery.
Battery priority setting [Active battery]
"BATT1" and "BATT2" (the default is "BATT1".)
Available options
<Note>:
You cannot select an option whose battery power voltage is lower than the
threshold voltage.
<Note>:
If the voltage of the prior battery drops down to the threshold voltage set via the
"BATT warning" item, the unit change the active battery to the other one in the manner
described below. Note that when the unit changes the active battery, the setting of the
"Active battery" item also changes.
•
BMS battery: If the time until the battery voltage drops down to the threshold voltage set via the "BATT
warning" item becomes less than one minute, the active battery changes automatically.
•
Non BMS battery: If the battery drops down to the threshold voltage set via the "BATT warning" item, the
display shows the "warning" message and the active battery changes automatically.
Note that even if you replace the prior battery with a new one, the active battery does not change.
If you want to make the replaced battery active, you must make setting of the "Active battery" item again.
1)
While the unit is stopped, press the [SHIFT] key followed by the [ENTER/YES] key.
2)
Use the [MENU] dial to select the "BATTERY SETUP" menu and press the [ENTER/YES] key.
The display shows the screen for battery-related settings.
4)
Use the [MENU] dial to select a desired option and press the [ENTER/YES] key to confirm
your setting.
5)
Press the [EXIT] key repeatedly until you exit the MENU mode.
<Note>:
If a battery is set to either of "BATT1" or "BATT2", or if no battery is set, you
cannot make selection of this item.
Flashing
Summary of Contents for PD606
Page 1: ...LOCATION RECORDER Owner s Manual Model PD606...
Page 14: ...14 Location Recorder Model PD606 Introduction...
Page 15: ...15 Location Recorder Model PD606 Chapter 1 Main features Chapter 1 Main features...
Page 20: ...20 Location Recorder Model PD606 Chapter 1 Main features...
Page 72: ...72 Location Recorder Model PD606 Chapter 4 Basic connections...
Page 134: ...134 Location Recorder Model PD606 Chapter 7 Creating and editing ALE files EDIT EDL FILE menu...
Page 215: ...215 Location Recorder Model PD606 Chapter 9 Specifications Chapter 9 Specifications...
Page 225: ......


