65
Appendix J: - Sbarco Printer Installation, Setup & Label Upload Procedures
J.1 Get the below ready before Printer Installation
1.
An appropriate cable to connect printer and computer. This cable usually comes with the printer. If not,
contact your printer supplier.
2.
A serial cable to connect printer and this instrument.
Pin #9 of this cable must be without any connection.
3.
Download BarDrawer software at http://www.sbarcotech.com/cht/download.php?gid=1
J.2 BarDrawer Software & Printer Driver Installation
1.
Turn off the printer, connect computer and printer by cable, and then turn on the printer.
2.
Install BarDrawer software according to the wizard. After that BarDrawer software is installation is done.
3.
Run BarDrawer software.
4.
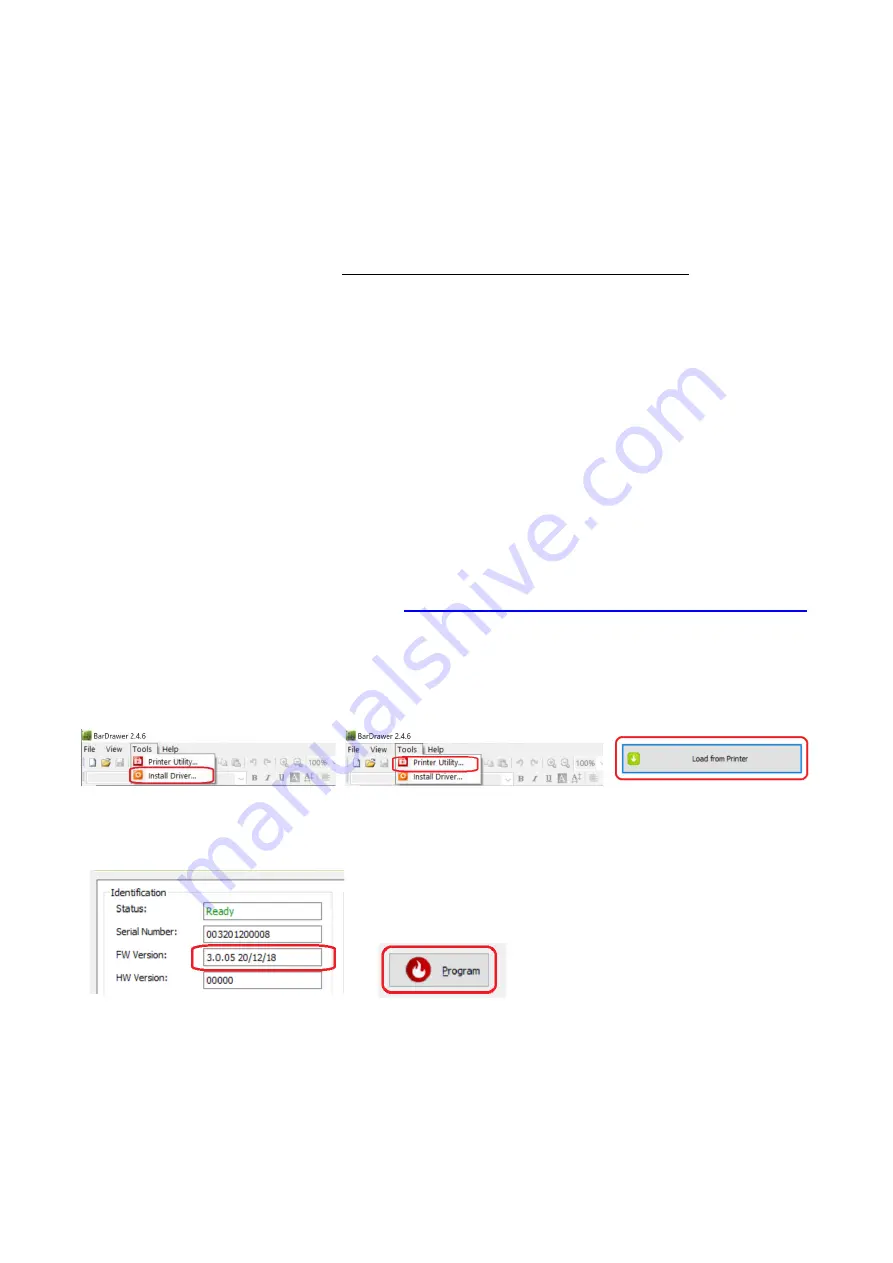
Click Install Driver under Tools (figure 1 below). Then install printer driver according to the wizard.
5.
After printer driver installation, click Printer Utility under Tools (figure 2 below).
6.
Click Load from Printer (figure 3 below).
7.
Check FW version: -
•
If FW version = 3.0.05 (date = 2020/12/18) or newer, printer installation is done.
•
If FW version is lower than 3.0.05 (date = 2020/12/18), then FW update is necessary. Continue
with below step for FW update.
8.
Download the latest Sbarco Printer FW at
https://www.fi-measurement.com/resource/driversnsoftwares
9.
Open file located of the Sbarco printer FW downloaded.
10. Doble click on the FW file name to start Firmware Tool.
11. Click Program (figure 4 below) to start FW update.
12. Click OK after FW update is completed.
Figure 1
Figure 2
Figure 3
Figure 4
Figure 5


