Administration
Installation Guide
4
Create an installation package
Follow these steps to create an installation package: files with a *.nip
extension or installers for specific workstations (according to their operating
system) with a preset configuration.
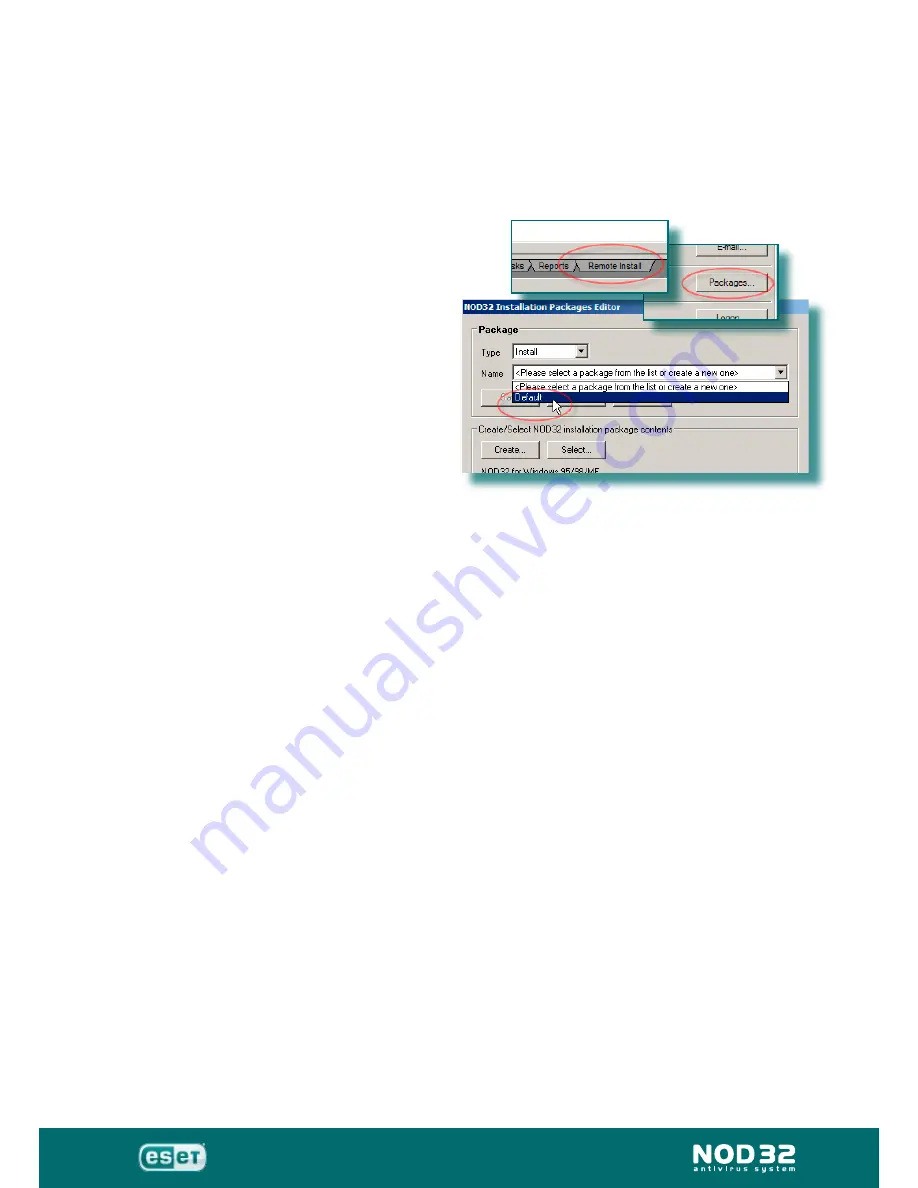
From RAC, click on ‘Remote Install’ tab.
Choose ‘Packages’.
Option 1:
Select the “
Default
”
package. This will use the
versions of NOD32 embedded
in RAS, but they may not
necessarily be the most
current versions, as NOD32 is
periodically updated and a new
version is made available on the
Eset website. Save the package
with a name of your choice. The
default saving directory is
C:\Program Files\Eset\RA\Server\packages
Option 2:
(Recommended)
Press ‘
Create
’ to setup your own package
using previously downloaded, and very latest, installers for NOD32 (as
described on page 13). In the following window, press the “...” browse
button to locate the installer(s) for NOD32. Choose to ‘
Create
’ this
package to ‘Server’ with a name of your choice, click OK and you will
move back to the ‘Packages Editor’ window.
Option 3:
Press ‘
Select
’ and you can choose a pre-designed package
that you may have already created or select either, or both, of the built-
in installers (eg: C:\Program Files\ESET\RA\Server\packages\Default\
nod32_nt.nip and/or nod32_98.nip)
Whichever method you chose, you will now be back in the ‘Packages
Editor’ window again.
In the
‘Edit/Select configuration associated with this package’
section,
press ‘Edit’ to create a new configuration or ‘Select’ and choose the
configuration that you have already created and saved to
C:\Program
Files\ESET\RA\Server\MyConfig.xml
You can choose either or both operating system platforms: Win9x and/
or WinNT and click ‘Save’.
In the section
‘Edit/Select command line associated with this package’
you can define command line parameters, which will be used with the
package. The default is: /INSTMFC /SILENTMODE.
In the lower right hand corner of the window, you can select ‘Show
me command line options’ which will provide details of the available
options. Full details are on page 80.
Press ‘Save’ and the complete package will be saved, by default, to
C:\Program Files\ESET\RA\Server\packages\MyPackage
►
►
►
►
►
►
►
►
►
►
Summary of Contents for LAN Update Server 2.7
Page 6: ...Administration Installation Guide Overview ...
Page 9: ...Administration Installation Guide Installation foranoffice network ...
Page 14: ...Administration Installation Guide 14 Running RAC ...
Page 17: ...Administration Installation Guide 17 Configuration Editor ...
Page 33: ...Administration Installation Guide 33 Createa package ...
Page 35: ...Administration Installation Guide 35 Remote Installation ...
Page 43: ...Administration Installation Guide 43 Use of Tasks ...
Page 49: ...Administration Installation Guide 49 More detailed information ...
Page 65: ...Administration Installation Guide 65 Possible problems error codes ...
Page 70: ...Administration Installation Guide 70 Installation for a multi site network ...
Page 72: ...Administration Installation Guide 72 ...
Page 74: ...Administration Installation Guide 74 Installation for asmall office network ...
Page 82: ...Administration Installation Guide 82 Additional information ...


