


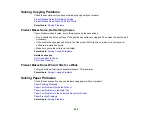


LCD screen message
Condition/solution
Printer error
A fatal error has occurred. Turn the product off and then back on again. If the
error continues, make sure there is no paper jammed in the product. If
jammed paper is removed and the error continues, contact Epson for
support.
Backup Error
A problem occurred while backing up data to an external USB device. Note
the displayed error code and contact Epson for support.
Error code XXXXX
Parent topic:
Related references
Paper Jam Problems Inside the Product
Paper Jam Problems in the Main Tray
Paper Jam Problems in the Automatic Document Feeder
Where to Get Help
Related tasks
Transferring Photos From a Memory Card to an External Device
Related topics
Loading Paper
Placing Originals on the Product
Solving Network Problems
Running a Product Check
Running a product check helps you determine if your product is operating properly.
1.
Disconnect any interface cables connected to your product.
2.
Load plain paper in the product.
3.
Press the
Setup
button.
4.
Press the arrow buttons to select
Maintenance
and press the
OK
button.
You see this screen:
276
Summary of Contents for WorkForce WF-7510
Page 1: ...WorkForce WF 7510 WF 7520 User s Guide ...
Page 2: ......
Page 29: ...4 Slide the edge guide shown below to your paper size 29 ...
Page 34: ...3 Slide the edge guides outward 4 Slide the edge guide shown below to your paper size 34 ...
Page 39: ...3 Slide the edge guides outward 4 Slide the edge guide shown below to your envelope size 39 ...
Page 57: ...Related topics Copying Scanning 57 ...
Page 131: ...131 ...
Page 171: ...You see this window 5 Select Fax Settings for Printer You see this window 171 ...
Page 237: ...Related topics Loading Paper 237 ...
Page 256: ...256 ...
Page 261: ...261 ...
Page 287: ...Caution Do not touch the flat white cable inside the printer 4 Lower the scanner unit 287 ...
Page 289: ...7 Open the rear cover and remove any additional jammed paper 289 ...
Page 296: ...5 Remove any jammed paper 296 ...
Page 297: ...6 Lower the document cover and close the ADF cover 7 Carefully remove the jammed paper 297 ...


