


• To print multiple pages on one sheet of paper, select the number of pages in the
Pages per Sheet
pop-up menu. To arrange the print order of the pages, select a
Layout Direction
setting.
• To print borders around each page on the sheet, select a line setting from the
Border
pop-up menu.
• To invert or flip the printed image, select the
Reverse page orientation
or
Flip horizontally
settings.
Parent topic:
Printing with Mac OS X 10.5, 10.6, or 10.7
Sizing Printed Images - Mac OS X 10.5/10.6/10.7
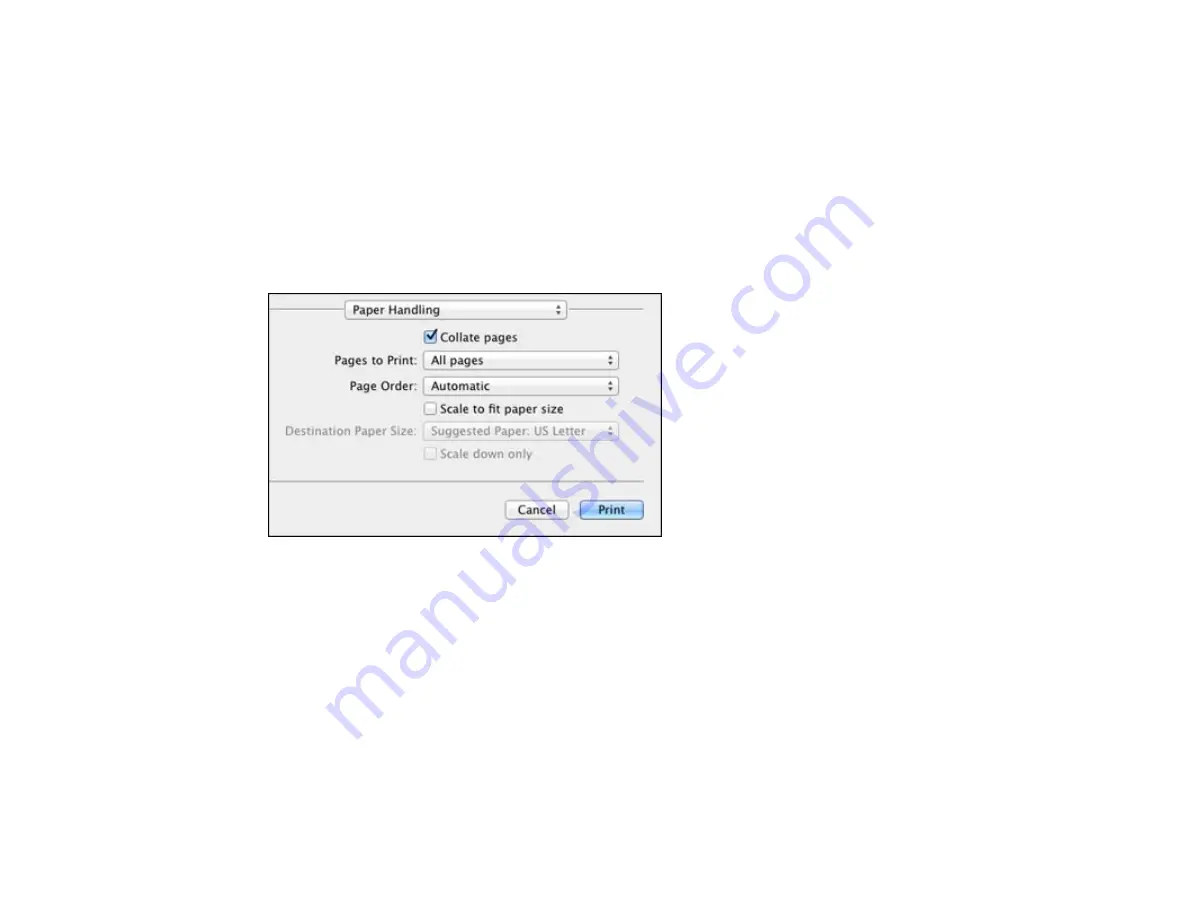
You can adjust the size of the image as you print it by selecting
Paper Handling
from the pop-up menu
on the Print window.
• To print only selected pages in a multi-page document, select an option from the
Pages to Print
pop-
up menu.
• To adjust the order in which pages are printed, select an option from the
Page Order
pop-up menu.
• To scale the image to fit on a specific paper size, select the
Scale to fit paper size
checkbox and
select a paper size from the
Destination Paper Size
pop-up menu.
Parent topic:
Printing with Mac OS X 10.5, 10.6, or 10.7
Selecting Double-sided Printing Settings - Mac OS X 10.5/10.6/10.7
You can print on both sides of the paper by selecting
Two-sided Printing Settings
from the pop-up
menu on the print window(WorkForce WF-7520 only).
88
Summary of Contents for WorkForce WF-7510
Page 1: ...WorkForce WF 7510 WF 7520 User s Guide ...
Page 2: ......
Page 29: ...4 Slide the edge guide shown below to your paper size 29 ...
Page 34: ...3 Slide the edge guides outward 4 Slide the edge guide shown below to your paper size 34 ...
Page 39: ...3 Slide the edge guides outward 4 Slide the edge guide shown below to your envelope size 39 ...
Page 57: ...Related topics Copying Scanning 57 ...
Page 131: ...131 ...
Page 171: ...You see this window 5 Select Fax Settings for Printer You see this window 171 ...
Page 237: ...Related topics Loading Paper 237 ...
Page 256: ...256 ...
Page 261: ...261 ...
Page 287: ...Caution Do not touch the flat white cable inside the printer 4 Lower the scanner unit 287 ...
Page 289: ...7 Open the rear cover and remove any additional jammed paper 289 ...
Page 296: ...5 Remove any jammed paper 296 ...
Page 297: ...6 Lower the document cover and close the ADF cover 7 Carefully remove the jammed paper 297 ...


