


5.
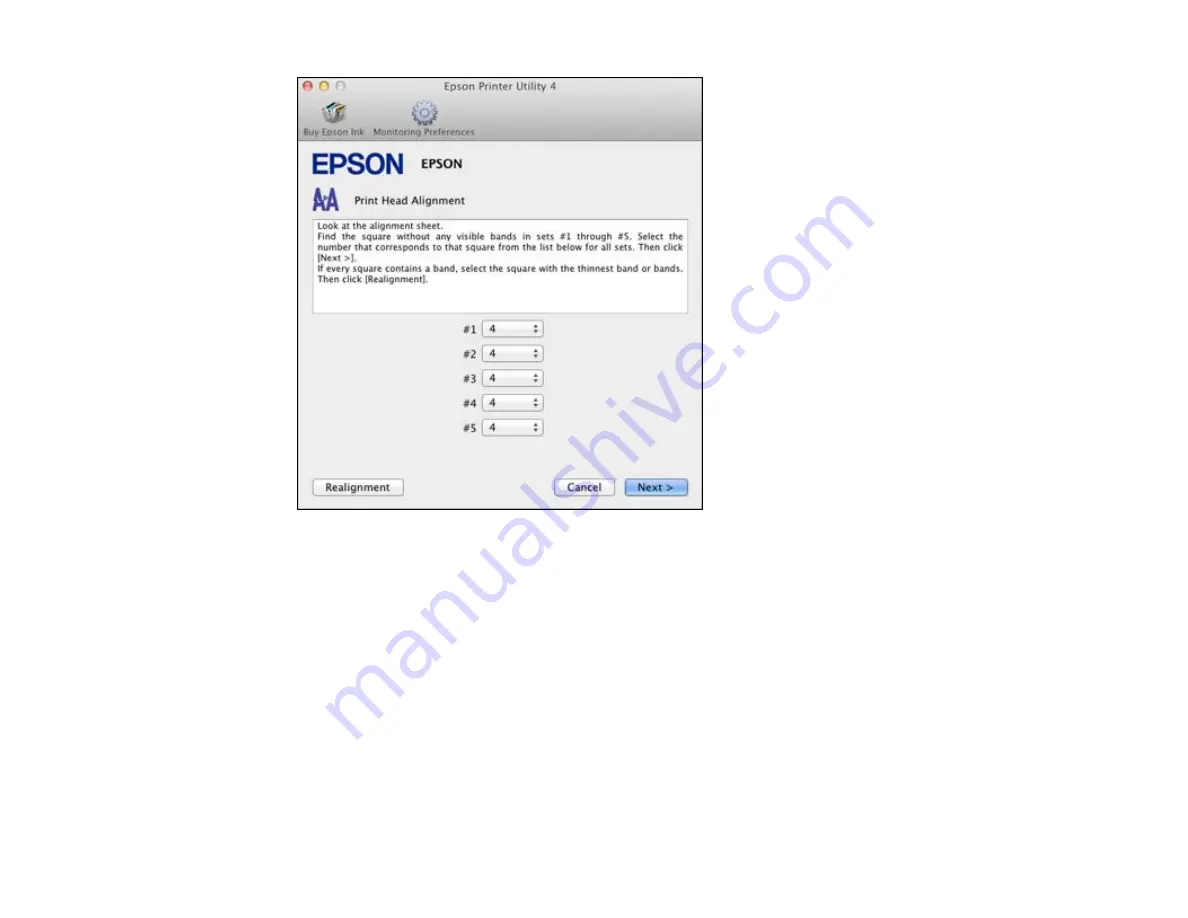
Check the printed pattern and follow the instructions on the screen to choose the number
representing the best printed pattern for each set.
• After choosing each pattern number, click
Next
.
• If no patterns are aligned in one or more of the sets, choose the closest one in each set and click
Realignment
. Then print another alignment sheet and check it.
Note:
Click
Skip
(where available) if you want to skip a particular alignment sheet.
6.
When you are done, click
Finish
.
Parent topic:
267
Summary of Contents for WorkForce WF-7510
Page 1: ...WorkForce WF 7510 WF 7520 User s Guide ...
Page 2: ......
Page 29: ...4 Slide the edge guide shown below to your paper size 29 ...
Page 34: ...3 Slide the edge guides outward 4 Slide the edge guide shown below to your paper size 34 ...
Page 39: ...3 Slide the edge guides outward 4 Slide the edge guide shown below to your envelope size 39 ...
Page 57: ...Related topics Copying Scanning 57 ...
Page 131: ...131 ...
Page 171: ...You see this window 5 Select Fax Settings for Printer You see this window 171 ...
Page 237: ...Related topics Loading Paper 237 ...
Page 256: ...256 ...
Page 261: ...261 ...
Page 287: ...Caution Do not touch the flat white cable inside the printer 4 Lower the scanner unit 287 ...
Page 289: ...7 Open the rear cover and remove any additional jammed paper 289 ...
Page 296: ...5 Remove any jammed paper 296 ...
Page 297: ...6 Lower the document cover and close the ADF cover 7 Carefully remove the jammed paper 297 ...


