


Related tasks
Changing Automatic Update Options
Product Status Messages
You can often diagnose problems with your product by checking the messages on its LCD screen. You
can also press the
? Help
button to view help topics.
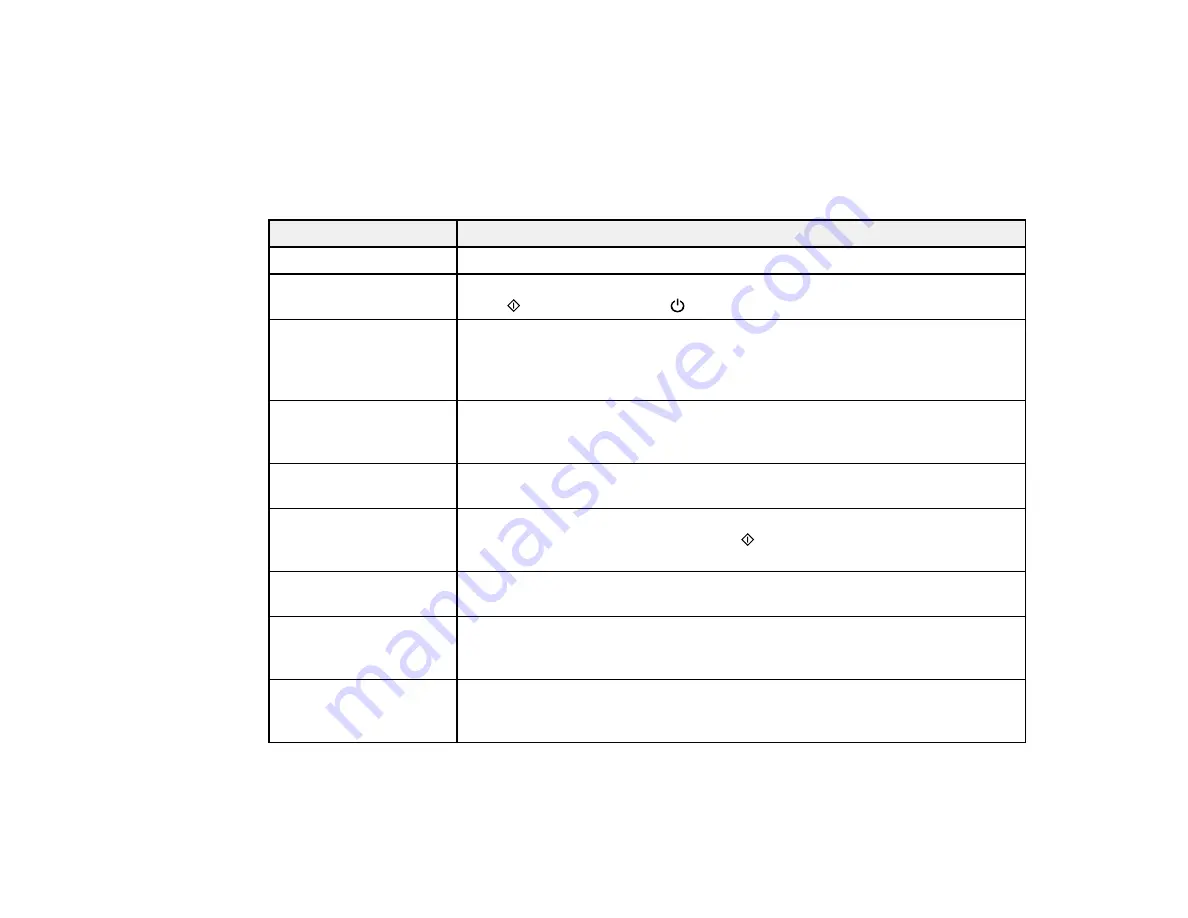
LCD screen message
Condition/solution
Paper out
No paper is loaded. Load paper in the product.
Paper jam
Paper is jammed in the product. Remove the jammed paper, then press one
of the
Start
buttons or the
On
button as instructed on the screen.
Cannot recognize
There is a problem with originals placed on the product. Check to make sure
photos. Make sure
they are placed correctly and repeat the operation.
photos are placed
correctly.
The combination of IP
There is a problem with the network connection to your product.
address and subnet
mask is invalid.
A printer's ink pad is at
The ink pad is at the end of its service life. Turn off the product and contact
the end of its service life. Epson for support.
A printer's ink pad is
The ink pads are near the end of their service life. Contact Epson for support.
nearing the end of its
(To continue printing, press one of the
Start
buttons.)
service life.
Communication error
Make sure the computer is connected to your product and your software is
installed correctly.
No dial tone detected.
Make sure the phone cable is connected correctly and the phone line works.
Try Check Fax
If you connected the product to a PBX (Private Branch Exchange) phone line
Connection.
or Terminal Adapter, turn off the
Dial Tone Detection
setting.
Recovery mode
An error has occurred during firmware updating. Connect your product using
a USB cable and try updating the firmware again. If you still receive this error
message, contact Epson for support.
275
Summary of Contents for WorkForce WF-7510
Page 1: ...WorkForce WF 7510 WF 7520 User s Guide ...
Page 2: ......
Page 29: ...4 Slide the edge guide shown below to your paper size 29 ...
Page 34: ...3 Slide the edge guides outward 4 Slide the edge guide shown below to your paper size 34 ...
Page 39: ...3 Slide the edge guides outward 4 Slide the edge guide shown below to your envelope size 39 ...
Page 57: ...Related topics Copying Scanning 57 ...
Page 131: ...131 ...
Page 171: ...You see this window 5 Select Fax Settings for Printer You see this window 171 ...
Page 237: ...Related topics Loading Paper 237 ...
Page 256: ...256 ...
Page 261: ...261 ...
Page 287: ...Caution Do not touch the flat white cable inside the printer 4 Lower the scanner unit 287 ...
Page 289: ...7 Open the rear cover and remove any additional jammed paper 289 ...
Page 296: ...5 Remove any jammed paper 296 ...
Page 297: ...6 Lower the document cover and close the ADF cover 7 Carefully remove the jammed paper 297 ...


