293
Print settings
Available options
Description
Finishing
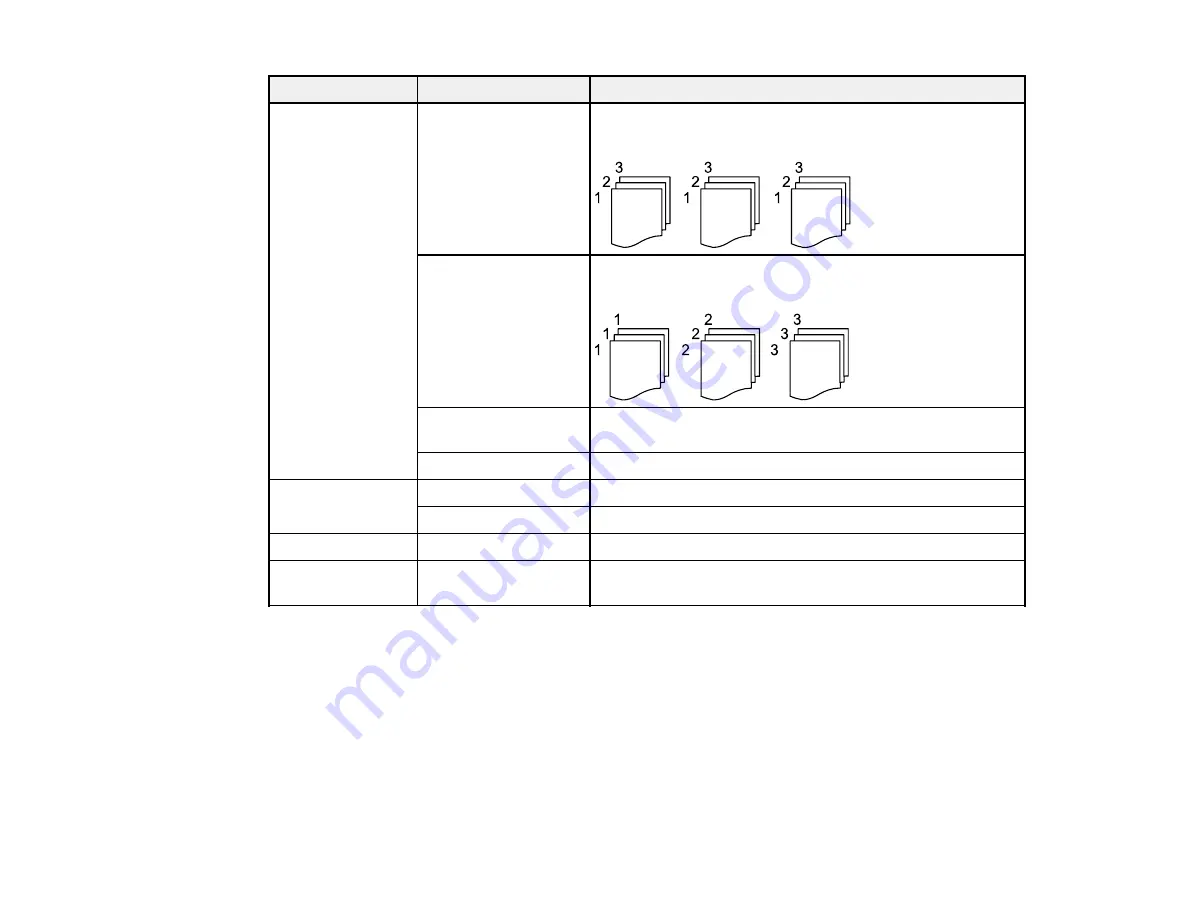
Collate (Page Order)
Select to print multiple copies of a multi-page document in
ordered sets.
Group (Same Pages)
Select to print multiple copies of a multi-page document in
unordered groups.
Eject Paper
Select
Shift Sort
* to eject offset printouts for each set of
copies.
Staple*
Select the staple location.
Quality
Standard
Provides good quality for most prints.
Best
Provides the highest quality for special prints.
Print Order
—
Select the printing order for multi-page documents.
Date
Various date formats
Prints the date the photo was taken on the photo in the
format you select.
* Displayed when the optional finisher unit is installed.
Parent topic:
Print Setting Options - PDF Mode
Select the print settings you want to use when printing a PDF from a USB device.
Note:
Not all options or settings may be available, depending on the file format.
Basic Settings
Summary of Contents for WF-C20590 Series
Page 1: ...WF C20590 User s Guide ...
Page 2: ......
Page 14: ......
Page 28: ...28 You see the Basic Settings screen 4 Select Date Time Settings ...
Page 80: ...80 You see a screen like this 5 Select PDL Print Configuration ...
Page 89: ...89 You see this screen 2 Select Load Paper under the How To options ...
Page 90: ...90 You see this screen 3 Select one of the options ...
Page 91: ...91 You see this screen 4 Select How To ...
Page 99: ...99 You see a screen like this 2 Select the paper source you want to select settings for ...
Page 110: ...110 Parent topic Placing Originals on the Product Related topics Copying Scanning Faxing ...
Page 191: ...191 You see a screen like this 4 Select Email ...
Page 200: ...200 You see an Epson Scan 2 window like this ...
Page 202: ...202 You see an Epson Scan 2 window like this ...
Page 207: ...207 You see this window ...
Page 223: ...223 DSL connection 1 Telephone wall jack 2 DSL filter 3 DSL modem ...
Page 224: ...224 ISDN connection 1 ISDN wall jack 2 Terminal adapter or ISDN router ...
Page 246: ...246 You see a screen like this 3 Select the Recipient tab ...
Page 251: ...251 You see a screen like this 3 Select the Recipient tab 4 Select Add New 5 Select Add Group ...
Page 311: ...311 You see a screen like this 6 Select Print Head Nozzle Check ...
Page 318: ...318 5 Open the interior of the document cover ...


