25
Status Icon Information
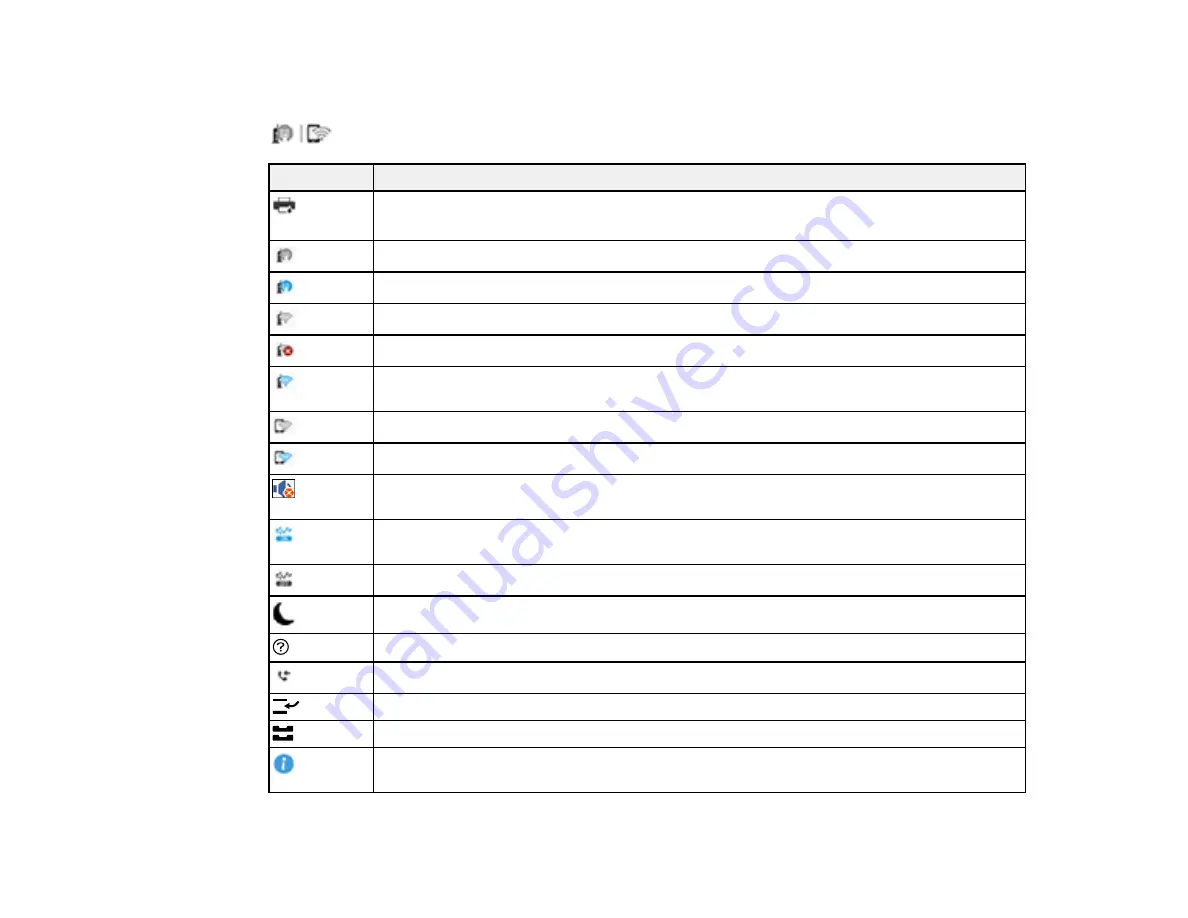
Your product displays status icons on the LCD screen for certain product status conditions. Press the
icon to view or change the current network settings.
Icons
Description
or
Job/Status
Displays the
Job Status
,
Printer Status
, and
Consumeables/Others
screens.
No Ethernet connection.
An Ethernet connection is established.
No Wi-Fi connection.
A Wi-Fi network error has occurred or the product is searching for a connection.
A Wi-Fi connection is established. The number of bars indicates the connection's signal
strength.
No Wi-Fi Direct connection.
A Wi-Fi Direct connection is established.
The Mute setting is enabled. The product does not make any sound when you press
buttons or select icons on the control panel. Select this icon to change the setting.
Quiet Mode is enabled. Noise is reduced during printing, but the print speed may be
reduced. Select this icon to change the setting.
Quiet Mode is disabled. Select this icon to change the setting.
Enables sleep mode and turns off the LCD screen.
Displays the help screen with how-to and troubleshooting topics.
Displays the
Fax Data Information
screen.
Enters job interruption mode. Select again to turn this mode off.
Displays the
Paper Setting
screen.
Displays additional information or instructions, such as loading paper or placing a
document.
Summary of Contents for WF-C20590 Series
Page 1: ...WF C20590 User s Guide ...
Page 2: ......
Page 14: ......
Page 28: ...28 You see the Basic Settings screen 4 Select Date Time Settings ...
Page 80: ...80 You see a screen like this 5 Select PDL Print Configuration ...
Page 89: ...89 You see this screen 2 Select Load Paper under the How To options ...
Page 90: ...90 You see this screen 3 Select one of the options ...
Page 91: ...91 You see this screen 4 Select How To ...
Page 99: ...99 You see a screen like this 2 Select the paper source you want to select settings for ...
Page 110: ...110 Parent topic Placing Originals on the Product Related topics Copying Scanning Faxing ...
Page 191: ...191 You see a screen like this 4 Select Email ...
Page 200: ...200 You see an Epson Scan 2 window like this ...
Page 202: ...202 You see an Epson Scan 2 window like this ...
Page 207: ...207 You see this window ...
Page 223: ...223 DSL connection 1 Telephone wall jack 2 DSL filter 3 DSL modem ...
Page 224: ...224 ISDN connection 1 ISDN wall jack 2 Terminal adapter or ISDN router ...
Page 246: ...246 You see a screen like this 3 Select the Recipient tab ...
Page 251: ...251 You see a screen like this 3 Select the Recipient tab 4 Select Add New 5 Select Add Group ...
Page 311: ...311 You see a screen like this 6 Select Print Head Nozzle Check ...
Page 318: ...318 5 Open the interior of the document cover ...


