237
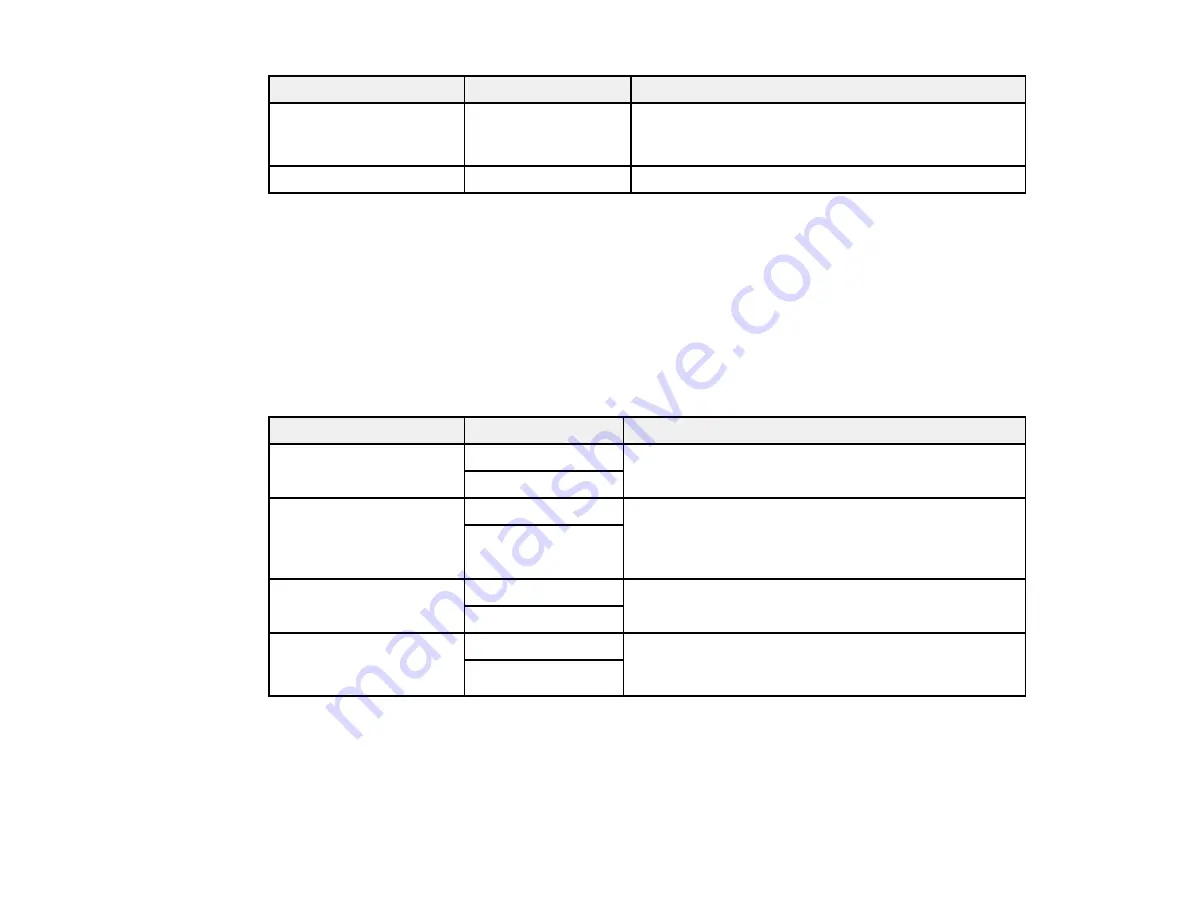
Setting
Options
Description
Rejection Fax
Various options
Lets you automatically reject faxes from blocked
numbers, with blank headers, or from unrecognized
contacts
Receiving Paper Size
Various options
Selects the paper size for incoming faxes
Parent topic:
Selecting Advanced Fax Settings
Related tasks
Selecting the Date and Time
Starting a Scan Using the Product Control Panel
Related topics
Setting Up Contacts and Contact Groups
Send Settings - Fax
Set the send options you want to use for outgoing faxes.
Setting
Options
Description
Auto Rotation
Off
Sends an A4 or letter-size document that is placed
long edge first into the ADF as an A3-size fax
On
Quick Memory Send
Off
Sends the first page of a multi-page document as
soon as it finishes scanning. Select this option to
decrease the amount of time it takes to fax a
document.
On
Batch Send
Off
Sorts outgoing faxes by recipient in the product's
memory, and then sends them as a batch
On
Save Failure Data
Off
Saves faxes that failed to be sent in the product’s
memory. You can resend the faxes from the product's
Status Menu.
On
Parent topic:
Selecting Advanced Fax Settings
Receive Settings - Fax
Set the save/forward or print options you want to use for incoming faxes.
Save/Forward Settings
Summary of Contents for WF-C20590 Series
Page 1: ...WF C20590 User s Guide ...
Page 2: ......
Page 14: ......
Page 28: ...28 You see the Basic Settings screen 4 Select Date Time Settings ...
Page 80: ...80 You see a screen like this 5 Select PDL Print Configuration ...
Page 89: ...89 You see this screen 2 Select Load Paper under the How To options ...
Page 90: ...90 You see this screen 3 Select one of the options ...
Page 91: ...91 You see this screen 4 Select How To ...
Page 99: ...99 You see a screen like this 2 Select the paper source you want to select settings for ...
Page 110: ...110 Parent topic Placing Originals on the Product Related topics Copying Scanning Faxing ...
Page 191: ...191 You see a screen like this 4 Select Email ...
Page 200: ...200 You see an Epson Scan 2 window like this ...
Page 202: ...202 You see an Epson Scan 2 window like this ...
Page 207: ...207 You see this window ...
Page 223: ...223 DSL connection 1 Telephone wall jack 2 DSL filter 3 DSL modem ...
Page 224: ...224 ISDN connection 1 ISDN wall jack 2 Terminal adapter or ISDN router ...
Page 246: ...246 You see a screen like this 3 Select the Recipient tab ...
Page 251: ...251 You see a screen like this 3 Select the Recipient tab 4 Select Add New 5 Select Add Group ...
Page 311: ...311 You see a screen like this 6 Select Print Head Nozzle Check ...
Page 318: ...318 5 Open the interior of the document cover ...


