Scan Quality Problems
The Edges of Your Document Are Not Scanned
You See Only a Few Dots in Your Scanned Image
A Line of Dots Always Appears in Your Scanned Images
Straight Lines in Your Image Come Out Crooked
Your Image Is Distorted or Blurred
Colors Are Patchy or Distorted at the Edges of Your Image
Your Scanned Image Is Too Dark
An Image on the Back of Your Original Appears in Your Scanned Image
Ripple Patterns Appear in Your Scanned Image
Characters Are Not Recognized Well When Converted into Editable Text (OCR)
Scanned Colors Differ From the Original Colors
You Have Trouble Adjusting the Scan Area in the Thumbnail Preview
The Edges of Your Document Are Not Scanned
Move the document about 0.12 inch (3 mm) away from the horizontal and vertical edges of the
document table to avoid cropping.
You See Only a Few Dots in Your Scanned Image
Make sure the document or photo is placed on the scanner’s document table with the
side to be scanned facing down. See
When scanning with the
Black & White
setting in Home or Professional Mode, change
the
Threshold
Adjusting the Color and Other Image Settings
for
instructions.
Summary of Contents for V500
Page 27: ...c scanner transportation lock d USB interface connector e cover cable ...
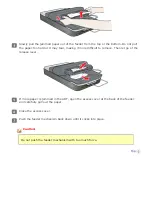
Page 34: ...Open the scanner cover Pull the scanner cover straight up and off the scanner ...
Page 47: ...Top ...
Page 64: ......
Page 69: ...Thumbnail preview ...
Page 78: ...Professional Mode ...
Page 98: ...Professional Mode ...
Page 99: ...Before you scan your film or slides you need to select these basic settings ...
Page 121: ......
Page 131: ...Professional Mode ...
Page 135: ...Professional Mode ...
Page 136: ...Note ...
Page 142: ......
Page 149: ...Click the Settings button You see the Scan to PDF Settings window ...
Page 157: ...Click the File Save Settings button The File Save Settings window appears ...
Page 183: ...Pull the scanner cover straight up and off the scanner ...


