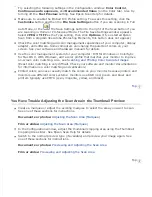
Adjusting the Color and Other Image Settings
the Color and Other Image Settings
for film and slides.
Adjust the Auto Exposure setting in Epson Scan’s Professional Mode window. See
Adjusting the Color and Other Image Settings
the Color and Other Image Settings
for film and slides.
You can also click
Configuration
in the Epson Scan window, click the
Color
tab, then
click the
Recommended Value
button to return the Auto Exposure setting to the
default value. See Epson Scan Help for details.
Increase the Resolution setting. See
for documents and
for film and slides.
Colors Are Patchy or Distorted at the Edges of Your Image
If your document is very thick or curled at the edges, cover the edges with paper to block
external light as you scan.
Your Scanned Image Is Too Dark
Change the
Display Gamma
setting to match your output device, such as a monitor
or printer, in the Epson Scan Configuration window. See Epson Scan Help for details.
Summary of Contents for V500
Page 27: ...c scanner transportation lock d USB interface connector e cover cable ...
Page 34: ...Open the scanner cover Pull the scanner cover straight up and off the scanner ...
Page 47: ...Top ...
Page 64: ......
Page 69: ...Thumbnail preview ...
Page 78: ...Professional Mode ...
Page 98: ...Professional Mode ...
Page 99: ...Before you scan your film or slides you need to select these basic settings ...
Page 121: ......
Page 131: ...Professional Mode ...
Page 135: ...Professional Mode ...
Page 136: ...Note ...
Page 142: ......
Page 149: ...Click the Settings button You see the Scan to PDF Settings window ...
Page 157: ...Click the File Save Settings button The File Save Settings window appears ...
Page 183: ...Pull the scanner cover straight up and off the scanner ...


