


Select the
Descreening
checkbox in Epson Scan’s Home or Professional Mode window.
In Professional Mode, select an appropriate Screen Ruling for the
Descreening
and
deselect the
Unsharp Mask
Adjusting the Color and Other Image Settings
for instructions.
Select a lower
Resolution
setting. See
for instructions.
Note:
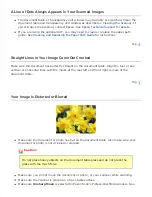
You cannot remove ripple patterns when you are scanning film or
monochrome images.
You cannot remove ripple patterns when you are scanning in Home Mode
using a resolution higher than 600 dpi. In Professional Mode, you may be
able to remove ripple patterns at resolutions higher than 600 dpi if you
reduce the Scale setting.
Characters Are Not Recognized Well When Converted into Editable Text (OCR)
Make sure the document lies perfectly straight on the document table. Align the text or
any vertical or horizontal lines with the marks at the rear left and front right corners of
the document table.
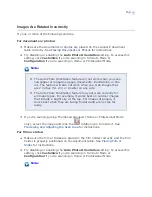
In Home Mode, select
Black&White
as the Image Type setting. In Professional Mode,
select
Black & White
as the Image Type setting, then click the
+
next to
Image
Type
and select
None
for the B&W Option setting. Then try adjusting the
Threshold
Converting Scanned Documents Into Editable Text
for instructions.
Check your OCR software manual to see if there are any settings you can adjust in
your OCR software.
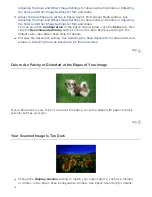
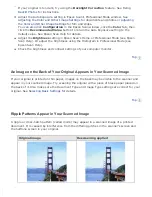
Scanned Colors Differ From the Original Colors
Change the Image Type setting in Epson Scan’s Home or Professional Mode. See
for film
and slides. Select different combinations of this setting and the others mentioned
below.
Change the Display Gamma setting to match your output device, such as a monitor or
printer, in the Epson Scan Configuration window. See Epson Scan Help for details.
Adjust the
Auto Exposure
setting in Epson Scan’s Professional Mode. Also try
selecting a different Tone Correction setting. See
Adjusting the Color and Other Image
Adjusting the Color and Other Image Settings
for film and slides.
Summary of Contents for V500
Page 27: ...c scanner transportation lock d USB interface connector e cover cable ...
Page 34: ...Open the scanner cover Pull the scanner cover straight up and off the scanner ...
Page 47: ...Top ...
Page 64: ......
Page 69: ...Thumbnail preview ...
Page 78: ...Professional Mode ...
Page 98: ...Professional Mode ...
Page 99: ...Before you scan your film or slides you need to select these basic settings ...
Page 121: ......
Page 131: ...Professional Mode ...
Page 135: ...Professional Mode ...
Page 136: ...Note ...
Page 142: ......
Page 149: ...Click the Settings button You see the Scan to PDF Settings window ...
Page 157: ...Click the File Save Settings button The File Save Settings window appears ...
Page 183: ...Pull the scanner cover straight up and off the scanner ...


