2-26
Using the Printer
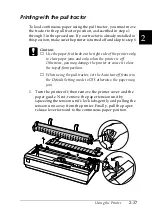
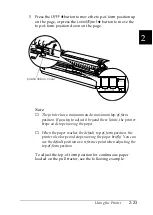
4. Press the
LF/FF
D
button to feed the paper backwards, or press
the
Load/Eject
U
button to feed the paper forwards, until the
paper perforation is aligned with the tear-off edge.
Note:
The printer has a minimum and a maximum tear-off position. If you
try to adjust the tear-off position beyond these limits, the printer
beeps and stops moving the paper.
5. After you set the tear-off position, press the
Pause
button to
exit the Micro Adjust mode.
6. Tear off the printed pages.
When you resume printing, the printer automatically feeds the
paper back to the top-of-form position and begins printing.
tear-off edge
Summary of Contents for LQ-1150 II
Page 1: ......
Page 4: ...ii ...
Page 8: ...vi Contacting Customer Support A 18 Customer support in India A 19 Index ...
Page 76: ...2 42 Using the Printer ...
Page 92: ...3 16 Using the Printer Software ...
Page 124: ...A 20 ...
Page 127: ...IN 3 U Unidirectional Uni d printing See Print direction Unpacking the Printer 1 2 to 1 3 ...

