1
Setting Up the Printer
1-19
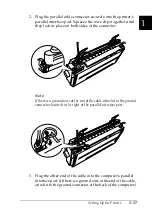
Note:
If there is a ground wire at the end of the cable, attach it to the ground
connector located to the right of the serial interface port.
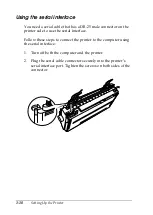
3. Plug the other end of the cable into the computer’s serial
interface port and then tighten the screws on both sides of the
connector. (If there is a ground wire at the end of the cable,
attach it to the ground connector at the back of the computer.)
4. Use the Default Setting mode to change the baud rate or parity
bit, if necessary. See “About Your Printer’s Default Settings”
on page 2-3.
Summary of Contents for LQ-1150 II
Page 1: ......
Page 4: ...ii ...
Page 8: ...vi Contacting Customer Support A 18 Customer support in India A 19 Index ...
Page 76: ...2 42 Using the Printer ...
Page 92: ...3 16 Using the Printer Software ...
Page 124: ...A 20 ...
Page 127: ...IN 3 U Unidirectional Uni d printing See Print direction Unpacking the Printer 1 2 to 1 3 ...


