Learning the Basics
2-11
Removing the Battery and
the System Card
To remove the battery and System Card:
1. Remove the rubber boot, if attached.
2. Place the 475 Field Communicator face down on a level, secure surface.
3. Loosen the battery retaining screws until the top of each screw is slightly above the
top of the 475 Field Communicator.
4. Slide the battery off the 475 Field Communicator. Do not pull up the battery because
this could damage the connector pins.
5. Push the System Card into the System Card socket until it clicks to release it. The
System Card socket is spring-loaded.
6. Grasp the System Card with your fingers and slide it straight out of the 475 Field
Communicator.
STARTING UP AND
SHUTTING DOWN
Prior to using the 475 Field Communicator without the power supply/charger, fully
charge the battery. See “Charging the Battery” on page 2-4 for more information.
Before operating the 475 Field Communicator, ensure:
• The 475 Field Communicator is not damaged.
• The battery is fully seated.
• All screws are sufficiently tightened.
• The communication terminal recess is free of dirt and debris.
Starting Up
Press and hold the Power key on the keypad until the green light on that key flashes
(approximately two seconds). See Figure 2-3 on page 2-6 for the location of the Power
key.
During startup, the 475 Field Communicator automatically checks for any system
software upgrades available on the internal System Card.
You are notified if an
upgrade is on the System Card and ready to be installed. The Field Communicator
Main Menu appears.
The Field Communicator
Main Menu
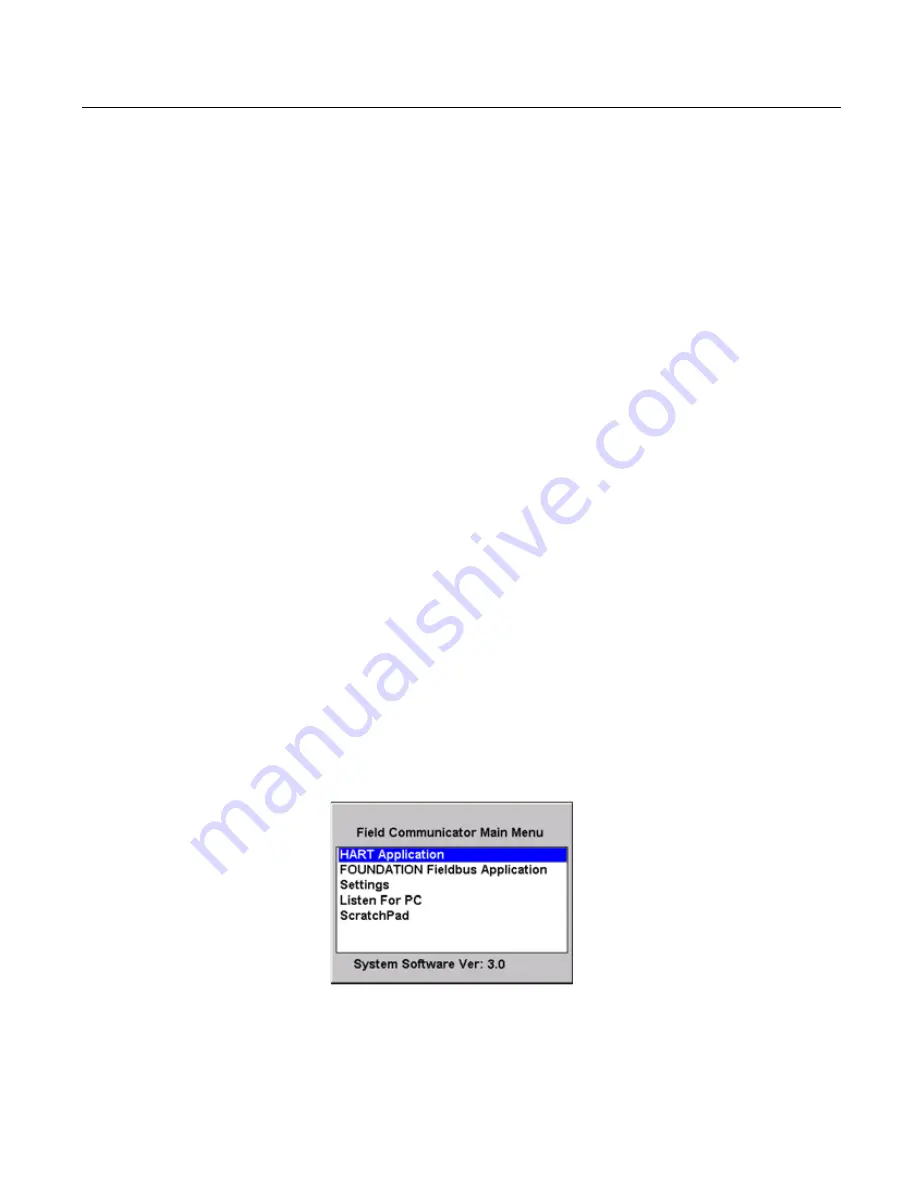
The Field Communicator Main Menu is the first menu that appears after you start the
475 Field Communicator. This menu lets you run the HART and the F
OUNDATION
Fieldbus applications, view the Settings menu, communicate with a PC, and launch
ScratchPad. See Section 3 “HART Functionality” and Section 4 “Fieldbus
Functionality” for more information on these applications.
Figure 2-6. Field Communicator Main Menu
Summary of Contents for 475
Page 1: ...USER S MANUAL ...
Page 2: ......
Page 4: ...2 ...
Page 10: ...Introduction 1 2 ...
Page 34: ...Learning the Basics 2 24 ...
Page 80: ...Troubleshooting 5 10 ...
Page 93: ...B 7 ...
Page 94: ...B 8 ...
Page 95: ...B 9 ...
Page 96: ...B 10 ...
Page 102: ...C 6 ...
Page 108: ...G vi ...
Page 113: ......


