INSTALLATION
EATON
Powerware
®
BladeUPS
®
(12 kVA) User's Guide
S
164201649 Rev 3
www.powerware.com
36
2.
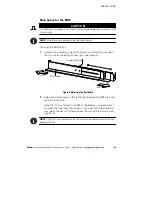
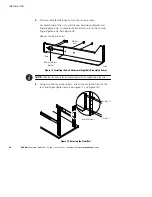
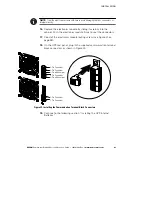
Pre-assemble four M6 hex nuts to the rail assembly:
Assemble two of the nuts and the rear hold-down bracket and
finger-tighten only. Assemble the other two nuts to the rail and
finger-tighten only. See Figure 18.
Repeat for the other rail.
M6 Hex
Nuts
Front
Rear
Rear Hold-Down
Bracket
Figure 18. Installing the Rail Hardware (Right Rail Assembly Shown)
NOTE
Verify that the holes in the rail align properly with the hole pattern in the rack.
3.
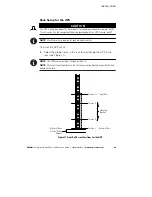
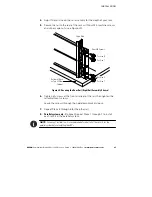
Using two M5 machine screws, attach the rail to the front of the
rack and finger-tighten only (see Figure 17 and Figure 19).
Position 1
Front M5 Screws
Position 12
Figure 19. Securing the Front Rail


