


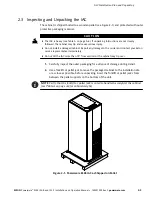
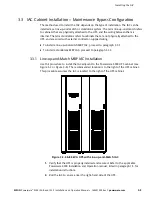


Installing the IAC
3-7
EATON
Powerware
®
9390 IAC-B and IAC-T Installation and Operation Manual
S
164201590 Rev C
powerware.com
11.
Install the nylon grommets from the field kit around the edges of the knockout
holes.
12.
Push the IAC toward the UPS cabinet until the doors are flush with each other.
13.
If not already installed, mount the hanger brackets to the top right side of the IAC
using M4 screws (see Drawing 164201590-5, sheet 2 of 2 on page A-33).
14.
If not already installed, hang the side panel on the hanger brackets and align with
the front and rear of the IAC.
15.
If not already secured, secure the side panel at the bottom using the M4 hex-head
screws previously removed.
16.
If permanently mounting the IAC, proceed to Step 19; otherwise, proceed to
Step 17.
17.
Secure the IAC in position by lowering the leveling feet until the cabinet is not
resting on the casters. Verify the cabinet is level and matches the height of the
installed UPS cabinet.
18.
Proceed to Step 21.
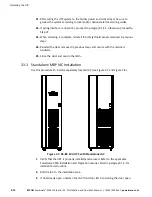
19.
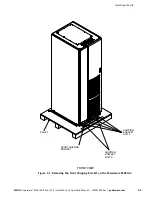
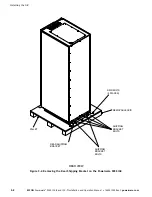
Using the retained hardware, reinstall the shipping brackets previously removed to
the front and rear of the IAC with the angle facing outward (see Figure 3-1 on
page 3-3 and Figure 3-2 on page 3-4).
20.
Secure the cabinet to the floor with contractor-supplied hardware.
21.
If installing a 40–80 kVA UPS with an IAC, proceed to Step 22; if installing a
100–160 kVA UPS with an IAC, proceed to Step 28.
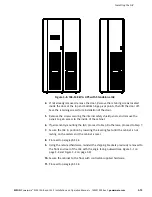
22.
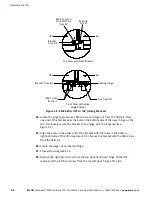
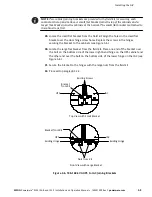
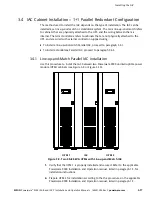
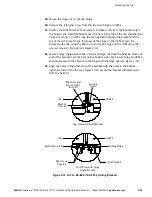
Remove the left-hand screw from the top door hinge on the IAC.
NOTE
Two cabinet joining brackets are provided in the field kit for securing each
cabinet at the top and bottom. A small flat bracket joins the top of the cabinets and a
larger angle bracket joins the cabinets at the bottom. The small flat bracket is attached
to the cabinet tops first.
23.
Locate the small flat bracket, four washers, and M4 screw from the field kit. Align
the holes in the small flat bracket over the hole in the top of the UPS and the
door hinge screw hole on the IAC. Use the four washers between the bracket and
the top of the UPS to match the thickness of the hinge on the IAC. Secure the
bracket to the UPS using the M4 screw, and to the hinge on the IAC using the
screw removed in Step 22 (see Figure 3-5).
Summary of Contents for Powerware 9390 IAC-B
Page 145: ......
Page 146: ...164201590C 164201590 C...


