


42
29
30
31
y
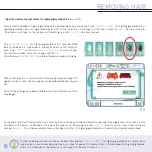
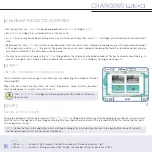
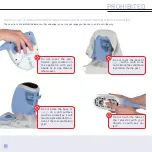
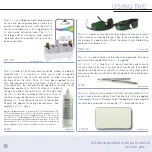
STEP 5
INSERTING A NEW
OPTIC
CARTRIDGE
• Check the direction for inserting the new
optic
cartridge.
To help you, a red dot indicates one side of the
optic
cartridge. This side must be
aligned to match the side of the applicator which has the same red dot.
In short, you need to match up the 2 red dots (photo
29
).
NOTE:
optic
cartridges are not symmetrical, and must therefore be inserted in a
particular direction, and certainly not the other way round.
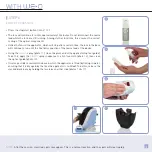
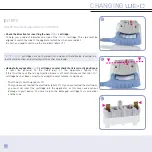
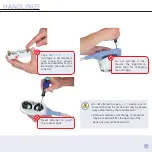
• Having fully engaged the
optic
cartridge, you must check that it is correctly positioned.
It must be parallel to the fixed part of the applicator (photo
30
).
If this is not the case (there is a projection in excess of 2 mm), this means that the
optic
cartridge has not been correctly inserted, You must remove it and check:
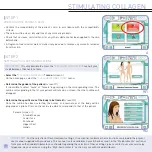
- That the dots match up (photo
29
).
- That you have not twisted the electrodes (photo
31
). If you have twisted the electrodes,
you must not insert the cartridge into the applicator, as this may cause serious
damage to your device. You must return the damaged cartridge to us and order
another one.
▼
▼
▼
▼
CHANGING
OPTIC
CARTRIDGE
Summary of Contents for WE-O
Page 1: ...User Manual...
Page 17: ...17 17 BY TOUCH SCREEN...
Page 18: ......
Page 19: ......
Page 38: ......
Page 39: ......
Page 55: ......