WARNING:
before approaching the machine for any maintenance, switch off the elec-
tricity.
The worn brush falls onto the bottom of the screen.
- Open the door
G fig. 12.
- Remove the old brush.
- Position the new brush inside the machine on the level of the holes of holder
G
.
- Insert shaft on the side from which it has been removed until you gift the correct position.
- Remove flange
M
and screw up hexagonal screws again.
- Close retainers of flange
M
onto hexagonal screws again.
- Insert both holders
G
.
- Tighten bolts at the ends of shaft
F
.
- Rotate holders in such a way that the 130° notch (of holder
G
) coincides with the refer-
ence point
E
fig. 17
on the side.
- Fasten holder
G
with bolts
H
.
Page 15
WARNING: only for March 2000 versions
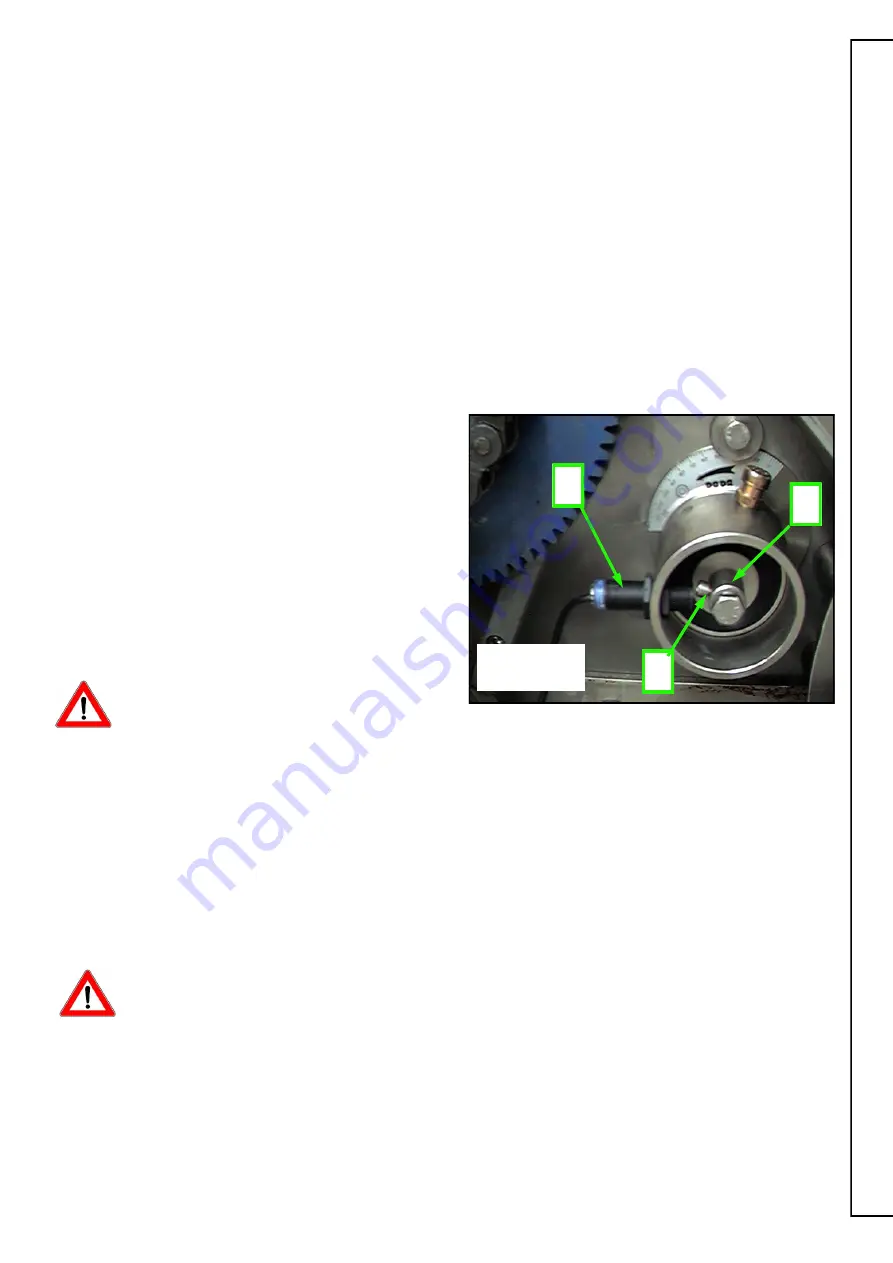
When replacing the brush control bush
R fig. 22.
It must be mounted exactly like it was
before: the socket head screw
P
,
which is out-of-centre to the bushing,
must lie outside the
machine.
In all other models, where the socket head screw
P
is centred, the bushing can be mounted
in both ways.
ROTATION SENSOR
A special proximity switch controls brush ro-
tation
S fig. 22
. If, for any reason, (brush wear,
mechanical stop, etc.) the brush stops, the sep-
arator cannot work.
N.B.:
In some models the rotation sensor
can be mounted on the side of the motor unit.
S
R
P
IMPORTANT
:
wash the brush at least once a week. Careful and complete washing of
the machine (rollers, screen, brush, inlet tank, sewage collection tank) at the end of each
working cycle extend separator life time with better performances.
fig. 22
Summary of Contents for SEPARATOR 2000
Page 23: ...Page 18...


