background image

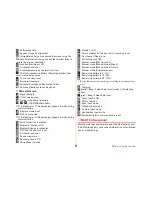
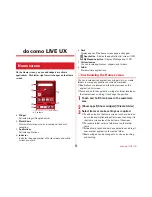
docomo LIVE UX

51

INFORMATION

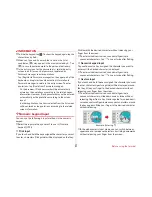
Applications and folders can be allocated in the dock (

P50) 

area. However, 

 cannot be moved/deleted/changed. To 

show/hide 

  on the Home screen, from the Home screen, 

tap 

[My Magazine use setting].

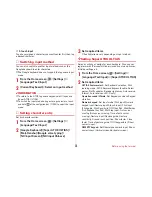
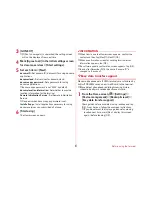
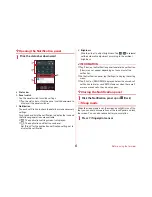
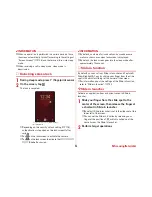
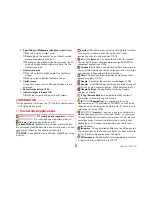
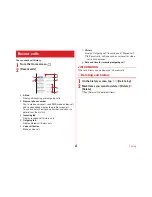
Removing applications/widgets from the 
Home screen

1

Touch and hold an application/widget to 
remove

2

Drag to [Back to apps list]/[Remove from 
Home]

Applications are moved to the application list screen (

P52).

Disabling applications or widgets : 

Touch and hold an 

application or widget and drag it to [Disable app]

[DISABLE]

[OK]

INFORMATION

If [Uninstall] appears when you touch and hold an 
application, drag the application to [Uninstall] and tap [OK] to 
uninstall.

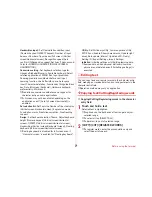
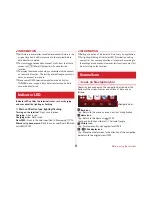
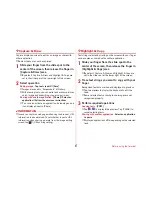
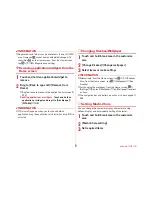
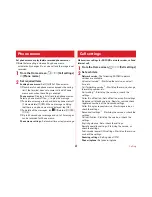
Changing Kisekae/Wallpaper

1

Touch and hold blank area in the customize 
area

2

[Change Kisekae]/[Change wallpaper]

3

Select items or make settings

INFORMATION

Alternatively, from the Home screen, tap 

[Kisekae]. 

Also, from the Home screen, tap 

[Wallpapers]

[See 

Kisekae].

For changing the wallpaper, from the Home screen, 

[Settings]

[Display & Wallpaper]

Tap [Wallpaper] to select 

an item.

The navigation bar and battery icons can also be changed.

P48

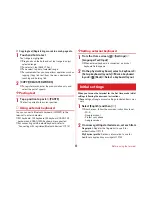
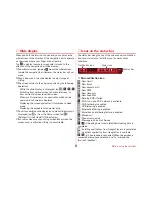
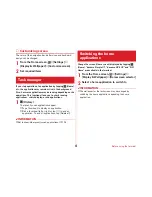
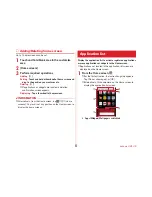
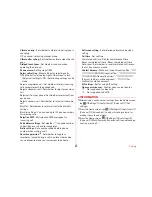
Setting Machi-Chara

You can change the character display, character moving, 
balloon display and auto-update setting of character.

1

Touch and hold blank area in the customize 
area

2

[Machi-Chara setting]

3

Set required items

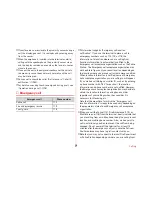
Summary of Contents for M02

Page 1: ...00 INSTRUCTION MANUAL 15 9 ...

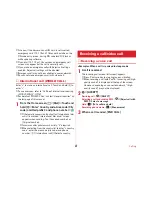
Page 2: ...is manual URL and contents are subject to change without prior notice Quick start guide in Japanese only This guide provides information of parts names and functions Instruction Manual application e manual installed in the terminal in Japanese only This manual provides detailed information and operations of the functions Operation steps From the Home screen Instruction Manual When activating for t...

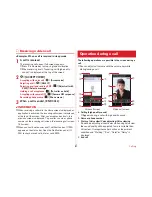
Page 3: ...ck start guide in Japanese only Notes and instructions for use Desktop holder F51 For optional accessories compatible with the terminal optional refer to NTT DOCOMO website https www nttdocomo co jp product option in Japanese only Basic package ...

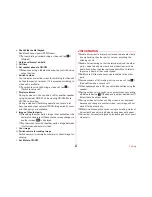
Page 4: ... 42 Task manager 48 Switching the home applications 48 Child proof 49 docomo LIVE UX 50 Home screen 50 Application list 52 Backup and restoration of Home screen 56 My Magazine 57 Calling 58 Making a call video call 58 Receiving a call video call 60 Operation during a call 61 Recent calls 63 Phone memo 64 Call settings 64 Phonebook 66 Mail Browser 69 docomo mail 69 Messaging SMS 69 Email 71 Gmail 7...

Page 5: ...ice connection 144 Connecting with a PC 144 Connecting with a printer 144 Connecting with other devices 146 International roaming 147 Outline of international roaming WORLD WING 147 Available services for overseas 147 Before using the terminal overseas 147 Making Receiving a call in the country you stay 150 Setting international roaming 151 After returning to Japan 152 Appendix Index 153 Troublesh...

Page 6: ...ny loss of saved contents of data resulting from malfunction repair changing of the model or other handling of the terminal In the terminal as it is for a PC some applications that you install may give instability of the operation or may send your location information or personal information registered to the terminal to outside via the Internet and the information may be used improperly Please th...

Page 7: ... the terminal is low running applications may not operate normally In this case delete the saved data Applications and service contents are subject to change without prior notice For the information on the services provided by Google refer to the terms of use for Google Inc And for the details on other web services read terms of use for each service When the terms of use screen appears follow the ...

Page 8: ... UIM card 12 Handling mobile phones near electronic medical equipment 13 Material list 13 Precautions Always follow these directions DANGER This sign denotes that death or serious injury may directly result from improper use WARNING This sign denotes that death or serious injury may result from improper use CAUTION This sign denotes that minor injury or damage to property may result from improper ...

Page 9: ...optional devices specified by NTT DOCOMO for your terminal May cause fire burns injuries electric shock WARNING Do not drop trample or throw the terminal or give a strong force it May cause fire burns injuries electric shock Keep conductive materials metal pieces pencil lead etc from coming in contact with the charging jack or external connection jack or dust into the terminal May cause fire burns...

Page 10: ...t part for a long time you may have redness itching or rash on your skin or it may result in low temperature burns depending on your constitution and or health condition Handling the terminal The internal battery for the terminal is as follows DANGER Do not throw the terminal into fire or apply heat May cause fire burns injuries electric shock due to internal battery to ignite burst heat or leak D...

Page 11: ...pment to fail or malfunction When you talk by setting handsfree or ring alert is sounding keep the terminal away from your ear And when connecting the earphone microphone etc to the terminal and play a game or music adjust the volume moderately Too loud volume may cause a hearing loss And if you cannot hear the sound around you clearly it may cause an accident If you have weak heart be careful whe...

Page 12: ... or hands May cause loss of sight or skin problems If the inside of the material gets into your eyes or mouth rinse it with clean water and see a doctor immediately Also if it gets on your skin or clothes use something such as alcohol to wipe off and wash it off with soap or something similar Do not discard the old terminal together with other garbage May cause malfunction or damage Bring the old ...

Page 13: ...ce heavy objects on the adapter cord May cause fire burns electric shock When you insert and remove the AC adapter from power outlet do not contact a metal strap or other metal objects with the jack May cause fire burns electric shock Do not use a transformer for overseas travel travel converter as the AC adapter May cause fire heat electric shock Do not put an excessive force up down left or righ...

Page 14: ... pull the adapter cord with excessive force Instead remove or insert the adapter straight Failure to do so may cause fire burns injuries electric shock Always remove the power plug from the outlet or cigarette lighter when not using the adapter for an extended period Failure to do so may cause fire burns injuries electric shock Immediately remove the power plug from the outlet or cigarette lighter...

Page 15: ...nal not to transmit signals There may be wearers of medical equipment such as implanted pacemakers or defibrillators around you The terminal s signals may affect the performance of electronic medical equipment When using the terminal in a medical facility be sure to observe the regulations of the facility Material list 0 Terminal Do Do Do Do Part Material Surface treatment Display panel Hardened g...

Page 16: ...lay Drops of water or dirt left on the display may cause stains If the terminal is wiped with alcohol paint thinner benzine or detergent the printing may disappear or color may fade Clean the jack occasionally with a dry cotton swab etc If the jack is soiled connection gets worse and it may cause power to be turned off or insufficient battery charge so clean the jack with a dry cotton swab etc Als...

Page 17: ...u saved in the terminal If the data is deleted DOCOMO assumes no responsibility for the loss of any data Do not drop the terminal or subject it to shocks May cause malfunction or damage Do not plug external devices into the external connection jack or stereo earphone jack at a slant or do not pull it forcibly while it is plugged May cause malfunction or damage It is normal for the terminal to beco...

Page 18: ...ery in the areas below In areas of excessive humidity dust or vibrations Near land line phones or TV radio It is normal for the adapter or desktop holder to become hot while charging Continue to use it When using the DC adapter for charging keep the vehicle engine running The vehicle s battery could become flat When using an outlet with a mechanism preventing unplugging follow the handling instruc...

Page 19: ...3 5 MHz are used and the bandwidth used by mobile object identification devices cannot be avoided Use of Bluetooth function is limited in some countries Confirm regulations of the country region to use it To use in airplane confirm with airline company in advance Cautions on using Bluetooth devices In the bandwidth used by this terminal in addition to home electric appliances such as a microwave o...

Page 20: ...is the DS SS method c OF The modulation is the OFDM method d 4 The expected interference distance is 40 m or shorter e All bandwidths between 2400 MHz and 2483 5 MHz are used and the bandwidth used by mobile object identification devices can be avoided Available channels vary by countries To use WLAN overseas check the conditions such as available frequency regulation etc for the country To use in...

Page 21: ... NFC reader writer and P2P function of the terminal uses weak waves requiring no licenses for radio stations It uses 13 56 MHz frequency band When using other reader writer or P2P function in your surroundings keep the terminal away sufficiently from them Before using confirm that there are no radio stations using the same frequency band nearby To use in airplane confirm with airline company in ad...

Page 22: ...hat a phone keeps functioning after 0 is slowly submerged to depth of 1 5 m in static tap water at room temperature left there for 30 minutes and then taken out Camera function cannot be used under water 3 IP6X a degree of protection indicates that the phone can maintain its functionality to prevent dust particles from entering into the phone even when it has been shaken for 8 hours in an apparatu...

Page 23: ...slot cap The terminal can be washed with tap water at room temperature With holding the external connection jack slot cap not to open wash the terminal with tap water without rubbing hard Do not apply water flow stronger than allowed P20 Do not use brush sponge soap detergent etc If mud or dirt has adhered to your terminal shake it several times in tap water put in a washbowl or other container to...

Page 24: ...om wait until the terminal reaches the room temperature Do not put hot water from a faucet or shower To ensure waterproofness dustproofness To prevent water or dust from entering the terminal be sure to observe the following points When attaching or removing a docomo nano UIM card or microSD card or when using the external connection jack put your fingertip in the groove and pull open the cap in t...

Page 25: ...Important precautions Do not perform actions shown in the illustrations below Observe the following precautions to use the terminal properly Accessories and optional devices are not waterproof dustproof Do not use the terminal to watch videos for example with it docked on the desktop holder included with the terminal in a location exposed to water such as a bathroom shower room kitchen or lavatory...

Page 26: ...ids with the external connection jack slot cap open the liquid may get inside the terminal and cause electric shocks or malfunction Stop using the terminal turn the power OFF and contact a DOCOMO specified repair office If the rubber gasket of external connection jack slot cap is damaged or deformed replace it at DOCOMO specified repair office DOCOMO does not guarantee actual operations under all ...

Page 27: ...erminal is wet When charging the battery after the terminal gets wet adequately drain the terminal and then wipe off the remaining water with a dry clean cloth or something similar before docking the terminal on the desktop holder or opening the external connection jack cap If the battery has been charged with the external connection jack cap open close the cap firmly after charging It is recommen...

Page 28: ...ndicator LED c Proximity sensor RGB sensor 2 Proximity sensor detects approach of your face prevents erroneous operation of the touch panel RGB sensor senses ambient light and brightness and automatically adjusts the display backlight d Earpiece Speaker e GPS antenna section 1 Part names and functions a g k m l h i j e c d b f n o p q r t l s u y x w v ...

Page 29: ... pressing and holding volume down key for 1 second or more 1 It is built in the terminal Covering around the antenna by the hand may affect the quality 2 Putting a protective sheet or sticker on the sensor or covering the sensor with fingers may cause erroneous operation or incorrect sensing result 3 Close the caps firmly to prevent water or dust from entering the terminal A docomo nano UIM card i...

Page 30: ...om the docomo nano UIM card slot c With the IC side facing up place the docomo nano UIM card on the tray c Check the orientation of docomo nano UIM card corner cut d Make sure that the display side of the terminal is facing down then insert the tray straight into the docomo nano UIM card slot d e Press firmly the slot cap of the terminal to close P22 Removing a Face up the display side of the term...

Page 31: ... off of battery To finish charging end applications beforehand It is normal for the terminal or AC adapter to become warm while charging When the terminal becomes warm charging may stop temporarily for the safety When the terminal becomes extremely hot stop using immediately If the temperature of the internal battery or the terminal becomes out of range for charging a charging error is notified an...

Page 32: ...s have a plug dedicated to 100V AC for domestic use When using AC adapters in the range of 100V and 240V AC overseas a conversion plug adapter applicable to the country you are staying is required Also do not charge the battery with a transformer for overseas travel DC Adapter 04 optional Used to charge in a car Charging with a desktop holder Follow the procedure below to charge the battery using ...

Page 33: ...f AC adapter from the desktop holder INFORMATION Do not let any object such as a mobile phone strap get between the terminal and the desktop holder The external connection jack on the back of the desktop holder is specifically designed for charging Connect only to the specified AC adapter Charging with AC adapter Follow the procedure below to use AC Adapter 05 optional for charging a With the disp...

Page 34: ...from the terminal and securely close the external connection jack on the terminal P22 Charging with a PC You can charge the terminal via a PC using microUSB connection cable 01 optional etc When a screen of new hardware detection or operation selection appears on the PC select キャンセル Cancel Turning power on 1 Press and hold P 2 sec or more until the indicator LED lights in green The terminal vibrat...

Page 35: ...ective sheet or seal on the display Operation with the touch panel wet Operation with finger wet by sweat or water Operation under water Tap Double tap Tap Touch the screen lightly and release the finger quickly Double tap Tap twice quickly Touch and hold Touch the screen for a while Some operations can be operated by keeping touching the screen with a finger Drag Slide Swipe Pan Drag Touch an ite...

Page 36: ...ge Some screens may not be saved 1 Press and hold P and volume down key at the same time 1 sec or more Screen shot is saved and appears on the status bar Flick the status bar downward to open the Notification panel P45 To check the image open the Notification panel and tap a notification for screenshot Select an application or from the Home screen tap Gallery Screenshots Emergency mode In case of ...

Page 37: ... Numeric keypad Multiple characters are assigned to a key You can select input method from Flick input Numeric keypad input Gesture input or 2 touch input P37 QWERTY keypad Enter characters using Romaji input Handwritten input Enter characters in handwriting Some key displays may be changed depending on the setting or condition a Drag left or right to adjust the width of the keypad b Enable disabl...

Page 38: ...the cursor After a character is fixed flick a key up to delete the character on the right to the cursor and flick to the left to delete all characters on the left to the cursor Flick down on the key to restore a character deleted after it was fixed or flick right in handwritten input mode in portrait view j Move the cursor to right On the numeric keypad flick up or down to move the cursor up or do...

Page 39: ... input method you want to use in Numeric keypad P38 Flick input If you touch and hold the key assigned the character you want to enter characters flick guide will be displayed on that key Flick towards the desired character without releasing your finger from the screen To enter voiced semi voiced sound small geminate consonant characters tap once or twice after flicking Numeric keypad input Tap co...

Page 40: ...epending on input method Setting Super ATOK ULTIAS Set entry actions or design for each keyboard Also you can register words Personal dictionary or edit common phrases initialize settings etc 1 From the Home screen Settings Language Text Input Super ATOK ULTIAS 2 Set required items ULTIAS Feature select Set Keyboard selection Flick learning mode ATOK Keyword Express Enable Select genres Notify upd...

Page 41: ... Keyboard selection Theme Adjust keyboard height Numeric keypad Vertical screen Horizontal screen QWERTY Vertical screen Horizontal screen Handwriting Vertical screen Horizontal screen Floating keyboard Vertical screen Horizontal screen Floating keyboard is disabled for full screen even if Horizontal screen is enabled for Floating keyboard Utility Set Dictionary utility Common phrase utility ATOK ...

Page 42: ... and OADG 109A keyboard are supported For connecting with Bluetooth keyboard refer to Connecting with registered Bluetooth devices P141 Setting external keyboard 1 From the Home screen Settings Language Text Input When external keyboard is connected a physical keyboard field appears 2 On the physical keyboard select a keyboard Set up keyboard layouts Mark a keyboard layout Back Select a keyboard l...

Page 43: ...s you subscribed all at once 6 Start using The Home screen appears INFORMATION When How to use the Home screen appears confirm the content and then tap Next Next OK When a confirmation screen for sending terminal error information appears tap OK If a software update confirmation screen appears tap OK In and after December 2015 the name docomo ID is changed to d account Easy data transfer support M...

Page 44: ...ng Light in red Charging error Flash in red New SMS Flash in the color specified in Messaging P70 Missed call phone memo Flash in a color specified in Missed call LED P103 INFORMATION Setting and action of indicator LED may vary by application For lighting blinking of indicator LED Illumination setting comes first For some applications it may work according to the settings of application However t...

Page 45: ... character entry To set to show hide slide display icons while slide display is displayed tap or from the Home screen tap Settings Useful tools Slide display For some screens such as during screen lock or when the screen saver is activated sliding is not available Icons on the status bar The status bar along the top of the screen shows notification icons and status icons that allow you to check va...

Page 46: ...onnection is enabled Bluetooth function is ON Bluetooth device is connected NFC Osaifu Keitai lock is set Omakase Lock is set Phone memo is set Speaker phone is ON Microphone is muted Vibrator is ON Permit preferential interrupt only Important is set No interrupt None is set Positioning with GPS Manner mode Manner mode Manner mode Manner mode Silent Manner mode Manner mode Alarm Manner mode Origin...

Page 47: ...fication d Brightness Slide the slider to adjust brightness Tap to release set the automatic adjustment according to the ambient brightness INFORMATION Tap Clear on the Notification panel to delete the notification Clear may not appear depending on the content of the notification On the Notification panel tap Settings to display the setting menu Tap CALL or SEND SMS displayed below the missed call...

Page 48: ...en when lock screen is displayed By default the lock screen goes into the sleep mode after approximately 10 seconds Slide in function By default you can call out Slide in launcher and Capture Draw Highlight Copy by sliding your finger from the slide spot start point for sliding at the corner of the screen For information about the settings of the Slide in function refer to Slide in function P130 S...

Page 49: ... while using the browser URL information is also obtained To set whether to paste URL information when sharing operate from the image editing screen tap URL sharing setting Highlight Copy Text strings selected by tracing on the screen with your finger can be copied or shared with another application 1 Slide your finger from the slide spot to the center of the screen then release the finger in High...

Page 50: ...applications 1 History The recently used applications appear Tap a thumbnail to display an application Flick a thumbnail left or right or tap u to end an application To end all applications tap Delete all INFORMATION Set to show hide recently used applications P126 Change the screen Home screen displayed by tapping Home docomo Simple UI docomo LIVE UX and NX Home are available in the terminal 1 Fr...

Page 51: ... 1 Press and hold P until the phone options menu appears 2 Child proof OK To cancel the settings press P for 1 second or more INFORMATION When Child proof is set the terminal does not go into the sleep mode by pressing P or no operation in a certain period of time Child proof ...

Page 52: ...You can locate desired applications widgets etc or create folders to manage applications on the Home screen Applications are located on either Home screen or the application list screen Touch and hold the application widget or folder located on the Home screen and drag it to change the position 1 Touch and hold blank area in the customize area 2 Show apps Show widgets Create folder 3 Select items ...

Page 53: ...all appears when you touch and hold an application drag the application to Uninstall and tap OK to uninstall Changing Kisekae Wallpaper 1 Touch and hold blank area in the customize area 2 Change Kisekae Change wallpaper 3 Select items or make settings INFORMATION Alternatively from the Home screen tap Kisekae Also from the Home screen tap Wallpapers See Kisekae For changing the wallpaper from the ...

Page 54: ... INFORMATION Alternatively from the Home screen tap Home screens Or pinch in at any position on the Home screen to display the home screens Display the application list to activate registered applications or move applications or widgets to the Home screen Applications not located in the application list screen are displayed on the Home screen 1 From the Home screen For the first activation the ins...

Page 55: ...plication shortcut for dmenu You can easily access sites recommended by DOCOMO or convenient applications P78 Facebook Facebook is a social service that allows users to communicate with friends family colleagues and classmates and see what is happening in the world today Gmail You can use email provided by Google or other general providers P73 Google Search for the terminal or web pages P98 Google...

Page 56: ...aff of the Call center to support the terminal operations by remote checking the display of your own terminal P159 Osaifu Keitai Pay money etc only by holding the terminal over the IC card reader in stores etc P80 Voice Search Just speak to the terminal to use Google Search P98 Camera Shoot still images or videos P83 Calendar View calendar and register schedule Gallery View play still images video...

Page 57: ... cloud free of charge then accessing the backup data from smartphones tablets or PC etc Browser View web pages like a PC P75 Maps View your current location find other locations and calculate routes P95 Email Set email accounts provided by general providers to send receive emails P71 Messaging Send Receive SMS P69 Media Player Play music and videos P91 Memo An application for creating managing mem...

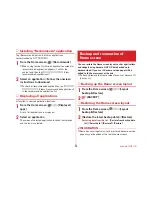
Page 58: ...ications is displayed 2 Select an application The screen of selected application location is displayed and the icon is selected You can restore the Home screen layout such as applications and widgets using docomo LIVE UX data backed up in docomo cloud If you use it docomo service page will be added to the home screens at the end To back up restore the Home screen layout set docomo ID d account Bac...

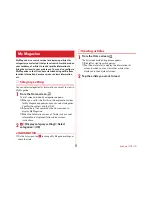
Page 59: ...you set for the first time the explanation screen for My Magazine appears and you can select categories Confirm the content and tap OK Alternatively flick upward on the Home screen to display My Magazine When the cofirmation screen of Twitter link or use of information is displayed follow the onscreen instructions 2 Display category setting Select categories OK INFORMATION On the list screen tap t...

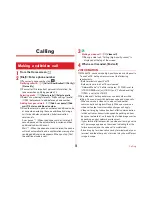
Page 60: ...h quality sound is displayed at the top of the screen 4 When a call is ended End call INFORMATION With VoLTE you can make high quality voice and video calls To use VoLTE both parties must meet the following requirements Both terminals support VoLTE Both parties are in a VoLTE service area Network Mode in Cellular networks P149 is set to LTE 3G GSM Auto or LTE 3G and Call mode setting P65 is set to...

Page 61: ...io wave condition When location information is notified name of Emergency call acceptance organization you are calling to will appear If you make a call hiding your caller ID such as by entering a phone number with 184 for each call the location information and phone number are not notified However the Emergency call acceptance organization may decide to obtain the location information and phone n...

Page 62: ... code Area code City code omitted prefix 0 and phone number If Automatic conversion function for International dial assist is marked International dial assist screen appears when sending Tap Converted number or Original number In some countries and areas such as Italy 0 is required When selecting from the country list to enter country code enter the area code city code and phone number Internation...

Page 63: ...reen After you accept and end call the previous screen is displayed Tap a caller s name or phone number on the incoming call screen the incoming call screen full screen When you could not answer a call notification icon P43 appears on the status bar Open the Notification panel P44 to check missed calls dial or send SMS The following operations are possible in the screen during a call You can adjus...

Page 64: ...een in full screen and normal screen l Your image m Switch camera for sending image Switch camera in camera out camera to shoot image for sending n Set Mute to ON OFF INFORMATION Enable Voice clear to improve call sound to be heard clearly by emphasizing the other party s voice or adjusting the listening sound Enable Voice slowing so that the terminal adjusts the other party s voice to be heard sl...

Page 65: ...ng tab Display received call history only d Outgoing tab Display dialed call history only e Voice call button Make a voice call f History Display Outgoing call Incoming call Missed call In Recent calls call type such as voice call or video call is not displayed g Date and time for incoming outgoing call INFORMATION Up to 500 items can be displayed in Recent calls Deleting call history 1 On the his...

Page 66: ...age Make various settings for DOCOMO network services call and Internet call 1 From the Home screen Call settings 2 Set each item Network service The following DOCOMO network services are available Voicemail service 1 Start stop the service or set call time etc Call forwarding service 1 Start stop the service change forwarding number etc Call waiting 1 Start stop the service or check the settings ...

Page 67: ...rator Prefix settings Set a number added before phone number when making a call Reverb suppression 2 Set whether to suppress reverberant sound during a call in a place where voice sound echoes to make your voice clear to be heard Call mode setting Set preferred network mode when calling Call time Set call time Cumulated call time Display cumulated call time Reset cumulated call time Reset cumulate...

Page 68: ... In the profile screen you can make a call send SMS etc b Search Search contacts c Register P66 Register a new phonebook entry d Logging in to out from cloud e Display submenu You can delete operate the cloud menu SD card SIM card sharing settings or view help application information f Index Display the index Search entries in the order of Japanese syllabary alphabet etc Adding an entry to the pho...

Page 69: ...ting group name In the group list touch and hold a group Delete group OK In Group list tap Delete group to select a group to delete INFORMATION Only groups of docomo account can be sorted Registering a contact to a group 1 In the phonebook list Group 2 Select a group Add member Mark a contact to add OK OK Canceling group Select a group Delete member Mark a contact to delete OK OK INFORMATION Group...

Page 70: ...p and restore phonebook data and other data to a microSD card etc all at once P99 Send all data common Activate application such as Bluetooth or mail attachment to send all contact data It is not supported for some applications INFORMATION If you try to send all phonebook entries via Bluetooth communication to an i mode terminal data cannot be moved normally My profile You can check your own phone...

Page 71: ...le phone number 3 Type message Enter a message Send INFORMATION SMS can be also sent to or received from the parties using overseas network operators For countries and overseas network operators available refer to NTT DOCOMO website To send to users of overseas network operators enter Country code and then the recipient mobile phone number Alternatively enter 010 Country code and the recipient mob...

Page 72: ...n tap MENU Delete all threads DELETE Setting SMS 1 From the Home screen Messaging MENU Settings 2 Set each item SMS Enabled Change default SMS application P130 Delete old messages Set whether to delete old messages if the number of saved messages reaches upper limit Text message limit Set the number of messages to save per thread Backup Copy messages between the terminal and a microSD card Deliver...

Page 73: ...MANUAL SETUP in Step 2 and manually enter the account settings With some service providers settings for OP25B Outbound Port 25 Blocking spam mail transmission blocking are needed For details contact the service provider you are subscribed to If you have already set a mail account and want to add on another mail account on the mail list flick right the left edge of the screen Tap Settings Add accou...

Page 74: ... bar Open the Notification panel and tap the notification to display an email Replying to an email 1 Display an email 2 Replying all Reply all 3 Enter a message SEND Forwarding an email 1 Display an email 2 Forward 3 Enter a mail address message SEND Deleting emails 1 Display an email DELETE Setting Email Make Email settings General settings for Email 1 From the Home screen Email 2 Flick right the...

Page 75: ...o Wi Fi Email notifications Set whether to show notification on the status bar when receiving an email Choose ringtone Set ringtone when receiving an email Vibrate Set whether to vibrate the terminal when receiving an email LED Set color of indicator LED when receiving an email Incoming settings Set incoming mail server Outgoing settings Set outgoing mail server INFORMATION To delete Email account...

Page 76: ...the notification icon P43 appears on the status bar and the detailed screen is displayed The buzzer alarm or the incoming ringtone sounds in maximum volume The setting cannot be changed By default the sound is emitted even in Manner mode You can set to disable the sound P74 Displaying received Area Mail 1 From the Home screen Disaster kit 2 Early Warning Area Mail Select an Area Mail Deleting Area...

Page 77: ...isplayed when you zoom in out a web page to valid invalid takeover of the magnification status Pinch out Pinch in Zoom in out Double tap Zoom in To return to the view before it is zoomed in double tap again Activating Browser to display a website 1 From the Home screen The preset home page is displayed Slide the screen downward to display the address bar at the top part of web page Enter URL or a ...

Page 78: ...story of frequently viewed web pages tap Most visited 2 Select a history of the web page Adding bookmark to view website Registering a bookmark 1 When a web page is displayed slide the screen down to display the top of the screen Menu Save to bookmarks Details of bookmark are displayed You can change the label name location to be added etc 2 OK Displaying web pages from bookmarks 1 When a web page...

Page 79: ...display the top of the screen Menu Print From here on refer to Print P146 Setting Browser 1 When a web page is displayed slide the screen down to display the top of the screen Menu Settings 2 Set each item General Set home page displayed when Browser is activated or downloaded file saving location Privacy security Set cache deleting browser history displaying hiding warning screen Cookie form data...

Page 80: ...ous services including selling digital contents such as music videos books shopping sites travel reservation sites etc are provided 1 From the Home screen dmarket Top screen of dmarket appears For details on dmarket refer to NTT DOCOMO website With Play Store you can access to Google Play to search convenient applications or fun games which you can download and install on the terminal Also movie c...

Page 81: ...lication For details on billing for application or canceling refer to Help P78 4 Check the download progress When installation is completed appears on the status bar INFORMATION Be sure to check the security of application then install it at your own risk The terminal may be infected with a virus and data may be damaged NTT DOCOMO is not liable for malfunctions if any caused by the application you...

Page 82: ...you are required to erase the data yourself For support such as reissuance restoration temporary preservation or transfer of data contact Osaifu Keitai compatible service providers For important data be sure to use an Osaifu Keitai compatible service with backup service Data saved in IC card installed to Osaifu Keitai compatible terminal If the data in the IC card is lost modified or damaged by an...

Page 83: ...ay attention to the following when holding the terminal over a card reader NFC module equipped device etc Bring mark close to the device slowly do not hit it strongly Hold mark horizontally over the center of the compatible device If scanning fails even with it held in front of the center of the scanner slightly lift up the terminal or move it backwards forwards or to the left right P80 If there a...

Page 84: ...D application iD refers to electronic money offered by DOCOMO Once you have set up iD on your Osaifu Keitai you can hover the terminal over an IC card reader at various shops to make your shopping easier and more comfortable You can register the information of up to two cards and use either one depending on the privilege To use iD with your Osaifu Keitai you need to configure settings using the iD...

Page 85: ...ot a malfunction When the terminal is in high temperature state for a long time the camera may not be available Wait until the terminal cools down to use again When the battery is low the camera may not be available Fully charge the terminal before using the camera The captured images may be different from actual objects for color and brightness If you try to shoot an object in an environment with...

Page 86: ...taking and sending photos using camera equipped mobile phones If you cause the public any trouble using the terminal you may be punished under law or regulations for example nuisance prevention ordinance Viewing shooting screen a Flash icon An icon appears showing the setting of the flash P87 b Location information icon It appears when location information is set to be added P88 c White balance ad...

Page 87: ...can zoom in out using the slide bar Zoom function is not available for in camera Switching to in camera out camera MENU Switch camera Displaying taken still picture Flick left Gallery P90 appears and you can move copy and edit still images Pinch in for film strip view so that you can delete a still image by flicking it down Continuous shooting You can shoot continuously up to 100 images Continuous...

Page 88: ...does not sound Main operations on the panorama shooting screen Displaying taken still picture Flick left Gallery P90 appears and you can move copy and edit still images Pinch in for film strip view so that you can delete a still image by flicking it down Closing the panorama shooting screen BACK Return to the previous shooting mode before setting to the panorama shooting screen Automatic still ima...

Page 89: ...vailable Camera Mode Tap Still RapidPic Video Panorama QR code to select a camera mode Switch camera Switch to in camera out camera Picture Size Select shooting size Although Picture Size larger than FullHD 1920u1080 is set when you activate Camera from another application such as phonebook an image size is changed automatically to FullHD 1920u1080 Flash Select Flash setting from auto flash flash ...

Page 90: ...video 1 From the Home screen Camera 2 MENU Video A video shooting screen appears 3 Display an object on the shooting screen Start Shooting start sound is heard and a shooting is started You can also start shooting by pressing the volume up key When shooting starts elapsed time appears on the shooting screen 4 Stop Shooting end sound is heard and a shooting stops You can also stop shooting by press...

Page 91: ...h as incandescent or fluorescent Adjust flicker Reduce flicker noise or stripe pattern emerged under a fluorescent lamp etc Shooting settings for video Tap MENU displayed on the video shooting screen to change the following shooting settings Some items cannot be selected depending on the combinations Some items cannot be set for the in camera Camera Mode Tap Still RapidPic Video Panorama QR code t...

Page 92: ...ts Closing the QR code shooting screen Return to the previous shooting mode before setting to Reading with QR code reader Turning the light ON OFF MENU Light ON Light OFF 4 Check scanned data Saving data On the scanned data MENU Save to history Tap history field Displaying history On the QR code shooting screen MENU History Select a history Using QR code data Use the scanned QR code data Displayed...

Page 93: ...g album image Touch and hold an album image on the album list image list to display check mark at the album image Frame in light blue appears on the image and the image is in selected status Tap to deselect When albums images are selected number of selected items is displayed at the top of the screen Tap a number of selected items to operate Select all Deselect all INFORMATION In the album list yo...

Page 94: ...epeat is off Repeat all songs Repeat current song f SNS shring Share the music information using LINE Twitter or Facebook g Playing operation Pause Play Play previous next file Go back to the top of the file depending on the operation status 10 seconds fast rewinding 10 seconds fast forwarding h Search Search music video files on dmarket i Display submenu Check and operate Settings Help to beginne...

Page 95: ... touch and hold a play list Delete playlist OK To edit a play list on the play list screen select a play list Edit You can use the GPS function on the terminal and a compatible application to check your current location or search for routes to your destination The terminal is equipped with GPS receiver using satellite signal for measuring current location When using GPS function a packet communica...

Page 96: ...ngs clustered or residential area Inside or under a thick covering of trees Near a high voltage cable In a car inside a train compartment Bad weather such as heavy rain or snow When there are obstructions people or objects near the terminal Precautions for using electronic compass An electronic compass is equipped with the terminal and it senses the faint fluctuation in the magnetic field of the e...

Page 97: ...GPS in a place with sky view Note that this function increases power consumption Google Maps The Google Maps application lets you measure your current location find locations and calculate routes To use Google Maps a network connection via LTE 3G GPRS network or Wi Fi is required To measure your current location turn Location data GPS ON in advance P95 Google Maps do not cover all countries and ci...

Page 98: ...ap the notification Detailed screen appears Displaying schedule Display information of registered schedule 1 On the calendar screen tap schedule 2 Check the schedule Editing schedule Edit Edit schedule 保存 Save Deleting schedule Delete one DELETE Main operations in the Calendar screen Switching display Switch disp Select display unit Selecting search conditions Conditions Select a search condition ...

Page 99: ... tap MENU Settings to make settings for the clock Using timers 1 From the Home screen Clock 2 TIMER The timer screen appears 3 Enter time START The countdown starts 4 When the countdown ends Pausing the countdown During the countdown STOP To restart the countdown tap START Resetting the countdown While pausing the countdown Deleting a timer Adding a timer Enter time START Slide up or down the time...

Page 100: ...n of the application Google Search You can search in the website by entering keywords You can check information for the current location weather traffic conditions etc using Google Now 1 From the Home screen Google Google For the first activation a confirmation screen for Google Now appears Follow the onscreen instructions 2 Enter a keyword Search suggestions appear according to the character entr...

Page 101: ...a Storage BOX or microSD card Backing up to Restoring from microSD card Transfer or back up phonebook entries docomo mails bookmarks etc using external memory such as a microSD card Backup Back up data such as phonebook docomo mail media files etc to a microSD card If a microSD card is not inserted image video data is saved to the phone memory according to the terminal memory structure With the ap...

Page 102: ... card is not enough backup may not be executed In such case delete unnecessary files from the microSD card to save the memory space When the remaining battery gets low backup or restoration may not be executed In such case charge the battery of the terminal and then back up or restore For each function instructions and other menu items tap Help to refer to check help Backing up to Restoring to doc...

Page 103: ... confirmation screen for log in appears follow the onscreen instructions 3 Select for data type to restore Select data to restore Select Select restore method Start restore Restore Enter a docomo apps password OK INFORMATION When restoring from docomo cloud data is restored to the same saving location as when backed up When the model is changed etc however data is restored to the different saving ...

Page 104: ... vibration also stops temporarily Vibrate on ring Set whether to vibrate while ringtone is sounding You cannot set during manner mode Even if Vibrate on ring is unmarked vibrator works when Ring volume is set to 0 Vibrate after calling Set whether to vibrate when a call ends Sound at start charging Set whether to notify by sound when starting charging App notification Set whether to display the no...

Page 105: ...sound volume INFORMATION When Ring volume is set to 0 the vibration turns to ON To set the vibration OFF set it to the Manner mode Interruptions Set the ringtone notification sound and vibration to work only for the specified date time or functions 1 From the Home screen Settings Sound Vibration LED Volumes Interruptions When calls and notifications arrive 2 Select a setting item Always interrupt ...

Page 106: ...th Low Energy Settings are emitted Changing Manner mode type 1 From the Home screen Settings Sound Vibration LED Manner mode Select manner mode 2 Selecting an item Manner mode All sounds do not sound from the terminal speaker And the vibration turns to ON Manner mode Silent In addition to mute sounds turn off the vibration Manner mode Alarm Same operation as Manner mode except alarm volume and vib...

Page 107: ...rect image quality of videos YouTube etc If videos recorded by Camera or downloaded and saved to microSD card are in the size of 1080p or less the image quality is corrected at the time of playback Video correction may not be available depending on the video Picture correction Set whether to correct image quality of still images Gallery Daydream Setting steps P107 Setting wallpaper on the lock scr...

Page 108: ...N 3 Set required items Adjust touch area Set the area where the Touch and go display function is available Touch and sleep Tap the notification display on the lock screen or notification panel to set to make the terminal sleep mode INFORMATION When the glove touch function P130 is set to ON the touch and go display function is not available with hands in gloves When the Display method for notifica...
Page 109: ...ery check Display applications which affect the battery life such as applications running in the background when the screen is off Battery saver Enable disable battery saver When the battery saver is enabled the status bar and navigation bar turn to orange is displayed on the status bar 1 From the Home screen Settings Battery Battery usage 2 MENU Battery saver 3 Tap the button in the upper right o...

Page 110: ...i network connection selection screen may appear INFORMATION Even when Wi Fi is ON packet communication is available However while you connect Wi Fi network Wi Fi comes first When the Wi Fi network is disconnected network connection switches to LTE 3G GPRS automatically Note that packet communication fee may apply if network connection stays switched To use docomo services via Wi Fi set docomo ID ...

Page 111: ... supporting AOSS and WPS connection Set Wi Fi to ON in advance 1 From the Home screen Settings Wi Fi Easy Settings Select network 2 EASY SETTINGS 3 Select a registration method AOSS system AOSS system Tap AOSS button Perform operations on the access point On the connection complete screen Finish WPS system WPS system Push button system PIN entry system 8 digits PIN entry system 4 digits Perform ne...

Page 112: ...t routing an access point etc Set Wi Fi to ON in advance To transfer data such as videos or still images using Wi Fi Direct obtain an application compatible with data transfer via Wi Fi Direct from Play Store and install it 1 From the Home screen Settings Wi Fi Advanced Wi Fi Direct When a Wi Fi Direct device does not appear tap SEARCH FOR DEVICES 2 Tap a detected Wi Fi Direct device Disconnecting...

Page 113: ...in connection Wi Fi Direct Miracast in connection If the Wi Fi network registered in Frequently used hotspot behaves erratically some applications that usually restrict communications to Wi Fi may temporarily switch over to packet communications LTE 3G If data amount exceeds the limit of subscribed budget plan and transmission speed is limited multi connection does not work Wi Fi sleep policy Set ...

Page 114: ...ection or the time out occurs Activate or deactivate packet communication as required 1 From the Home screen Settings Data communication Airplane mode Cellular networks 2 Turn OFF Data enabled 3 Check the content and OK Setting access point APN Access point for connecting to the Internet sp mode is already registered You can add and change access points if necessary For details on sp mode refer to...

Page 115: ... Delete APN Connecting VPN Virtual Private Network VPN Virtual Private Network is a technology to connect to the information in a protected local network such as enterprises or universities from another network To set up a VPN connection from the terminal you need to retrieve the information related to security from your network administrator Authentication may be required Set security code passwo...

Page 116: ...ct the terminal and a PC with the USB cable The selection screen for connecting appears 2 View tethering settings OK 3 Set USB tethering to ON INFORMATION Operations on Windows Vista Windows 7 Windows 8 8 1 and Windows 10 PC are confirmed However operations for all PCs are not guaranteed Wi Fi tethering You can allow Wi Fi devices to access the Internet by using the terminal as Wi Fi hotspot You c...

Page 117: ... hotspot screen For some Wi Fi devices AOSS connection may not be established If connection is failed use WPS connection or connect manually Bluetooth tethering You can connect your Bluetooth devices to the Internet Up to 5 Bluetooth devices can be connected simultaneously You need to pair the Bluetooth devices with your terminal beforehand P141 1 From the Home screen Settings Data communication A...

Page 118: ...screen Display method for notification Set whether to display all notifications on the lock screen Smart Lock 1 Setting steps P121 Password manager Setting steps P121 Make passwords visible Set whether to display passwords when entering security code passwords Security Set followings Storage type Setting steps P122 Trusted credentials Setting steps P122 Install certificates Setting steps P122 Clea...

Page 119: ... and the docomo nano UIM card to a docomo Shop or contact General Inquiries on the last page of this manual Network security code The network security code is a 4 digit number necessary for identification or using the docomo Network Services at reception of your request in docomo Shop or at a docomo Shop docomo Information Center or お客様サポート Customer support It can be set any number at the subscrip...

Page 120: ...icate To set for the first time authentication is not required 3 Selecting an item None Set not to display the lock screen Touch Swipe Set to cancel the unlock screen by touching swiping Fingerprint Set to unlock by fingerprint authentication When using the fingerprint authentication check the precautions P119 before registering the fingerprints When the fingerprint is already registered and Secur...

Page 121: ...ver the fingerprint sensor Precautions for using fingerprint authentication Precautions for using fingerprint authentication are as follows This function is used to authenticate the information on the characteristics of fingerprint image For this reason user with fingerprint that does not provide enough characteristics information may not be able to use the fingerprint authentication Scanning 3 ti...

Page 122: ...entity authentication or verification Note that DOCOMO assumes no responsibility for any damage caused by use of this terminal or unavailability of this terminal Precautions for using fingerprint sensor Precautions for using fingerprint sensor are as follows The fingerprint sensor is waterproof however malfunction may occur if water or dirt adheres to the surface of the fingerprint sensor or your ...

Page 123: ...e the registrations if there are 2 registrations in all 3 Follow onscreen instruction to set as the alternative security unlock preference DONE Operating fingerprint authentication 1 When a fingerprint authentication screen is displayed slide the registered finger on the fingerprint sensor If the authentication failed remove the finger from the fingerprint sensor and try the authentication again S...

Page 124: ... Settings Lock Security Security 2 Check Storage type Displaying trusted credentials or certificates 1 From the Home screen Settings Lock Security Security Trusted credentials INFORMATION To delete installed certificates delete from Clear credentials Installing authentication information or certificate You can install authentication information or certificates 1 From the Home screen Settings Lock ...

Page 125: ...ou install a microSD card to which a password is set on another terminal and you have not authenticated password with the terminal yet When a password is set to microSD card Password authentication is required when the microSD card is attached to other terminal If you attach it to a PC or a phone without password setting function using the data or formatting cannot be made Application lock Set app...

Page 126: ...firm the content and tap CLOSE If you tap DISPLAY NOTES check each item and tap Back Privacy mode operation settings Phonebook History Specify a phonebook entry group to be hidden To make operation settings for Phonebook History install NX Contact If you did not install yet follow the onscreen instructions on the way of operation to download 1 From the Home screen Settings Lock Security Security P...

Page 127: ...e Browser Picture Set to hide icons of specified applications on the Home screen or hide specified bookmarks or images during privacy mode Home setting Browser setting Picture setting Specify applications bookmarks or images to be hidden Action for app notifications Set whether to hide notifications from application in privacy mode Notifications from applications are shown only when from the Home ...

Page 128: ...recently used applications when you tap History 1 From the Home screen Settings Lock Security Security 2 Mark Unmark Hide recently used app Permitting to install unknown sources applications Permit to install applications obtained from sites other than Play Store mails etc To protect the terminal and personal data download applications only from trusted sources such as Play Store etc 1 From the Ho...

Page 129: ...he new PIN code again Application pinning Set whether to fix the currently running application to prevent other applications from using 1 From the Home screen Settings Lock Security Security Application pinning 2 Tap the button in the upper right of the screen to set Application pinning to ON 3 Activate the application to be fixed 4 History of the application to be fixed GOT IT To unlock the fixed...

Page 130: ... Authenticate ENCRYPT SD CARD OK Disabling encryption Unencrypt SD card UNENCRYPT SD CARD Authenticate UNENCRYPT SD CARD OK INFORMATION Data of encrypted SD card will not be able to use with other terminal except this terminal If data reset is performed data of encrypted microSD card cannot be used therefore disable microSD card encryption before resetting the terminal Change the language used for...

Page 131: ...K INFORMATION Depending on screen turning the power OFF and ON reflects font settings The font settings may not be reflected or set font may not be displayed correctly on some applications or Web sites Setting Voice Search Setting Google voice search 1 From the Home screen Settings Language Text Input Voice input 2 Select a function Set each item Languages Set language for Google voice search Ok G...

Page 132: ...m the Home screen Settings Useful tools 2 Mark Unmark Glove touch INFORMATION Depending on the material of the gloves you may find touch operation difficult If this is the case tilt your fingers to bring the pads of the fingers into contact with the touch panel when operating the terminal If Glove touch is marked and you use touch gestures without wearing gloves the terminal may perform unintended...

Page 133: ...ocket or between partitions and walk at the speed of 100 120 steps per minute Even when you wear Step counter correctly if your walking or movement does not reach to the terminal like when moving part of body such as only hands or feet your steps amount may not be counted accurately Steps may not be counted accurately in the following cases When the terminal moves randomly as the bag you put the t...

Page 134: ...t settings such as one for checking periodically for updates Osusume App Set notification setting of recommended application by DOCOMO docomo apps password Set password for applications provided by DOCOMO The default setting is 0000 AUTO GPS Set AUTO GPS functions etc docomo location information Set location information functions for imadoco search imadoco kantan search and Keitai Osagashi Service...

Page 135: ... 2 Select an application Deleting application data or cache 1 From the Home screen Settings Device management Apps 2 Select an application CLEAR DATA CLEAR CACHE When CLEAR DATA is selected tap OK Deleting applications For deleting the applications you obtained from Play Store operating from the Google Play screen is recommended P79 You cannot uninstall some pre installed applications by default A...

Page 136: ...CARD Check total amount and available amount in the microSD card Mount SD card Unmount SD card Recognize microSD or cancel connection of microSD card to remove it safely Erase SD card Setting steps P134 SD card password settings Setting steps P123 Erasing data in microSD card Format Note that this operation erases all data in the microSD card 1 From the Home screen Settings Device management SD ca...

Page 137: ...pe Select an account MENU Remove account REMOVE ACCOUNT INFORMATION docomo account and FUJITSU account cannot be removed Starting synchronization manually 1 From the Home screen Settings Device management ACCOUNTS 2 Select an account type Select an account MENU Sync now Canceling sync 1 During synchronization MENU Cancel sync Date time Make the settings of date and time When you set Automatic date...

Page 138: ...n you hold the terminal in your hand Accessibility shortcut Set whether to enable accessibility functions Text to speech output Set up text to speech output Touch hold delay Set time to detect a touch and hold Color inversion Set whether to make the color inverted Color correction Make the settings related to color correction function About phone Display various information of the terminal 1 From ...

Page 139: ...oSDXC card on which data is destroyed format the microSDXC card all data will be erased on an SDXC device When copying data to from a non SDXC compatible device use a microSDHC card or microSD card complying with standards of device to share data The terminal supports up to Class 10 speed microSD card The terminal supports UHS speed Class 3 microSD card Installing Removing microSD card Install Rem...

Page 140: ...s faced down and face up the metal contacts of microSD card then insert into the microSD card slot until it clicks c Press firmly the slot cap of the terminal to close P22 Removing a Open the slot cap hooking the groove with your fingertip P22 b Push the microSD card lightly and release it then pull the microSD card straight out c Press firmly the slot cap of the terminal to close P22 INFORMATION ...

Page 141: ... to show how to use File Manager Tap Make a new folder to create a new folder 3 Select operation Copy Copy a folder file Move Cut the folder file Delete Delete a folder file Copy to Copy to a folder that you select a folder file Move to Move to a folder that you select a folder file Rename Rename a folder file Add to Bookmark Add the folder to Bookmark Send To Send the folder zipped file Zip ZIP c...

Page 142: ... established correctly when other devices are powered on or the connection may cause noises on TV or radio or reception difficulty Under strong ambient signals connection may not be established Radio waves emitted by a Bluetooth device may affect electronic medical equipment Turn off the terminal and other Bluetooth devices in a train aircraft or hospital near an automatic door or fire alarm and a...

Page 143: ...PIN as required and OK PAIR When connection is requested from another Bluetooth device If a Bluetooth pair setting request screen appears enter a pass code PIN if necessary and tap OK PAIR Sending or receiving data to or from Bluetooth device You can send data such as Gallery P90 and contacts or receive data from a Bluetooth device Set a Bluetooth device to be connected or to be detectable in adva...

Page 144: ...tification Detail Setting When Alert Notification is ON select items to notify incoming call docomo mail Email Gmail SMS alarm calendar Find Me Ringtone Set whether to emit ringtone when receiving notification from compatible devices by ON OFF Find Me Ringtone Settings When Find Me Ringtone is ON select from the notification ringtone list Proximity Set notification level for compatible devices whe...

Page 145: ...quipped terminals 1 From the Home screen Settings Useful tools NFC Osaifu Keitai Settings When a password setting screen appears set a password If Lock NFC Osaifu Keitai is marked unmark the checkbox 2 Mark Reader Writer P2P 3 Android Beam Tap the button at the upper right of the screen to turn Android Beam on Transferring content displayed on the screen You can transfer content shown on the scree...

Page 146: ...mode OK Connected as a media device MTP Transfer music movies etc using file management software compatible with MTP Connected as a camera PTP Transfer photos or movies to PC etc which are not compatible with MTP 3 Operate following onscreen instructions 4 Perform target operations INFORMATION When Camera PTP is selected data on the internal storage in the terminal can be operated from the PC only...

Page 147: ...en displayed after printer search screen tap MENU Add printer to check the connection method and set connection Connecting with a Wi Fi printer You can easily connect the terminal with a printer using Canon Print Service and Epson Print Enabler that search a Wi Fi compatible printer manufactured by Canon and Seiko Epson If Google Cloud Print application is available for another Wi Fi compatible pr...

Page 148: ...isplays by connecting the terminal to a Wi Fi Miracast device through Wi Fi connection 1 From the Home screen Settings 2 Wi Fi Miracast Turn Miracast ON 3 Tap a detected Wi Fi Miracast device Disconnecting Wi Fi Miracast device Tap a connected device OK INFORMATION When connecting a device that does not support HDCP images or sounds are not output properly Depending on content external output may ...

Page 149: ...es International call access codes Universal number international prefix available countries regions and network operators refer to NTT DOCOMO website 1 To use data communication during roaming set Data roaming setting to on P148 2 Calling is available via 3G 3G850 or GSM INFORMATION Some services may not be available depending on the network operator or network overseas You can confirm the name o...

Page 150: ...se network services overseas you need to set Remote access to activate You can set Remote access in the country you visit From Japan P64 from overseas P152 Even if the setting canceling operation is available some network services cannot be used depending on overseas network operators After arriving overseas When you arrive overseas and turn the terminal ON a connection to the available network is...

Page 151: ...ted set the mode to LTE 3G GSM Auto after returning to Japan Date time When you have set Automatic date time Automatic time zone in Date time to ON the date time and time differences of the terminal are corrected by receiving information related to time and time differences from the network of overseas telecommunications carrier you connect to Correction of the time or time differences may not be ...

Page 152: ...er Making a call inside the country you stay You can make a call to the other party s land line phone or mobile phone in the same way you do in Japan 1 From the Home screen 2 Dial Enter a phone number Start with the area code city code If you make a call to the party using WORLD WING make a call as an international call to Japan by entering the country code 81 Japan even when making a call in the ...

Page 153: ...activate restriction is selected tap OK to enter network security code Incoming notification while roaming Incoming call notification while roaming Activate notification Deactivate notification Confirm notification setting Incoming calls received when the power is off or while you are out of the service area are notified by SMS when the power turns on or you are back in the service area free When ...

Page 154: ...charges apply Tap OK to operate following the voice prompt Incoming call notification while roaming charges apply Tap OK to operate following the voice prompt Roaming guidance charges apply Tap OK to operate following the voice prompt Voicemail service charges apply Select an item and tap OK to operate following the voice prompt Call forwarding service charges apply Select an item and tap OK to op...

Page 155: ...ot turn on or blinks Is the adapter s power plug or cigarette lighter plug inserted to the outlet or cigarette lighter socket correctly In case of using an AC Adapter optional is the microUSB plug of AC adapter connected to the terminal correctly P31 In case of using the desktop holder included is the microUSB plug of AC adapter connected to the desktop holder correctly P30 In case of using the de...

Page 156: ...e battery fully charged contact Repairs on the last page of this manual in Japanese only or DOCOMO specified repair office The docomo nano UIM card is not recognized Is the docomo nano UIM card installed in the right direction P28 The screen reacts slowly when a touch panel is tapped key is pressed When large amount of data is saved in the terminal or transferring large size data between the termi...

Page 157: ...isappears press and hold the volume down key When safe mode is booted Safe mode is displayed at the lower left of the screen To exit the safe mode turn the power OFF and ON Back up the necessary data before using safe mode Some widgets that you created may be removed Safe mode is not a normal booting state To use ordinarily exit the safe mode Operations are not possible when tapping the screen Do ...

Page 158: ...ng volume in Volumes set to 0 P103 Have you activated any of the following functions Manner mode P104 Airplane mode P115 Do you set call restriction such as Call Blocking P65 The followings are set to 0 seconds Set answer time in Phone memo P64 Ring time settings in Voice mail service P64 Ring time in Call forwarding service P64 Calls cannot be made Is the docomo nano UIM card installed in the rig...

Page 159: ...tions for using contents saved in the phonebook or those using Caller ID notification do not operate Even when a caller notifies its caller ID it is not displayed on the terminal unless notified from the network or network operator used And a notified caller ID may be different from that of the caller by some networks or network operators you use Cannot perform data communication overseas Check th...

Page 160: ...r You cannot perform the fingerprint authentication when the terminal is connected with a PC etc While the terminal is connected with a device such as a PC using a USB cable the fingerprint authentication may not be available In such a case disconnect the terminal from the device and retry the fingerprint authentication Commercially available external devices USB mouse keyboard etc are not recogni...

Page 161: ...ano UIM card with the power ON The terminal may not operate normally By sharing screens of your terminal with DOCOMO you can receive technical support to make settings use applications connect with peripheral devices such as a PC In Japanese only This service is not available when your docomo nano UIM card is not inserted during international roaming or in Airplane mode Anshin Enkaku Support is a ...

Page 162: ...al OFF and ON Warranty The terminal is provided with a written warranty Make sure that you receive it Check the written contents and items such as 販売店名 お買い上げ日 Shop name date of purchase and keep it in a safe place If it does not contain the necessary information immediately contact the shop where you bought it The warranty is valid for a period of one year from the date of purchase The Desktop Hol...

Page 163: ...ou have sent the terminal to a repair shop other than a DOCOMO specified repair office Even in case that a repair is possible since those conditions are outside the range of the warranty a repair is charged After expiration of the warranty All repairs that are requested are charged Replacement parts Replacement parts parts required to maintain the product functions are basically kept in stock for ...

Page 164: ...rcumstances DOCOMO may replace your terminal with its equivalent instead of repairing it In that case we cannot transfer these data to replaced products except for some data About Software Update Software Update is a function that checks if update is necessary and if required download and install software to update When update is required it is notified with Software Update on the status bar or in...

Page 165: ...OCOMO specified repair office SMS sent during updating is stored in the SMS center Updating may take time Updating is unavailable in the following cases During a call When 圏外 out of service area is displayed Tethering in use as an access point When date or time is not set correctly When the remaining battery is not sufficient When the terminal is low on available memory When the basic software is ...

Page 166: ...re below a Select an upgrade method Perform now only via Wi Fi Immediately download the update file via Wi Fi connection Perform at scheduled time via Wi Fi Xi Via Wi Fi connection or Xi FOMA the update file will be downloaded automatically at the reserved time If download via Xi FOMA is not available Perform at scheduled time only via Wi Fi appears b Select operation Download and Install After do...

Page 167: ... Store From the Home screen Play Store Flick right the left edge of the screen Update each application in My apps INFORMATION For OS version support information on each application contact the application provider Phone Main specifications Product name 0 Size Approx 141mm H u69 mm W u8 9mm T Weight Approx 149 g Internal memory ROM 16GB RAM 2 GB Continuous stand by time 1 2 FOMA 3G Stationary Auto ...

Page 168: ...amera Up to approx 6 0 x 80 levels Videos Out camera Up to approx 6 0 x 80 levels Still picture recording size Out camera 8M maximum pixels 3264u2448 6M wide 3264u1840 SNS 2048u1536 FullHD 1920u1080 Mobile email 640u480 In camera 2M maximum pixels 1920u1080 1 7M 1520u1152 Mobile email 640u480 Video recording size Out camera FullHD 1920u1080 Fit screen 1280u720 Mobile email 640u480 In camera FullHD...

Page 169: ...5 2 4 GHz 5 GHz are supported for IEEE 802 11n 6 It is confirmed that the terminal and all Bluetooth devices are compliant with Bluetooth standards designated by Bluetooth SIG and they are authenticated However procedures may differ or data transfer may not be possible depending on the device s characteristics or specifications 7 These are created by standardizing connection procedures for Bluetoo...

Page 170: ...pptx when saved 5 Output is available from the print screen of Writer Spreadsheets 6 Output is available from the save screen of Writer print screen of Spreadsheet Type Extension Create View Edit Save Document file Writer wps u 1 wpt u 1 doc 1 docx 1 dot u 1 docm u 1 dotm u 1 dotx u 1 Spreadsheet file Spreadsheets et 2 ett u 2 xls 2 xlsx 2 xlt u 2 xlsm u 3 2 csv 2 Presentation file Presentation dp...

Page 171: ...ice to ensure it only uses the minimum required to reach the network Therefore in general the closer you are to a base station the lower the power output of the device This mobile phone can be used in positions other than against your ear Please keep the mobile phone farther than 1 5 cm away from your body by using such as a carrying case or a wearable accessory without including any metals This m...

Page 172: ... WLVVXH UHFRPPHQGHG E 7KH RXQFLO RI WKH XURSHDQ 8QLRQ 7KH OLPLW LQFRUSRUDWHV D VXEVWDQWLDO PDUJLQ RI VDIHW WR JLYH DGGLWLRQDO SURWHFWLRQ IRU WKH SXEOLF DQG WR DFFRXQW IRU DQ YDULDWLRQV LQ PHDVXUHPHQWV 7HVWV IRU 6 5 KDYH EHHQ FRQGXFWHG XVLQJ VWDQGDUG RSHUDWLRQ SRVLWLRQV ZLWK WKH SKRQH WUDQVPLWWLQJ DW LWV KLJKHVW FHUWLILHG SRZHU OHYHO LQ DOO WHVWHG IUHTXHQF EDQGV OWKRXJK WKH 6 5 LV GHWHUPLQHG DW WKH...

Page 173: ... WKHUH PD EH GLIIHUHQFHV EHWZHHQ WKH 6 5 OHYHOV RI YDULRXV SKRQHV DQG DW YDULRXV SRVLWLRQV WKH DOO PHHW WKH 8 6 JRYHUQPHQW UHTXLUHPHQWV 7KH KDV JUDQWHG DQ TXLSPHQW XWKRUL DWLRQ IRU WKLV PRGHO SKRQH ZLWK DOO UHSRUWHG 6 5 OHYHOV HYDOXDWHG DV LQ FRPSOLDQFH ZLWK WKH 5 H SRVXUH JXLGHOLQHV 6 5 LQIRUPDWLRQ RQ WKLV PRGHO SKRQH LV RQ ILOH ZLWK WKH DQG FDQ EH IRXQG XQGHU WKH TXLSPHQW XWKRUL DWLRQ 6HDUFK VHF...

Page 174: ...KHQ XVLQJ WKH SKRQH LQ FORVH SUR LPLW WR SHUVRQDO PHGLFDO GHYLFHV VXFK DV SDFHPDNHUV DQG KHDULQJ DLGV 3DFHPDNHUV 3DFHPDNHU PDQXIDFWXUHUV UHFRPPHQG WKDW D PLQLPXP VHSDUDWLRQ RI FP EH PDLQWDLQHG EHWZHHQ D PRELOH SKRQH DQG D SDFH PDNHU WR DYRLG SRWHQWLDO LQWHUIHUHQFH ZLWK WKH SDFHPDNHU 7R DFKLHYH WKLV XVH WKH SKRQH RQ WKH RSSRVLWH HDU WR RXU SDFHPDNHU DQG GRHV QRW FDUU LW LQ D EUHDVW SRFNHW Hearing A...

Page 175: ...ng recorded pictures of others without their consent to general public through Internet websites etc because they may infringe on portrait rights Trademarks FOMA i mode i αppli ToruCa mopera U WORLD CALL WORLD WING iD sp mode LIVE UX logo of ToruCa logo of iD logo of dmenu logo of i concier are trademarks or registered trademarks of NTT DOCOMO INC Catch Phone Call waiting service is a registered t...

Page 176: ...is product includes module developed by Independent JPEG Group FeliCa is a contactless IC card technology developed by Sony Corporation This product is licensed based on MPEG 4 Visual Patent Portfolio License The use of MPEG 4 Video Codec function is allowed for personal and nonprofit use only in the cases below Recording moving pictures and i motion that conform to MPEG 4 Visual Standard hereinaf...

Page 177: ...ses refer to the following website For details refer the website below http spf fmworld net fujitsu c develop sp android In Japanese only This terminal supports SIM unlock If you release SIM lock you can use SIM by a carrier other than NTT DOCOMO Available services and functions may be limited DOCOMO is not liable to any failures or malfunctions For details of SIM unlock procedure refer to NTT DOC...

Page 178: ...ation 135 Removing 135 Setting 135 After Sales Service 160 Airplane mode 115 Android Beam 143 Anshin Enkaku Support 159 APN 112 App battery check 107 App running time 107 Application list 52 Application info 55 Disabling applications 55 Managing 55 Sorting 55 Uninstalling 55 Application lock 123 Application pinning 127 Apps 133 Clear cache 133 Clear data 133 Deleting 133 Disabling 134 Uninstalling...

Page 179: ...141 Function ON OFF 140 Pair setting 141 Renaming 142 Sending Receiving data 141 Unpairing 142 Bluetooth Low Energy 142 Alert Notification 142 Alert Notification Detail Setting 142 Find Me Ringtone 142 Proximity 142 Time 142 Bluetooth tethering 115 Bookmarks 76 Deleting 76 Editing 76 Registering 76 Brightness 105 Automatic brightness 105 Super clear mode 105 Browser 75 Accessibility 77 Advanced 77...

Page 180: ...dapter 31 Charging adapter 30 Desktop holder 30 PC 32 Precautions 29 Charging jack 27 Child proof 49 Clearing credentials 122 Clock 96 Alarm 97 Stopwatch 97 Timer 97 World clock 96 Customize screen 48 D Data communication Airplane mode 112 Data enabled 112 Data roaming 148 Data usage 112 Date 135 Date time 135 Automatic date time 135 Automatic time zone 135 Select time zone 136 Set date 135 Set ti...

Page 181: ...hone Launcher 130 Earpiece 26 Easy data transfer support 41 Easy settings for Wi Fi tethering 115 AOSS system 115 WPS system 115 Editing text 39 Email 71 Account settings 73 Backup 73 Creating 71 Deleting 72 Displaying 72 Forwarding 72 General settings 72 Mail account settings 71 Receiving 72 Reply all 72 Replying 72 Restore 73 Sending 71 Settings 72 Emergency mode 34 Encrypt phone 128 Encrypt SD ...

Page 182: ...and restore 56 Create folder 50 Customizing 50 Deleting 52 Disabling applications 51 Home screens 52 Kisekae 51 Remove from Home 51 Setting Machi Chara 51 Wallpaper 51 Homescreen selector 48 I Icon 42 Back icon 42 History icon 42 Home icon 42 Navigation bar 42 Notification icon 43 Slide display icon 42 Status bar 43 Status icon 44 iD application 82 In camera 27 Indicator LED 26 42 Initial settings...

Page 183: ...nal manner 104 Maps 95 Material 13 Media Player 91 Play list 93 Playing music video 92 Purchasing from dmarket 93 Messaging 69 Microphone 27 microSD card 137 Connected as a camera PTP 144 Connected as a media device MTP 144 Erasing data 134 Format 134 Installing 138 Operation from a PC 144 Removing 138 microSD card slot 27 microSD password 118 Miracast 146 Missed call LED 103 Multi connection 110 ...

Page 184: ...ID notification 58 64 Emergency call 59 Making a call 58 Receiving a call 60 Select prefix 58 Phone memo 64 ON OFF 64 Phone memo list 64 Recording 60 Settings 64 Phone ringtone 102 Phonebook 66 Deleting 67 Editing 67 Exporting 68 Favorites 67 Importing 68 Index 66 My profile 68 Phonebook list 66 Profile screen 67 Registering group 67 Registration 66 Search 66 Using Group 67 Picture correction 105 ...

Page 185: ...eypad 35 R Recent calls 63 Recommended applications 56 Reject SMS 65 Rejecting calls with SMS 60 Remote operation settings 64 152 Reset 160 Reverb suppression 65 RGB sensor 26 Roaming settings 151 Network service overseas 152 S SAR 169 Schedule 96 Displaying 96 Registering 96 Screen lock Lock 118 Locking 45 Security unlock preference 118 Unlock 46 Screen lock sound 103 Screen timeout 106 Screensho...

Page 186: ... Slide 33 Slide display 43 131 Slide spot 46 Slide to activate camera 116 Slide in function 46 130 Slide in launcher 46 Slot cap 27 Smart Lock 121 SMS 69 Creating 69 Deleting 70 Displaying 70 Forwarding 70 Receiving 69 Replying 70 Sending 69 Setting 70 Software Update 162 Sound at start charging 102 Sound Vibration LED 102 Speaker 26 Specifications 165 Spell checker 128 Status bar 43 Status icon 4...

Page 187: ... Turning power off 32 Turning power on 32 U Unknown sources 126 Unlocking PIN lock 127 USB tethering 114 Useful tools 130 Using overseas 147 After returning to Japan 152 Checking 147 Communication services 147 Making a call in the country you stay 150 Receiving a call in the country you stay 150 Settings 148 V Vibrate on touch 102 Vibrate when ringing 102 Video call Making a call 58 Receiving a ca...

Page 188: ...nced settings 111 Connecting 108 Deleting 109 Easy Settings 109 Scanning 108 Wi Fi Auto ON OFF 110 Wi Fi antenna section 27 Wi Fi Direct 110 Wi Fi Easy Settings 109 AOSS system 109 WPS system 109 Wi Fi sleep policy 111 Wi Fi tethering 114 WORLD CALL 60 WORLD WING 147 X Xi antenna section 26 27 ...

Page 189: ...ic safety are exempted In public places such as a theater movie theater or art museum Using the terminal in quiet public places will likely bother other people Match the volume of voice and ring alert to your location In a quiet place like a restaurant or hotel lobby pay attention to the volume of your voice etc when using the terminal In town areas while using the terminal be sure not to block fo...

Page 190: ...ower off of mobile phone and the call is disconnected Vibrate P102 Vibrates when there is an incoming call Manner mode P104 Eliminates all sounds the terminal makes such as ring alert and keypad touch sound Shutter sound cannot be eliminated And you can use optional services such as Voicemail service Call forwarding service etc P64 We collect old phones etc regardless of brands and manufacturers B...

Page 191: ...site Universal number international prefix 8000120 0151 81 3 6832 6600 toll free From DOCOMO mobile phones For loss theft malfunction and inquiries while overseas 24 hour reception If you lose your terminal or have it stolen immediately take the steps necessary for suspending the use of the terminal If the terminal you purchased is damaged bring your terminal to a repair counter specified by DOCOM...

Page 192: ...fore you dial For Applications or Repairs and After Sales Service please contact the above mentioned information center or the docomo Shop etc near you on the NTT DOCOMO website Repairs Business hours 24 hours open all year round Unavailable from part of IP phones From land line phones In Japanese only 0120 800 000 toll free Unavailable from land line phones etc No prefix 113 toll free From DOCOMO...

Reviews: